Managing student enrollment data can become time-consuming and chaotic—especially if done manually. That’s why smart trainers and educational coordinators are switching to automated tools like Excel VBA. If you’re looking for a simple yet effective way to track course enrollments, fees, and student information, then creating a Training Enrollment Data Entry Form in Excel using VBA is your best solution.
In this detailed guide, you’ll learn how this tool works, why it’s effective, and how to implement it in your training workflow—no tech degree required!
What is a Training Enrollment Data Entry Form?
A Training Enrollment Data Entry Form is a structured Excel worksheet integrated with VBA (Visual Basic for Applications) to streamline the process of enrolling students into training programs. It enables you to capture vital student information, track fee deposits, and maintain real-time records without complicated manual entries.
This Excel-based form reduces errors, saves time, and centralizes your entire training enrollment process in one organized place.
Click here to purchase Training Enrollment Data Entry form
Why Use Excel and VBA for Training Enrollment?
You might be wondering: “Why not use Google Forms or expensive training management software?” Here’s the answer:
Excel is already widely used and understood.
VBA allows you to create interactive features like forms, buttons, drop-downs, and automated timestamps.
It’s a cost-effective, offline, and fully customizable solution.
So, whether you’re managing a corporate training program, an academic institute, or a private coaching class—this tool will work wonders for you.
Key Features of the Training Enrollment Form
This VBA-powered Excel template comes with two essential worksheets. Let’s take a closer look at each one:
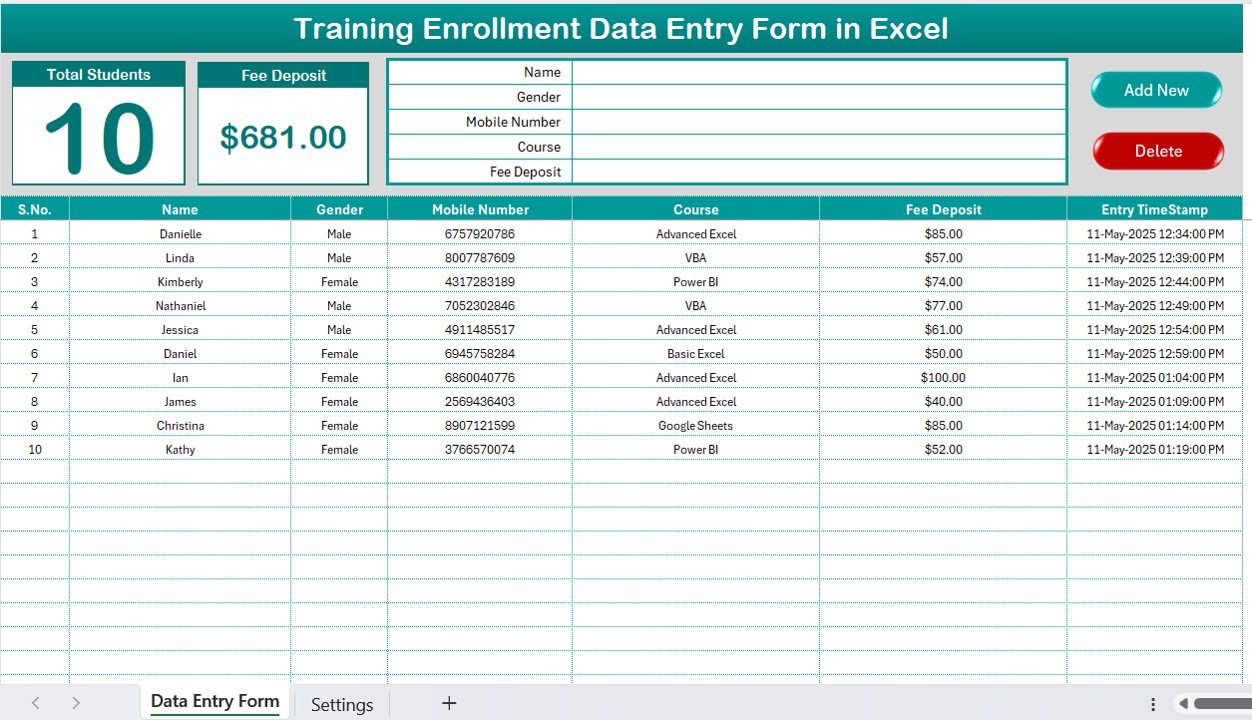
Training Enrollment Data Entry Form Sheet Tab
Click here to purchase Training Enrollment Data Entry form
This is the main section of the workbook, where the actual data entry takes place. It includes:
Dashboard Cards
At the top of the sheet, you’ll find 2 data cards that give you instant insights:
- Total Students Enrolled
- Total Fee Deposited
These dynamic cards update automatically as you add new records.
Mini Data Entry Form
The form captures essential student details in just a few clicks:
- Name
- Gender
- Mobile Number
- Course
- Fee Deposit
Additionally, it includes two buttons:
- Add New: To insert the student data into the table
- Delete: To remove an existing record
All new entries also get a timestamp to track when the entry was added.
Main Table
Once the user submits the form, the data populates below in a structured table with these columns:
- Serial No.
- Name
- Gender
- Mobile Number
- Course
- Fee Deposit
- Entry Timestamp
This table provides a comprehensive and time-stamped view of all training enrollments.
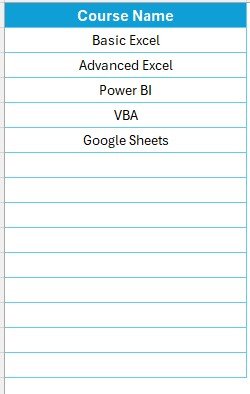
Settings Sheet Tab
Click here to purchase Training Enrollment Data Entry form
This secondary sheet helps maintain data consistency through drop-downs.
Here, you’ll:
- Define available courses
- Manage lists for form fields
This setup ensures cleaner data and eliminates typing errors.
Click here to purchase Training Enrollment Data Entry form
Advantages of Using a Training Enrollment Data Entry Form
Still not convinced if this form is right for you? Let’s break down the key benefits:
- Time-Saving: No more flipping between spreadsheets or manually writing down student information. One-click data entry boosts speed and accuracy.
- Reduces Human Error: With predefined drop-down lists and validation, you can eliminate typos, duplicate entries, and data mismatch issues.
- Visual Dashboard Insights: The form includes automatic KPI cards (Total Students, Total Fee Deposited), helping you analyze your data in seconds.
- Easy to Maintain and Update: Being in Excel, you don’t need special software or licenses. Anyone with basic spreadsheet knowledge can maintain it.
- Instant Reporting: You can filter by course, gender, or fee status and export it instantly to share or print.
How to Use the Training Enrollment Form Effectively?
Let’s walk through the simple steps to make the most out of this tool.
🟩 Step 1: Set Up Your Drop-down Lists in Settings Tab
Add your courses, gender types, and other fixed options here. This ensures consistency in your entries.
🟩 Step 2: Open the Main Sheet
Start entering data using the mini form on the top section.
🟩 Step 3: Click ‘Add New’
Each entry goes directly into the table below, along with an automatic timestamp.
🟩 Step 4: Analyze the Dashboard Cards
Review total enrolled students and total fees collected. These update dynamically with each record.
🟩 Step 5: Use Filters for Analysis
Want to check how many students enrolled in “Advanced Excel”? Use Excel’s filters to find out instantly.
Click here to purchase Training Enrollment Data Entry form
Best Practices for the Training Enrollment Form
To make sure you’re getting the most out of this tool, here are a few best practices to follow:
🔸 Use Data Validation Wisely: Always keep your drop-down options in the Settings sheet up to date. This prevents wrong or inconsistent data.
🔸 Backup Your Data Regularly: Even though Excel is stable, don’t forget to take weekly backups—especially before any major changes.
🔸 Protect the VBA Code: Use a password to lock the VBA editor so users don’t accidentally modify the code.
🔸 Make a Copy for Each New Batch: Duplicate the file for every new batch or semester to keep things clean and organized.
🔸 Train Your Team: Spend a few minutes explaining the form to staff or faculty who’ll use it. This improves adoption and accuracy.
Who Should Use This Training Enrollment Tool?
This form is ideal for:
📚 Training Institutes
🧑🏫 Corporate HR Teams
🏫 Educational Institutions
🧑💻 Freelance Trainers
🏢 Coaching Centers
Anyone who needs to manage training participants and their fee records will benefit from this.
Click here to purchase Training Enrollment Data Entry form
When Should You Consider Upgrading?
While this Excel-based solution is powerful, you may outgrow it over time. If you notice the following, it might be time to scale up:
- You manage over 500+ students every month.
- You need multi-user access or real-time collaboration.
- You require automated reminders or payment tracking.
- You want to generate advanced reports or dashboards.
- In those cases, consider integrating your data with Microsoft Power BI, Google Sheets, or custom-built apps.
How to Customize the Form for Your Needs?
Even though the default form is ready-to-use, you can personalize it in many ways:
- Add more fields (e.g., Email, Address, Qualification).
- Modify dashboard cards (e.g., Course-wise Enrollments).
- Link it with other sheets (e.g., Payment Tracker).
- Add conditional formatting (e.g., highlight unpaid records).
- All of this is possible with basic Excel knowledge and a little VBA tweaking.
Conclusion
In today’s fast-paced world, having an automated system for managing training enrollments can make a big difference. The Training Enrollment Data Entry Form in Excel using VBA is not only simple and affordable but also scalable and user-friendly.
You don’t need coding expertise or expensive tools—just Excel, a bit of logic, and this ready-to-use template.
Frequently Asked Questions (FAQs)
❓ How do I install this Training Enrollment Form?
You don’t need to install anything. Simply open the Excel file and enable macros to get started.
❓ Can I add more fields to the form?
Yes, you can add new fields in the form and update the VBA code accordingly. It’s flexible and customizable.
❓ Is this form secure to use?
Yes. You can lock the sheets and VBA editor with a password to ensure security and avoid unauthorized changes.
❓ What happens if I delete a record by mistake?
If you haven’t taken a backup, the deleted record cannot be restored. That’s why we always recommend regular backups.
❓ Can I use this on Mac?
Yes, but make sure Excel for Mac supports VBA. Some features may work differently based on your Excel version.
❓ Is this suitable for non-technical users?
Absolutely! If you know how to open Excel and click a few buttons, you can use this form without any problem.
Visit our YouTube channel to learn step-by-step video tutorials