In today’s fast-paced business environment, onboarding a new vendor shouldn’t slow your operations down. Yet, many companies struggle with scattered vendor data, incomplete documentation, and delayed approvals. That’s where a New Vendor Setup Tracker in Excel comes to the rescue.
This ready-to-use, Excel and VBA-powered tracker simplifies every step of vendor onboarding. From logging vendor details to tracking approvals and generating visual reports, it brings structure and clarity to the entire process—all within Excel.
In this article, we’ll explore the features, advantages, best practices, and FAQs related to this tracker, so you can make your vendor management process more efficient and compliant.
Click to Purchases New Vendor Setup Tracker in Excel
What Is the New Vendor Setup Tracker in Excel?
The New Vendor Setup Tracker in Excel is an advanced template that allows you to manage vendor onboarding through a simple interface. With the help of built-in VBA automation, data entry forms, and dynamic dashboards, it streamlines the entry, update, deletion, and analysis of vendor records.
Whether you’re working in procurement, finance, or operations, this tool helps you maintain vendor data with accuracy and consistency—without needing complex software.
Key Features of the New Vendor Setup Tracker
Let’s break down the components that make this tool so powerful:
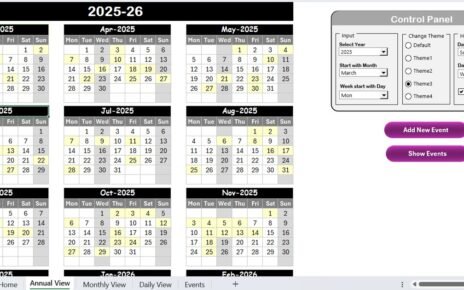
Secure Login Form
-
Start with a simple User ID and Password login screen.
-
Only authorized users can access the system (e.g., Admin1 / abcd).
-
Provides a professional, secure entry point into the tracker.
Main Form (Central Hub)
-
After login, users land on a main menu form where all core actions are available.
-
Easily navigate to dashboard, data entry, user management, or settings with the click of a button.
Dashboard Sheet Tab
Visualize your vendor data instantly:
-
🟢 5 Interactive Slicers to filter data by country, category, status, and more.
📊 5 Visual Charts:
- Doughnut chart: New Vendors by Active Status
- Pie chart: Vendors by Category
- Arrow chart: Vendors by Currency
- Column chart: Vendors by Payment Terms
- Flag chart: Vendors by Country
These visuals are connected to pivot tables, automatically updating when data changes.
Data Entry Sheet Tab
This is the backbone of the tool, capturing full vendor details such as:
-
Vendor Name, Contact Info, Tax ID
-
Address, Bank Details, Payment Terms
-
Vendor Category, Currency, Active Status, Setup Date
Top functions on this sheet:
-
🔘 Add New Record: Opens a user-friendly form to input vendor data.
-
✏️ Update Record: Select a record ID to prefill data, make changes, and submit.
-
🗑️ Delete Record: Remove records with confirmation to avoid accidental deletion.
Click to Purchases New Vendor Setup Tracker in Excel
Manage List Sheet
Create and manage drop-down values used in the data entry form:
-
Countries
-
Currencies
-
Payment Terms
-
Vendor Categories
-
Active Status
You can Add or Delete entries via two simple buttons.
Support Sheet Tab
-
Hosts background pivot tables used to power charts in the dashboard.
-
No manual intervention required—this sheet updates automatically.
-
You can choose to hide it from daily users.
User Management
-
Add, edit, or delete users with different access roles.
-
Change passwords securely from the management screen.
Settings Sheet
-
Customize tool configurations and dropdown defaults.
-
Ideal for admins to fine-tune how the tracker behaves.
Advantages of Using the New Vendor Setup Tracker in Excel
This tool isn’t just about organization. It provides numerous strategic benefits that improve business operations:
✅ Centralized Vendor Records: Store all data in one place, eliminating confusion.
✅ Quick Form-Based Entry: Avoid errors with structured, guided data input.
✅ Real-Time Dashboard: Instantly visualize vendor stats with built-in charts.
✅ Excel Compatibility: No need for external software—use what you already have.
✅ Improved Compliance: Maintain tax IDs, payment terms, and banking info securely.
✅ Role-Based Access: Control who can view or edit the tracker.
✅ Customizable Lists: Tailor dropdowns to match your business needs.
Why Use Excel and VBA for Vendor Management?
Some companies invest in large ERP systems, but for small to mid-sized businesses, that’s not always feasible. Excel offers:
-
Familiarity: Almost everyone knows how to use Excel.
-
Flexibility: Easily customize or expand your template as your needs grow.
-
Speed: Immediate deployment—no installation or cloud configuration required.
-
Automation via VBA: Enhance capabilities like form entry, validations, and security.
Best Practices for Using the Vendor Setup Tracker
To get the most from this Excel tool, follow these tried-and-true best practices:
✅ Define a Clear Vendor Onboarding Process
-
Create a checklist of required fields (Tax ID, Bank Account, etc.)
-
Use dropdowns to ensure standardized values.
✅ Keep User Access Limited
-
Allow only trusted users to edit or delete vendor records.
-
Change passwords periodically via the User Management screen.
✅ Refresh the Dashboard Regularly
-
Use the provided buttons or refresh shortcuts to update charts after data entry.
✅ Back Up Regularly
-
Save backup copies of your Excel file weekly to avoid data loss.
✅ Maintain List Sheet Periodically
-
Add new currencies or countries as your vendor base grows.
-
Delete outdated terms to keep data entry simple.
Tips to Customize the Tracker for Your Business
-
Add extra fields: e.g., GST Number, Business Type, or Approval Status.
-
Use conditional formatting: highlight inactive vendors or high-risk categories.
-
Connect with Power BI: for more advanced reporting needs.
-
Password-protect sheets: for added data security.
Transitioning from Manual Vendor Management
Are you currently tracking vendors in multiple sheets or emails? Transitioning to this tool is simple:
-
Export existing data to a structured Excel format.
-
Paste records into the Data Entry Sheet in the appropriate columns.
-
Run the Dashboard to instantly see summaries and trends.
The result? Faster setup time, fewer mistakes, and clearer oversight.
Common Use Cases for the Vendor Setup Tracker
🏢 Procurement teams onboarding new suppliers.
💰 Finance teams validating vendor banking information.
🌍 Global companies dealing with multiple currencies and payment terms.
📊 Auditors and compliance officers needing easy access to vendor records.
Why Every Business Needs a Vendor Setup Tool
Without a structured tracker, vendor management becomes chaotic:
-
Documents get misplaced
-
Tax and compliance information is missing
-
You lose time chasing vendor details
By implementing this Excel-based solution, you move from reactive to proactive vendor management.
Real-World Example
Scenario: A mid-sized construction company hires vendors for different sites—materials, labor, equipment rental.
Problem: Data was scattered across emails, handwritten notes, and spreadsheets.
Solution: The New Vendor Setup Tracker:
-
Standardized vendor details
-
Allowed site managers to add records securely
-
Gave procurement visibility into all active vendors
-
Provided monthly dashboards for board meetings
Outcome: Improved procurement efficiency by 40% in the first 3 months.
Data Security Considerations
Though Excel is user-friendly, always consider security:
-
Enable macro security settings to prevent unauthorized scripts.
-
Protect sensitive sheets with passwords.
-
Store Excel files in secure, access-controlled folders.
Conclusion: Simplify Vendor Onboarding with Excel
Managing vendors shouldn’t be a bottleneck. With the New Vendor Setup Tracker in Excel, you can:
-
Automate manual processes
-
Gain visibility across your vendor base
-
Empower teams with secure, structured tools
This ready-to-use template combines Excel’s simplicity with VBA’s power, providing everything your business needs to manage vendors with confidence.
❓ Frequently Asked Questions (FAQs)
Q1: Can I use this tool without knowing VBA?
Absolutely. The VBA runs in the background. You just need to use buttons and forms.
Q2: Is the tool customizable?
Yes. You can add new fields, dropdowns, or modify the form based on your workflow.
Q3: How do I add a new vendor?
Click on “Add New Record,” fill in the form, and hit “Submit.” The data is saved, and the dashboard updates automatically.
Q4: Can I track inactive vendors?
Yes. Use the “Active Status” field and related dashboard chart to filter active/inactive vendors.
Q5: Is this suitable for large companies?
While the tracker is built in Excel, it can easily support hundreds of records and can be extended to connect with Power BI for enterprise reporting.
Q6: Can I recover deleted records?
Once deleted from the Excel file, records are gone unless backed up. Always maintain regular backups.
Q7: Is the dashboard interactive?
Yes! Use the slicers to filter by category, country, currency, and more.
Visit our YouTube channel to learn step-by-step video tutorials