Excel is a veritable powerhouse when it comes to managing and analyzing data. Regardless of whether you are dealing with massive datasets or tiny lists, Excel offers an array of functionalities to assist you in sorting and transforming your information. One such tool is the “Text to Column” feature, which allows you to convert a solitary column of data into multiple columns through a series of rules. In this article, we delve into four practical tips for harnessing the power of the Text to Column feature to separate and reorganize your data.
Tip 1: Split IDs and Names with Fixed Width in Text to Column
When working with data that encompasses multiple details within a single cell, it can be useful to divide that data into distinct columns. For instance, if you have a list of employees and their corresponding IDs within one column, it would be helpful to split that information into two separate columns – one for the employee ID and another for the employee’s name.
To achieve this, you must use the “Fixed Width” option . This option allows you to indicate where the data should be divided by specifying the width of each column.
Here’s how you can use the Fixed Width option to separate employee ID and employee name:
- Choose the column that contains the combined employee ID and name.
- Navigate to the “Data” tab and click on “Text to Columns.”
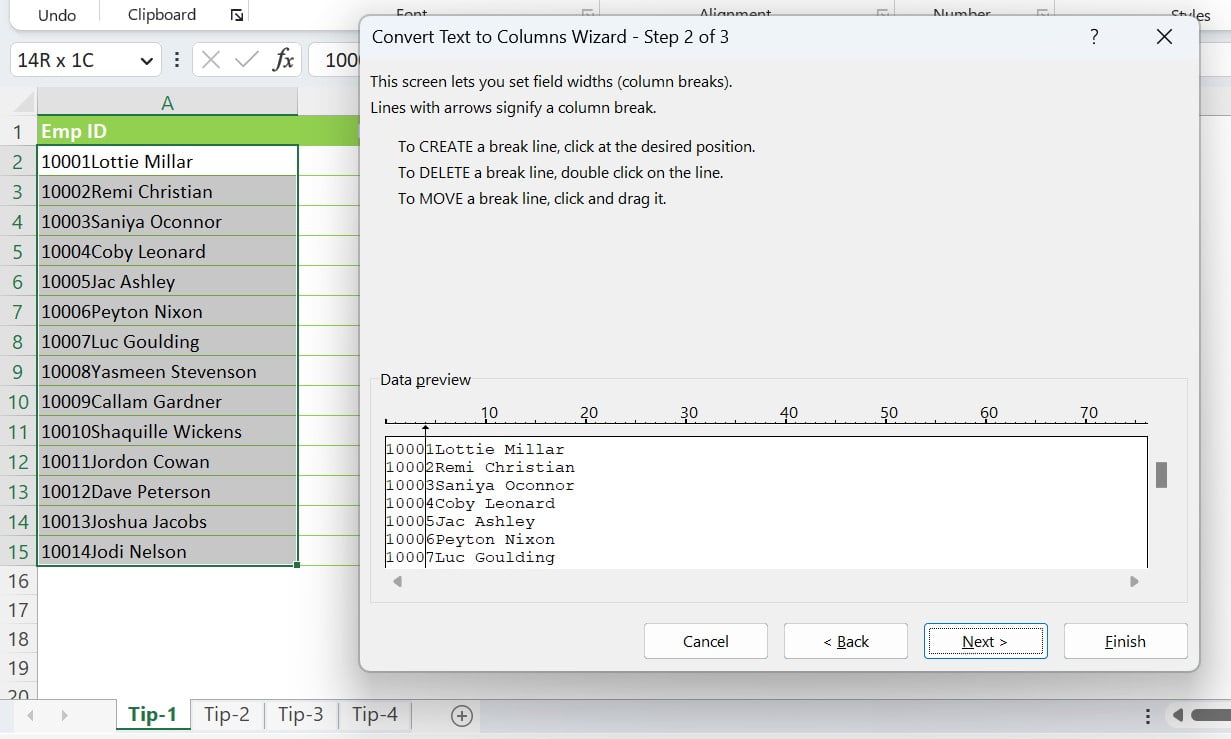
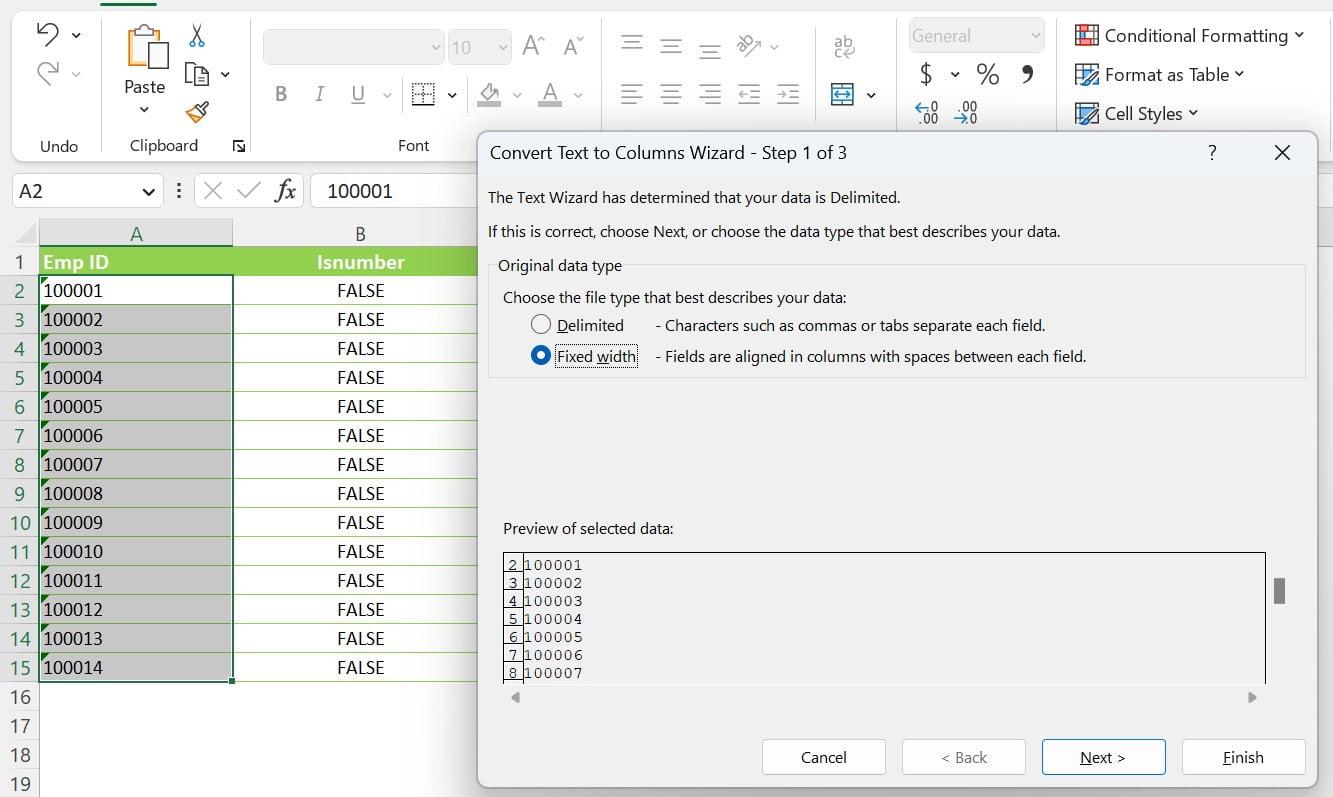
- In the Text to Column wizard, select the “Fixed Width” option and hit “Next.”
- It’s time to get precise and separate those employee IDs and names. You can effortlessly split the data into separate columns. But wait, it’s not as straightforward as it seems.
- You’ll need to be vigilant and specify exactly where the split should occur. To achieve this, grab the ruler and allocate a width of 5 characters (if your employee ID happens to be 5 characters long) to the first column, and the rest of the text to the second column. Now you’re all set to go, separating those IDs and names with ease.
- Finally, click “Finish” to conclude the process.
Your data should now be divided into two separate columns, one for the employee ID and one for the employee name.
Tip 2: Use the “Delimited” Option in Text to Column for Email Domain Isolation
In the world of data analysis, it is common to encounter email addresses lumped together in a single column of a spreadsheet. But what if you need to differentiate between the email ID and the domain? Fear not, for the “Text to Column” feature has got you covered, specifically with its “Delimited” option.
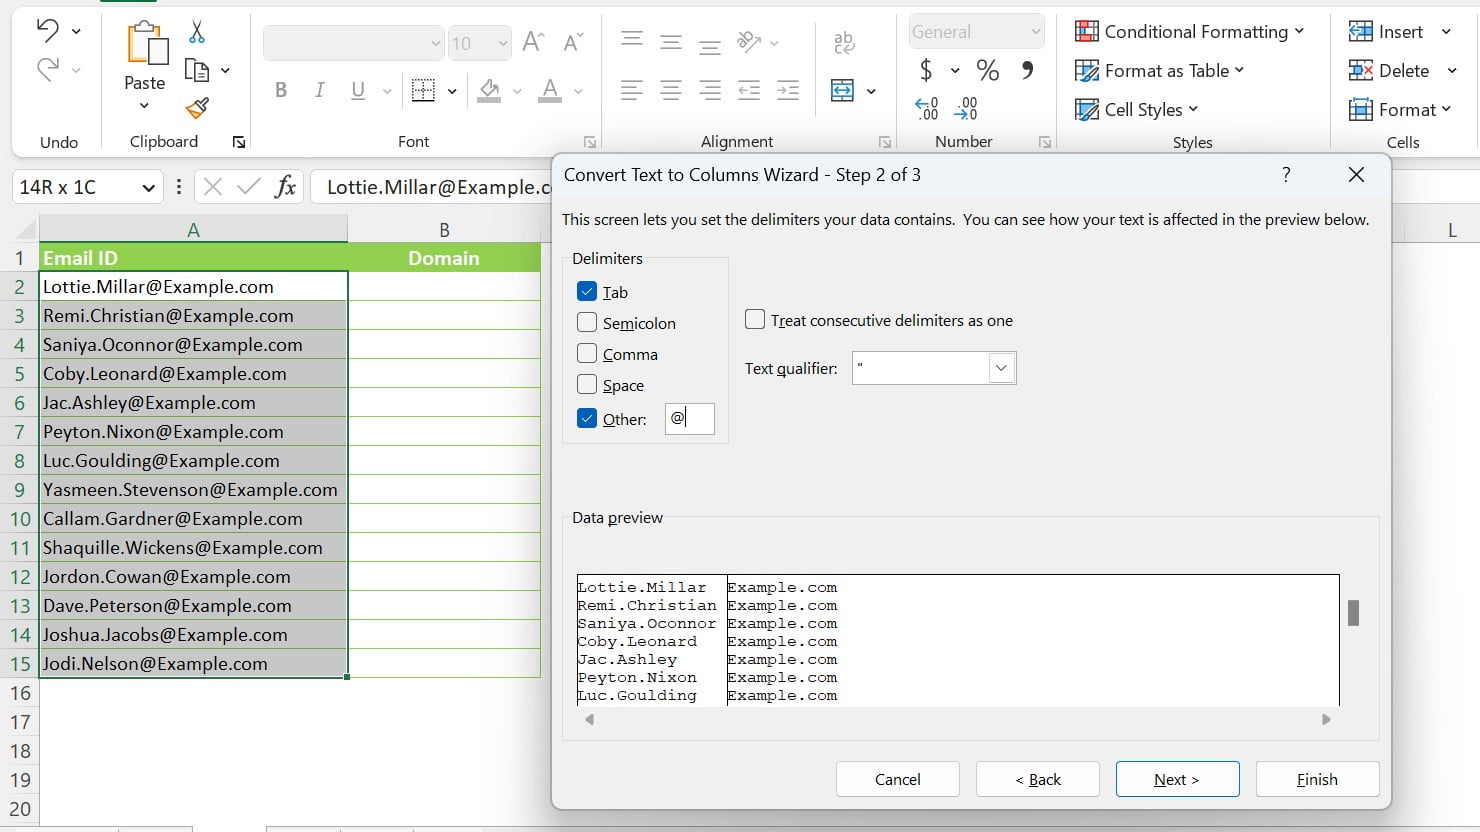
This option permits you to define a delimiter, such as a tab or a comma, to divide the data within the column. In this scenario, the “@” symbol serves as the delimiter, splitting the email ID and the domain apart.
Here’s a step-by-step guide to utilizing the “Delimited” option for your email domain separation needs:
- Select the column that holds the email addresses.
- Go to the “Data” tab and select “Text to Columns.”
- In the “Text to Columns” wizard, choose the “Delimited” option and press “Next.”
- In the following step, pick the “@” symbol as the delimiter and hit “Next.”
- Finally, specify the format for the column data as “General” and press “Finish.”
Voila! Your email addresses are now split into two separate columns, one for the email ID and the other for the domain, making it much easier to manage and analyze your data.
Tip 3: Transform Employee Ids into Numerical Digits with Text to Columns
On occasion, employee identification numbers may be recorded as text in a spreadsheet. But, when you want to compute mathematical operations with these identifiers, it’s essential to convert them into a numerical format. That’s where the power of the “Text to Columns” feature comes in. By utilizing the “General” format option, you can effortlessly change text-based employee IDs into numeric figures.
Here’s a step-by-step guide to converting employee IDs into numeric format with Text to Columns:
- Select the column holding the employee IDs.
- Navigate to the “Data” tab, and then click on “Text to Columns.”
- In the “Text to Columns” wizard, select the “Delimited” option and press “Next.”
- In the subsequent step, there’s no need to define the column width as you’re solely converting the data. Simply hit “Next.”
- Finally, opt for the “General” format option and press “Finish.”
And just like that, your employee IDs are now transformed into numerical digits, ready for any mathematical operation you may want to perform.
In the realm of data organization and analysis, the Text to Column feature in Excel remains a highly enigmatic and perplexing tool. This enigma presents itself in various forms, whether you are separating employee IDs and names, bifurcating email addresses, transforming employee IDs into numeric values, or converting dates into a more legible format. Yet, with these four tips, you can unravel the mystery of the Text to Column feature and elevate your data manipulation to a professional level.
Tip 4: Transmute Date from 20230330 to 30-Mar-2023 Format
In the world of Excel and dates, a common goal is to convert them into a format that is more easily readable. For instance, if you have a date stored as 20230330, it may be desirable to transmute it into 30-Mar-2023.
To convert dates from a numerical format to a readable format, the Text to Column feature and the “Date” format option must be utilized. The Date format option enables you to specify the desired format for the date and Excel will automatically convert the data accordingly.
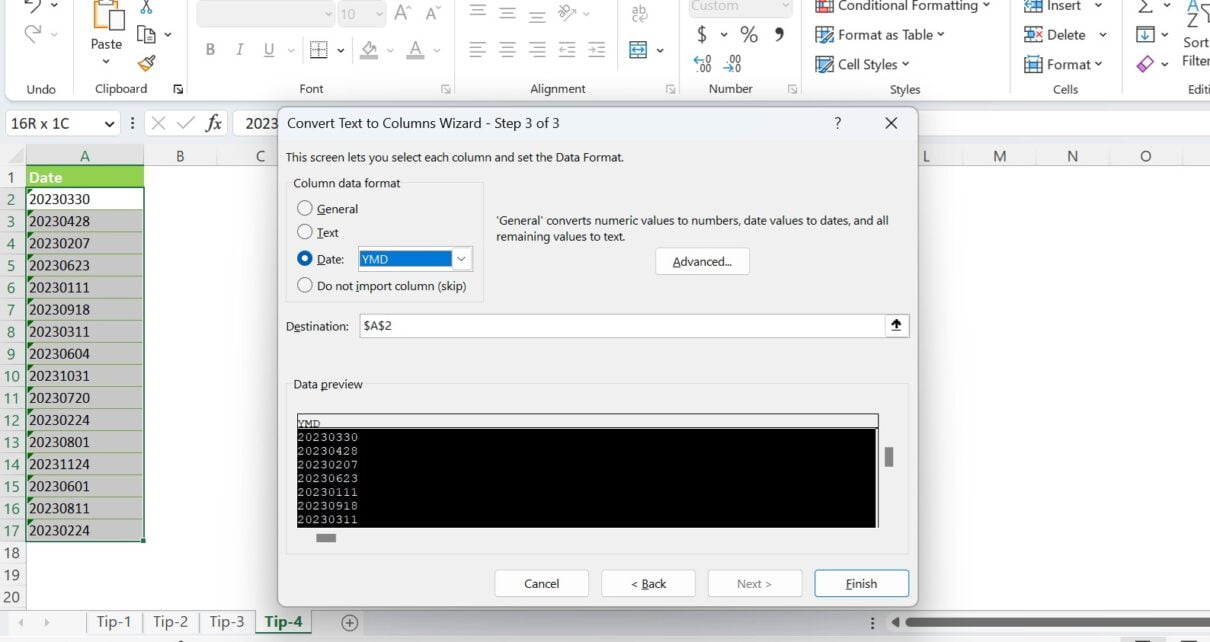
Here’s how to use the Date format option to convert the date from 20230330 to 30-Mar-2023:
- Choose the column that holds the dates.
- Visit the “Data” tab and click on “Text to Columns”.
- In the “Text to Columns” wizard, pick the “Fixed Width” option and proceed by clicking “Next”.
- In the subsequent step, there’s no need to specify the width of each column as conversion is the only objective. So, simply click “Next”.
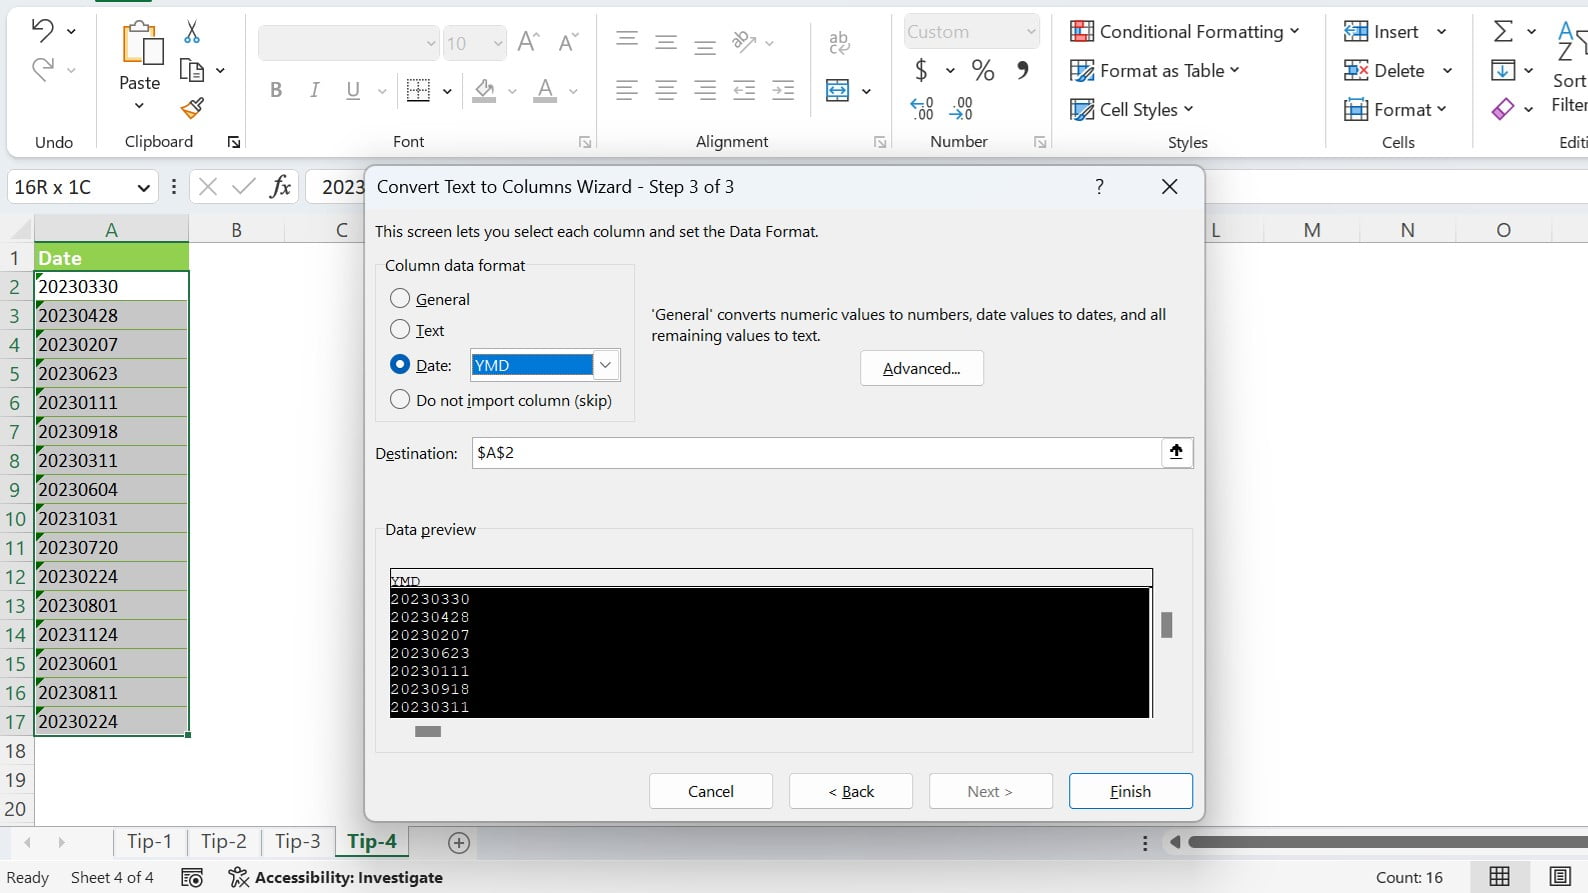
- In the ultimate step, choose the “Date” format option and select the desired date format from the dropdown list. In this case, the format would be “YMD”. Finally, click “Finish”.
- And there you have it! Your dates should now be in a more readable format, making it simpler to understand and analyze the data.
Conclusion
The Text to Column feature in Excel is a powerful tool that enables the separation and conversion of data. By mastering these four tips, you will be able to harness the full potential of the Text to Column feature, allowing you to manipulate data with ease and precision.
Visit our YouTube channel to learn step-by-step video tutorials
Watch the step-by-step video tutorial: