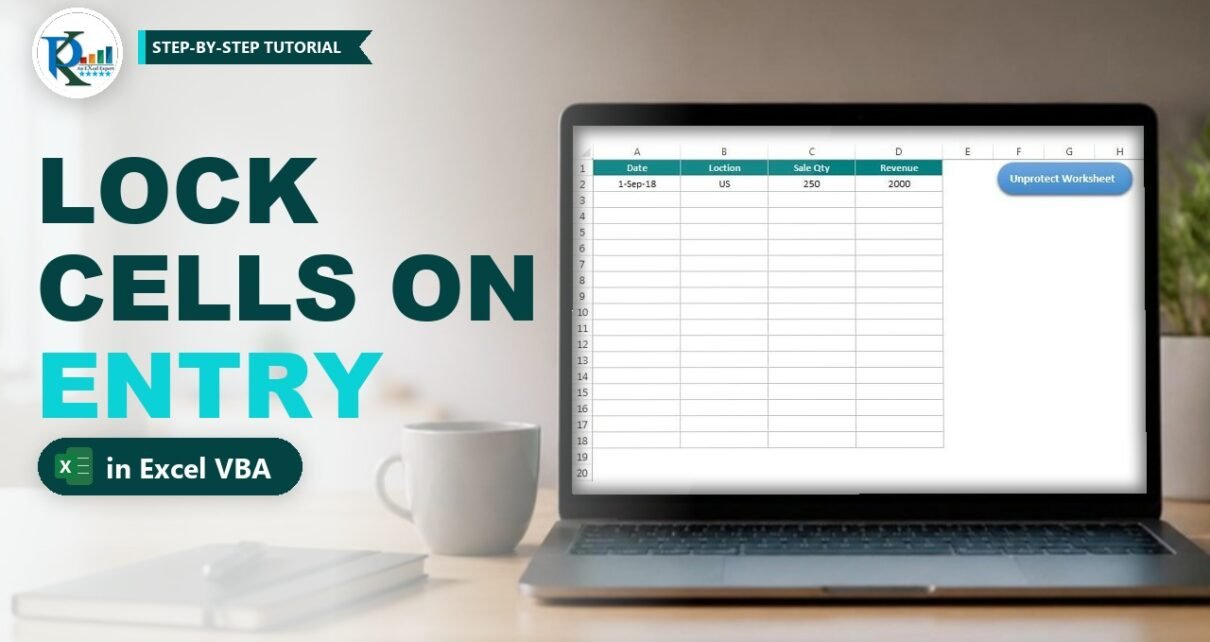
To lock an Excel cell after updating it, you need a few lines of VBA that protect each cell the moment someone types in it. One of our clients needed exactly this: a data entry sheet where every value can be entered only once, and only the admin, who knows the protection password, can change it later. In this tutorial you will build that template step by step with the Worksheet_Change event, Format Cells protection and a small Unprotect Worksheet button. It works in Excel 2010, 2013, 2016, 2019, 2021 and Microsoft 365 for Windows.
⬇️ Download the Lock Cell Template
Single-sheet workbook · .xlsm (macro-enabled) · demo protection password 1234
Watch the Video Tutorial
In the video PK demonstrates the finished template, then rebuilds it on a fresh sheet: the drop-down list, the Worksheet_Change code, unlocking the input range and the password button.
What You Will Build
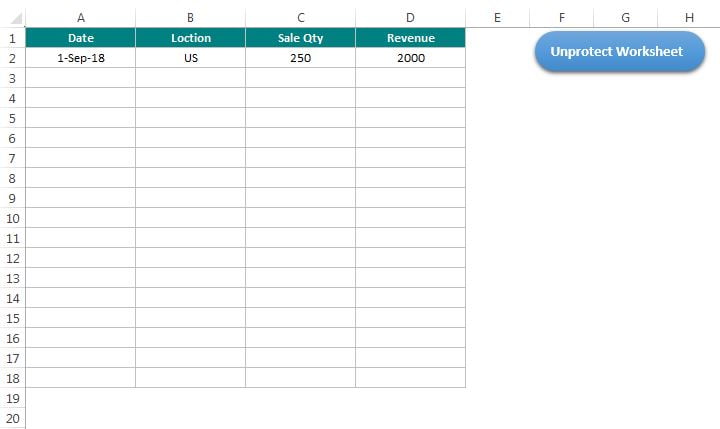
- A data entry table with Date, Location, Sale Qty and Revenue columns (A1:D18).
- Write-once cells: as soon as you type a value and press Enter, that cell is locked and the sheet is protected again.
- Open blank cells: empty cells stay unlocked, so new rows can still be filled in.
- Data validation on the Date column (dates in 2018 only) and a US / UK / India drop-down on Location.
- An Unprotect Worksheet button that asks for the password, so only the admin can correct a locked value.
How the Lock Cell Template Works
Excel protection has two parts, and this template uses both of them:
- Every cell has a Locked property (Format Cells → Protection). It is ticked by default, but it does nothing until the sheet is protected.
- Protect Sheet switches protection on. From then on, locked cells cannot be edited and unlocked cells can.
So the plan is simple. Start with the input range unlocked and the sheet protected. Every time a cell changes, a macro unprotects the sheet, sets that cell’s Locked property to True if it now holds a value (or False if it is empty), and protects the sheet again. If anyone then tries to type over a filled cell, Excel shows its standard message: The cell or chart you’re trying to change is on a protected sheet. They cannot change it from the formula bar either.
Part 1 – Set Up the Data Entry Sheet
Step 1: Create the table
Type the headers Date, Location, Sale Qty and Revenue in A1:D1 and format the table range A1:D18 with borders and a header fill. (In the download file the header reads Loction; it is just a label, so feel free to correct the spelling.) Give A2:A18 a date format such as d-mmm-yy.
Step 2: Add data validation
Validation keeps the one-time entries clean, which matters when users cannot fix their own mistakes. Select B2:B18, press Alt+D+L (or Data → Data Validation), choose List and type the source US,UK,India. In the download file, A2:A18 also has a Date rule that only accepts dates between 1-Jan-2018 and 31-Dec-2018, with the error message Invalid Date. Change those dates to the period you need.
Step 3: Unlock the input range
This step is easy to forget. Every cell is Locked by default, so if you skip it, nobody can type anything once the sheet is protected. Select A2:D18, press Ctrl+1 (the video uses the older shortcut Alt+O+E), open the Protection tab, untick Locked and click OK. The headers and every cell outside the table stay locked.
Part 2 – The VBA Code to Lock a Cell After Updating
Step 4: Open the sheet’s Change event
The code must live in the sheet module, not in a normal module, because it responds to changes on that sheet:
- Press Alt+F11 (or Developer → Visual Basic) to open the Visual Basic Editor.
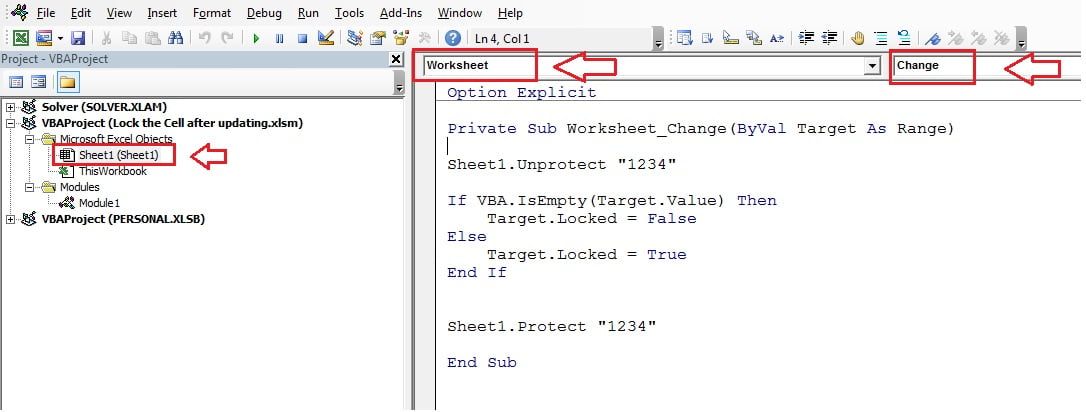
- In the Project window on the left, double-click the sheet that holds your table (Sheet1 in the download file).
- Select Worksheet in the first drop-down above the code window. Excel inserts an empty
Worksheet_SelectionChangeprocedure. - Select Change in the second drop-down, then delete the empty SelectionChange procedure.
Step 5: Paste the Worksheet_Change code
This is the code from the download file:
Option Explicit

Private Sub Worksheet_Change(ByVal Target As Range)

Sheet1.Unprotect "1234"

If VBA.IsEmpty(Target.Value) Then
    Target.Locked = False
Else
    Target.Locked = True
End If

Sheet1.Protect "1234"

End Sub
How the code works
Targetis the cell you have just updated. Excel passes it to the event automatically every time a value on the sheet changes.Sheet1.Unprotect "1234"removes protection first, because a cell’s Locked property cannot be changed while the sheet is protected.VBA.IsEmpty(Target.Value)checks whether the cell is now blank. If it is,Target.Locked = Falsekeeps it open for a new entry.- If the cell holds a value,
Target.Locked = Truelocks it. Sheet1.Protect "1234"switches protection back on, so the lock takes effect immediately.
Replace Sheet1 with the code name of your own sheet (the name before the brackets in the Project window) and 1234 with your own password. The password must be the same in both lines.
Step 6: Test it
Go back to Excel, type a date in A2 and press Enter. Now try to type in A2 again: Excel refuses with the protected-sheet message. The empty cells below still accept data. If you unprotect the sheet from Review → Unprotect Sheet and open Format Cells on A2, you will see that Locked is now ticked, while the empty cells are still unticked.
Part 3 – Add an Unprotect Worksheet Button for the Admin
Step 7: Write the unprotect macro
Press Alt+F11, then Alt+I+M to insert a new module, and paste this macro from the download file:
Option Explicit

Sub Unprotect_Worksheet()

Dim pwd As String

pwd = InputBox("Please input the password", "Input Password")

If pwd = "" Then Exit Sub

If pwd = "1234" Then
    Sheet1.Unprotect pwd
    MsgBox "Sheet has been unprotected", vbInformation
Else
    MsgBox "Incorrect password"
End If

End SubInputBoxshows a box with the prompt and the title Input Password and returns what the user typed.If pwd = "" Then Exit Substops the macro quietly in two cases: the user clicked OK without typing anything, or clicked Cancel (which also returns an empty string).- If the password matches, the sheet is unprotected and a confirmation message appears. Anything else shows Incorrect password and the sheet stays protected.
Step 8: Assign the macro to a shape
Insert a rounded rectangle (Insert → Shapes), type Unprotect Worksheet on it, right-click it, choose Assign Macro and pick Unprotect_Worksheet. Finally, protect the sheet once (Review → Protect Sheet) with the same password, turn off gridlines if you like, and save the file as an Excel Macro-Enabled Workbook (.xlsm).
Step 9: Correct a locked value as the admin
Click the button and enter the password. The sheet is unprotected and you can change any value. As soon as you press Enter, the Change event runs again and protects the sheet, so the corrected cell is locked once more. If you clear a cell instead, it becomes unlocked and can be filled again.
Improved Version for Pasted or Deleted Ranges (Addition)
This section is an extra, not part of the original file. The original code is perfect for one cell at a time. If a user pastes a block or deletes several cells at once, Target covers many cells, IsEmpty on a multi-cell range returns False, and the whole block is locked, blank cells included. The version below checks each cell separately and ignores changes outside the table:
Private Sub Worksheet_Change(ByVal Target As Range)

Dim rng As Range, c As Range
Set rng = Intersect(Target, Me.Range("A2:D18"))
If rng Is Nothing Then Exit Sub

Me.Unprotect "1234"
For Each c In rng.Cells
    c.Locked = Not IsEmpty(c.Value)
Next c
Me.Protect "1234"

End Sub
Me always refers to the sheet that holds the code, so you do not need to change the sheet name. Adjust A2:D18 to match your table.
Common Errors and Fixes
Cells do not lock after typing
Macros are probably disabled, or the code sits in a normal module instead of the sheet module. Enable macros when you open the file, check that the code is under the sheet in the Project window, and make sure the workbook is saved as .xlsm.
Nobody can type in any cell
The input range was never unlocked, so every cell still has the default Locked setting. Unprotect the sheet, repeat Step 3 on the blank input cells and protect it again.
Error: The password you supplied is not correct
The sheet was protected manually with a different password from the one in the code. Use exactly the same password in Review → Protect Sheet, in the Change event and in the unprotect macro.
Blank cells were locked after a paste
That is the multi-cell behaviour described above. Unprotect the sheet, unlock the blank cells again and switch to the improved version of the code.
Tips
- Change the demo password 1234 before you share the file, and lock the VBA project (Tools → VBAProject Properties → Protection) so users cannot read the password in the code.
- Remember that sheet protection stops accidental edits, not a determined expert. Keep a backup of important data.
- Combine the lock with data validation, as in this template, because users cannot fix a wrong entry themselves.
- Read Microsoft’s guide to protecting a worksheet and the Worksheet.Change event reference for all the options.
Want It Ready-Made?
If you would rather start from finished, macro-driven tools than build each one yourself, the Excel VBA Tools & Utilities Pack on NextGenTemplates.com bundles 8 working Excel VBA applications with login screens, UserForm data entry and one-click reports. You can also browse all Excel VBA tools.
Related Tutorials
- Protect Excel Worksheet as UserInterfaceOnly
- 6 Types of Password Protection in Microsoft Excel
- Excel Template with Protection and Validation
- VBA.InputBox vs Application.InputBox in Excel VBA
- How to Prevent Duplicate Entries Using Data Validation
Frequently Asked Questions
How do I lock a cell in Excel after data entry?
Unlock the input range in Format Cells, protect the sheet, and add a Worksheet_Change macro that unprotects the sheet, sets the changed cell to Locked when it holds a value, and protects the sheet again. Steps 3 to 5 show the full setup.
Can I lock a cell after entry without VBA?
Not automatically. Excel protection only locks cells that are already marked as Locked when the sheet is protected. To lock each cell at the moment it is filled, you need an event macro like the one in this tutorial.
How can the admin edit a locked cell?
Click the Unprotect Worksheet button and enter the password, or use Review then Unprotect Sheet. Change the value and press Enter; the macro locks the cell and protects the sheet again automatically.
Why can users still type in empty cells?
Because the input range was unlocked before protecting the sheet, and the macro keeps a cell unlocked whenever it is empty. Only cells that contain a value are locked.
Does the code work if macros are disabled?
No. The sheet stays protected, but new entries are not locked because the Change event never runs. Save the file as .xlsm and ask users to enable macros.
About the Author
PK is a Microsoft Excel expert and trainer and the founder of PK: An Excel Expert and NextGenTemplates.com. He has been teaching Excel, VBA, Power Query and Power BI since 2016 on his YouTube channel.
Conclusion
To lock an Excel cell after updating, you only need three things: an unlocked input range, a protected sheet and a short Worksheet_Change macro that locks each cell once it holds a value. Add the password button for the admin and some data validation, and you have a write-once data entry template that protects every record. Download the file, type a value and watch the cell lock itself.