Word Cloud is also known as text cloud or tag cloud. Size of the words change according to the value or weightage or frequency of any word. Here we have created a macro to create the word cloud in Excel. In this macro file, we have 2 worksheets
Word Cloud in Excel Using VBA
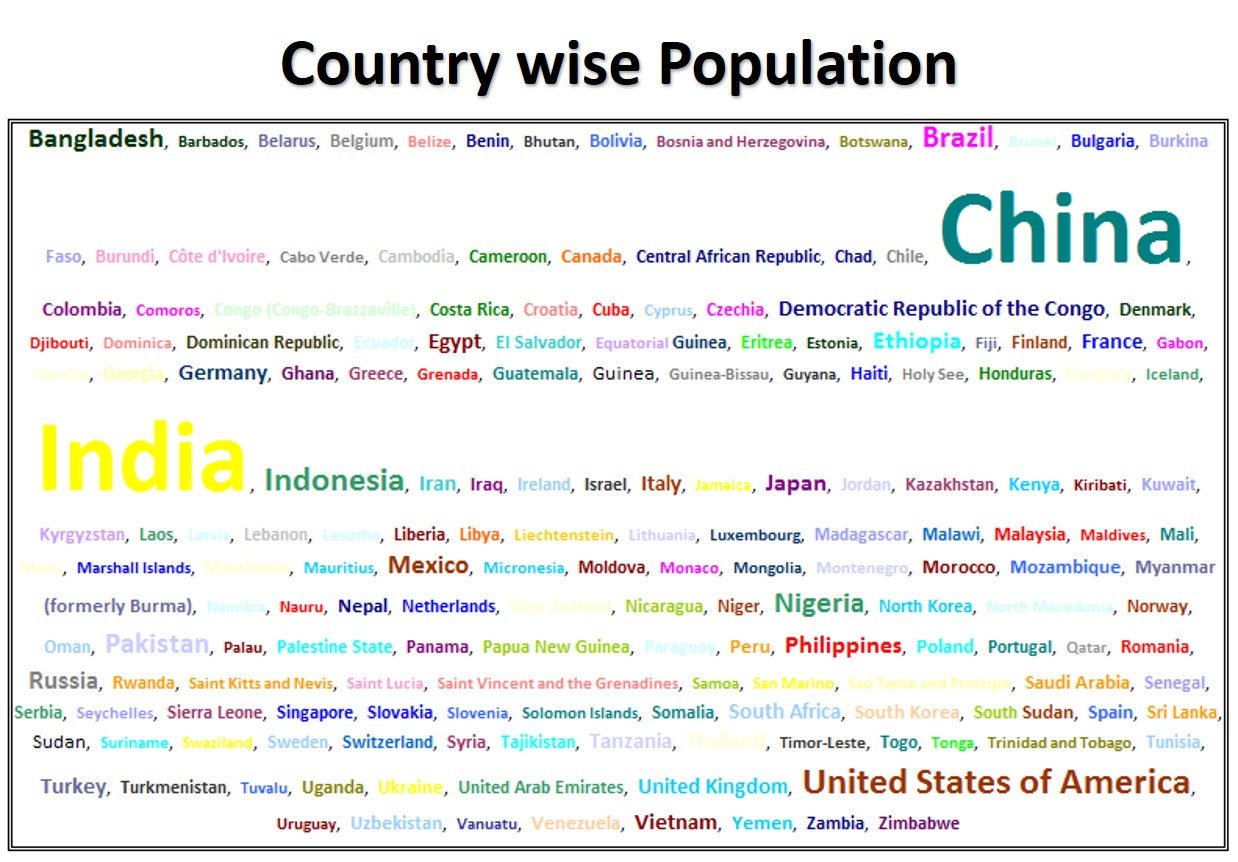
Setting Worksheet – In this worksheet, you need to enter your data, like we have entered the Country wise population. We have given small setting section wherein you can enter the Minimum Font Size, Maximum Font Size, Separator, Multiple Font Color (Yes or No) and Multiple Font Name (Yes or No)
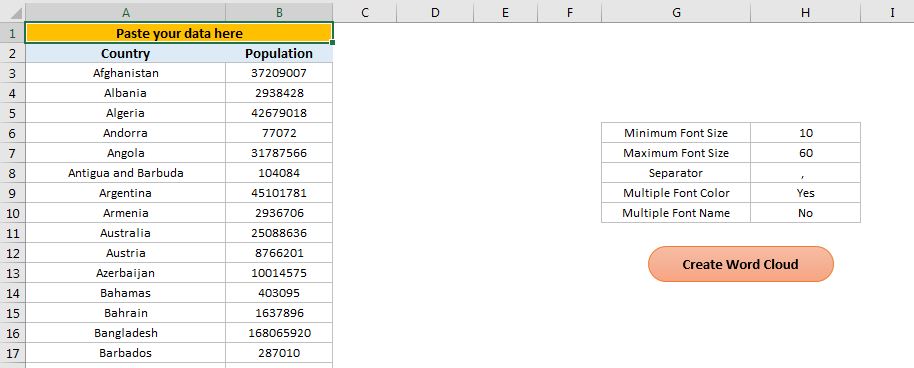
Word Cloud Worksheet – Once you will click on “Create Word Cloud” Button. It will create a word cloud on this worksheet.
Click to buy Word Cloud in Excel Using VBA
Below is the code to create a word cloud-
Option Explicit

Sub Create_Word_Cloud()

Dim Setting_Sh As Worksheet
Set Setting_Sh = ThisWorkbook.Sheets("Setting")

Dim WCSh As Worksheet
Set WCSh = ThisWorkbook.Sheets("Word Cloud")


Dim Min_Font_Size As Integer
Dim Max_Font_Size As Integer

Min_Font_Size = Setting_Sh.Range("H6").Value
Max_Font_Size = Setting_Sh.Range("H7").Value


Dim Max_Value As Long
Max_Value = Application.WorksheetFunction.Max(Setting_Sh.Range("B:B"))

Dim i As Integer

Dim start_ As Integer
Dim length_ As Integer


WCSh.Cells.Delete
WCSh.Range("B2").Locked = False

For i = 3 To Application.CountA(Setting_Sh.Range("A:A"))

If i = 3 Then
WCSh.Range("B2").Value = Setting_Sh.Range("A" & i).Value
Else
WCSh.Range("B2").Value = WCSh.Range("B2").Value & Setting_Sh.Range("H8").Value & Setting_Sh.Range("A" & i).Value
End If

Next i

For i = 3 To Application.CountA(Setting_Sh.Range("A:A"))

length_ = Len(Setting_Sh.Range("A" & i).Value)
start_ = Application.WorksheetFunction.Search(Setting_Sh.Range("A" & i).Value, WCSh.Range("B2").Value)

With WCSh.Range("B2").Characters(start_, length_).Font

.ColorIndex = IIf(Setting_Sh.Range("H9").Value = "Yes", Application.WorksheetFunction.RandBetween(3, 56), vbBlack)

.Bold = True

.Size = Min_Font_Size + Setting_Sh.Range("B" & i).Value * ((Max_Font_Size - Min_Font_Size) / Max_Value)

If Setting_Sh.Range("H10").Value = "Yes" Then
.Name = Setting_Sh.Range("P" & Application.WorksheetFunction.RandBetween(2, Application.CountA(Setting_Sh.Range("P:P"))))
End If
End With
Next i

With WCSh.Range("B2")
.EntireRow.AutoFit
.WrapText = True
.EntireColumn.ColumnWidth = 130
.HorizontalAlignment = xlCenter
.Borders.LineStyle = xlDouble
End With

WCSh.Activate
WCSh.Range("A1").Select
ActiveWindow.DisplayGridlines = False

End Sub
Click here to download the Practice file-
Visit our YouTube channel to learn step-by-step video tutorials
Watch the step by step video tutorial:
Click to buy Word Cloud in Excel Using VBA