In today’s fast-paced world, managing money wisely is no longer a luxury—it’s a necessity. Whether you’re trying to save for a dream vacation, control overspending, or simply track where your money goes every month, a Personal Finance Tracker in Excel can be your best friend.
This article will walk you through everything you need to know about creating, using, and benefiting from a powerful and ready-to-use Personal Finance Tracker built in Excel with VBA functionality. With user-friendly features and automation at its core, this tracker puts you in control of your finances without requiring advanced tech skills.
Click to Purchases Personal Finance Tracker in Excel
What Is a Personal Finance Tracker in Excel?
A Personal Finance Tracker in Excel is a dynamic tool designed to help individuals record, monitor, and analyze their financial activities like income, expenses, and savings. Unlike complex software or costly subscription-based apps, this Excel-based tool allows you to maintain your financial records in a spreadsheet format—completely customized to your needs.
This particular tracker also includes VBA-based automation, enabling features like login security, dropdown management, and automatic chart updates. Whether you’re a student, a working professional, or a home manager, this tool gives you complete visibility of your finances—instantly.
Click to Purchases Personal Finance Tracker in Excel
Key Features of the Personal Finance Tracker in Excel
Let’s explore the powerful features that make this Excel tool incredibly efficient:
1. Login Form for Secure Access

When you open the file, you’re greeted with a login form. You simply enter:
-
User ID: Admin1
-
Password: abcd
This ensures your financial data remains private and protected.
2. Main Form (Control Center)
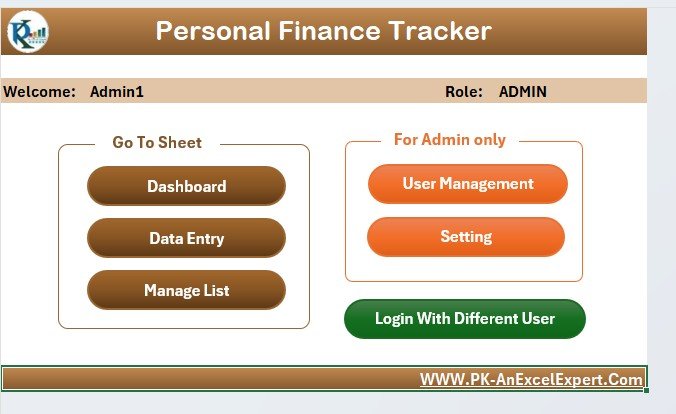
Once logged in, you’ll enter the Main Form, which acts as your central hub. From here, you can:
-
Add new transactions
-
Update or delete existing entries
-
Navigate easily through dashboard visuals and lists
3. Dashboard Sheet
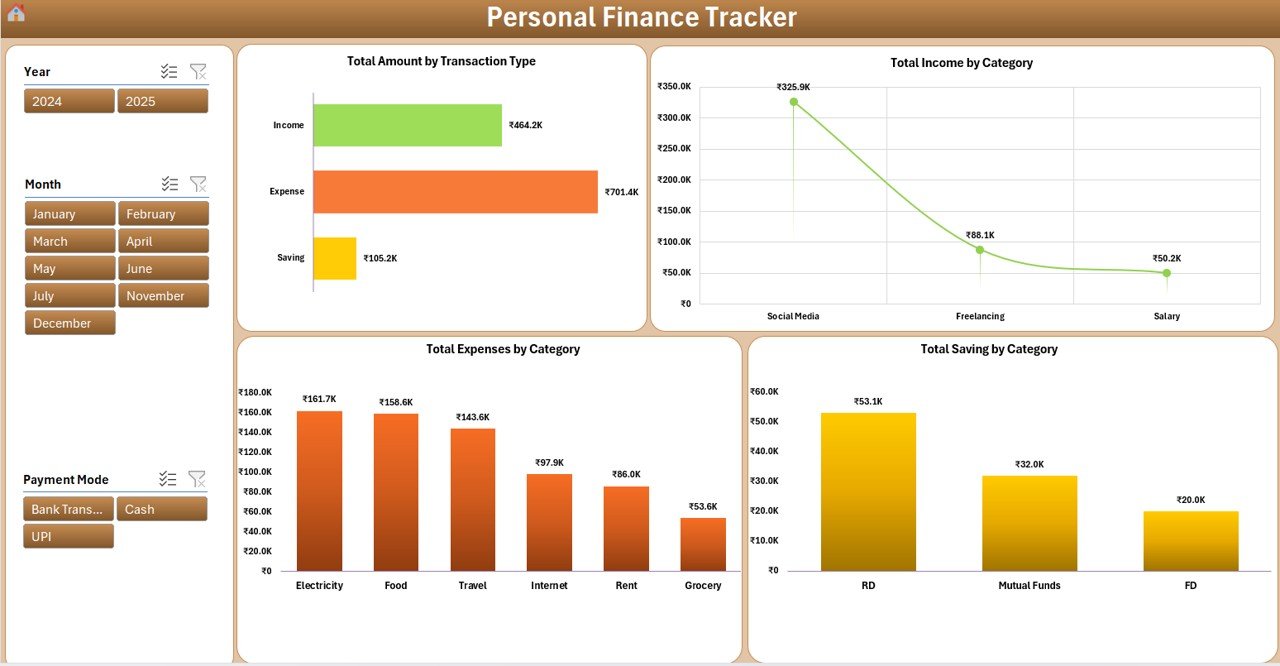
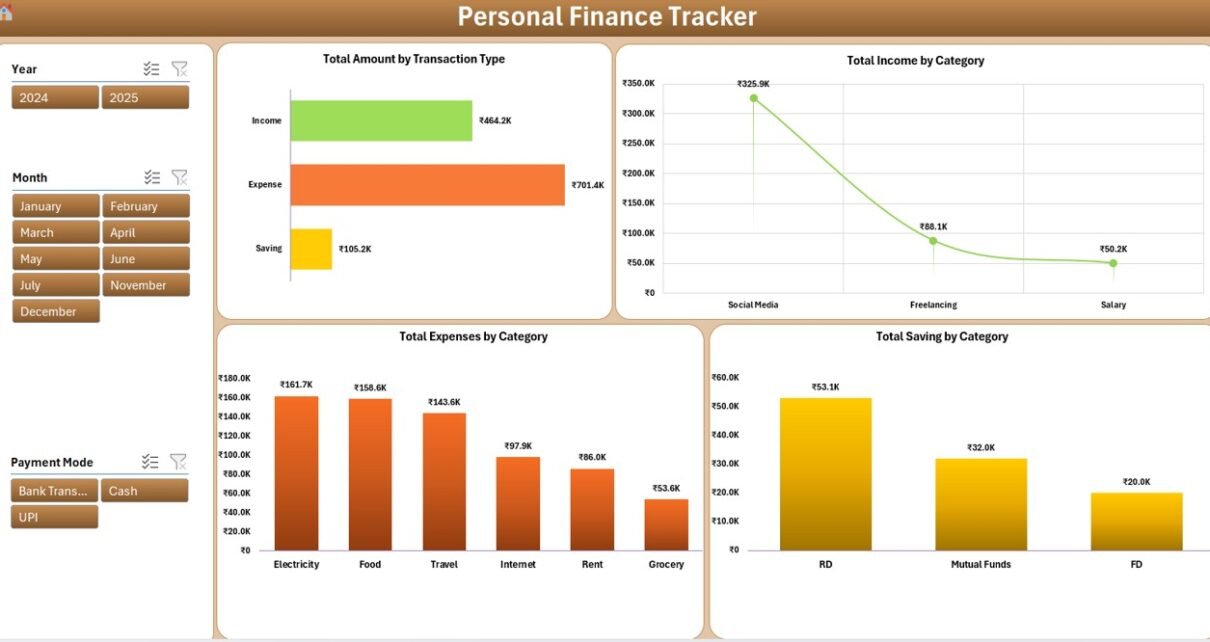
The dashboard gives you a visual summary of your financial health. You get:
-
Slicers to filter by month, year, and transaction type
Click to Purchases Personal Finance Tracker in Excel
Charts such as:
- Total Amount by Transaction Type
- Total Income by Category
- Total Expenses by Category
- Total Savings by Category
4. Data Entry Sheet
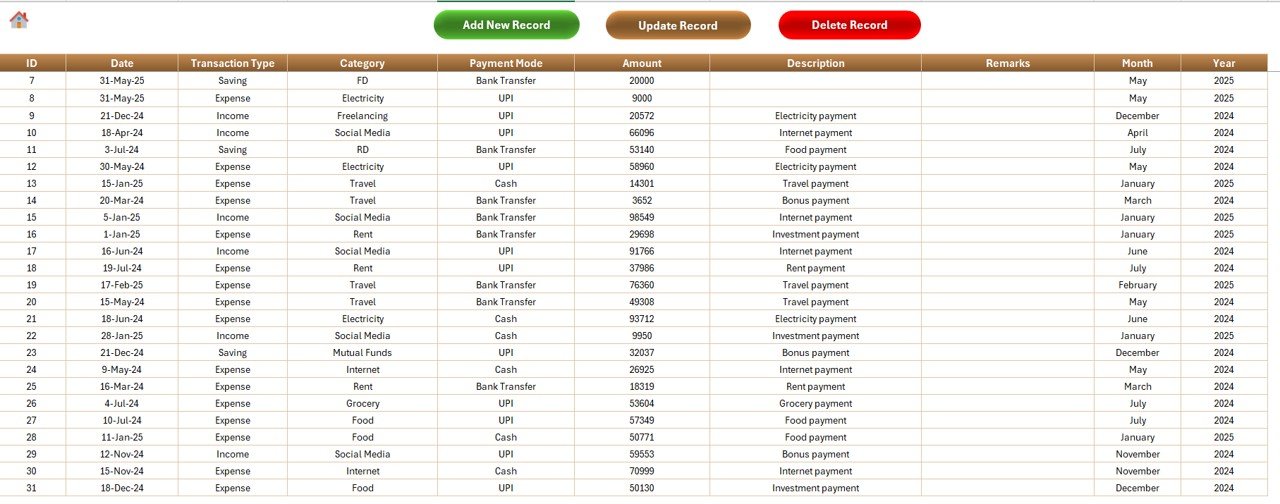
This sheet stores all your transaction details using these columns:
-
ID, Date, Transaction Type, Category
-
Payment Mode, Amount, Description
-
Remarks, Month, Year
You’ll also find three handy buttons:
Add New Record
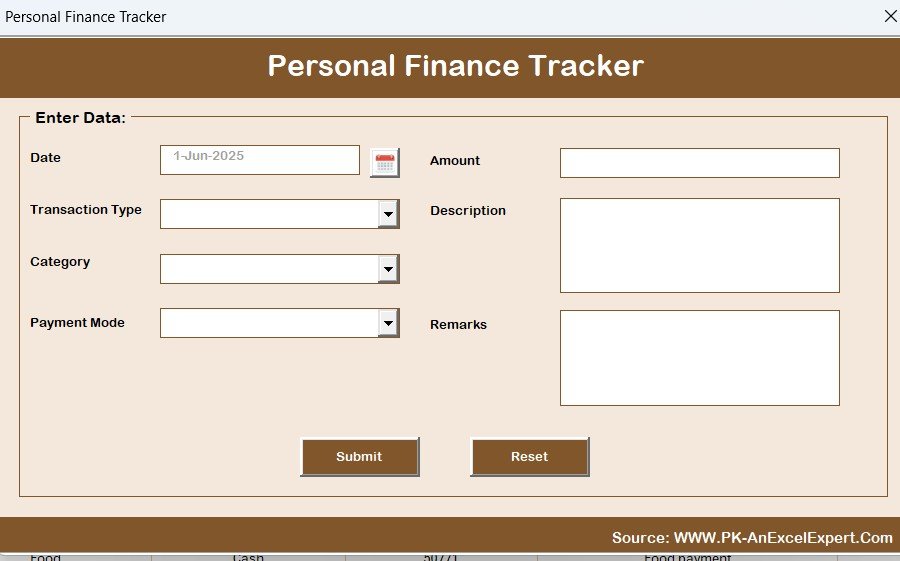
- Opens a form to submit new data
Click to Purchases Personal Finance Tracker in Excel
Update Record
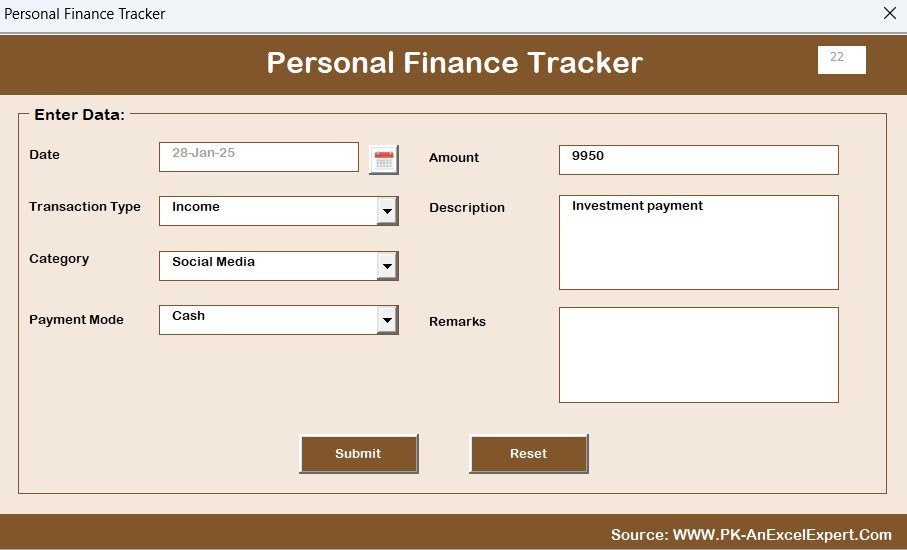
- Select a record by ID to edit details
-
Delete Record – Removes the selected record after confirmation
5. Manage List Sheet
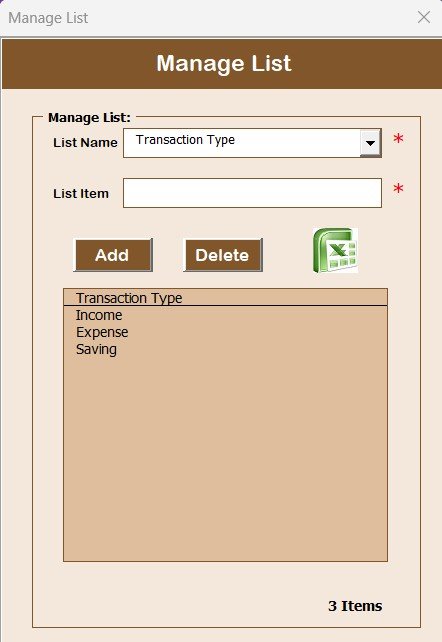
Maintain your dropdown lists for:
-
Transaction Type (Income, Expense, Saving)
-
Categories and Payment Modes
This ensures consistency across entries and makes data entry faster.
6. Support Sheet

This hidden helper sheet houses all pivot tables and back-end data that drive your dashboard. You don’t need to touch this unless you’re customizing.
Click to Purchases Personal Finance Tracker in Excel
7. User Management System

Manage users from a separate interface:
-
Add or delete users
-
Change passwords
This is ideal for shared household finances or team management.
Advantages of Using a Personal Finance Tracker in Excel
Using Excel to track your finances offers numerous benefits, especially when the template is enhanced with automation:
💡 Easy to Use
No special software required—just Excel!
💡 Customizable
You can tailor categories, payment modes, and charts to your personal preferences.
💡 Secure Access
Login form ensures only authorized users can access your data.
💡 Instant Insights
The dashboard delivers real-time visual summaries of income, expenses, and savings.
💡 Automated Updates
Any new entry automatically refreshes your dashboard and charts.
💡 Cost-Effective
You don’t need expensive budgeting tools or subscriptions—Excel does it all.
How to Use the Personal Finance Tracker in Excel: Step-by-Step
Let’s make it easy to get started:
Step 1: Open the File and Login
Use the provided credentials or create new ones through the User Management section.
Step 2: Add a New Transaction
Click on Add New Record, fill the form, and submit. It auto-updates your dashboard.
Step 3: Review Your Dashboard
Switch to the Dashboard tab to view your spending patterns and savings trends.
Step 4: Update or Delete Transactions
Select the relevant ID in the Data Entry sheet and click either Update Record or Delete Record as needed.
Step 5: Manage Dropdowns
Navigate to Manage List sheet to customize your categories, transaction types, and payment modes.
Best Practices for the Personal Finance Tracker
To get the most value from this tool, follow these simple best practices:
1. Record Every Transaction
Make it a habit to enter data daily or weekly. This ensures accurate tracking.
2. Use Consistent Categories
Avoid using different names for the same category (e.g., “Groceries” vs. “Grocery”). Stick to the lists in the Manage List sheet.
3. Filter by Month and Year
Use the dashboard slicers to analyze trends. This helps you set realistic monthly goals.
4. Change Your Password Regularly
If you’re using this tool with multiple users, update passwords regularly for security.
5. Review Charts Monthly
At the end of each month, check your Income vs. Expenses vs. Savings to see how well you’re progressing toward your goals.
Who Can Use This Tool?
This Personal Finance Tracker is ideal for:
-
Freelancers and small business owners
-
Salaried individuals tracking income and bills
-
Households managing joint finances
-
College students monitoring allowances and savings
Why Use Excel Instead of an App?
You might wonder—why choose Excel over fancy budgeting apps?
✅ More Control
You decide what features to include or remove.
✅ Offline Access
No internet? No problem. Excel works offline.
✅ No Subscription Fees
You don’t need to pay monthly to use this tool.
✅ Enhanced Customization
Want to add a new chart or sheet? Go ahead. Excel is flexible.
Real-World Use Cases
Here’s how people are using this tracker:
-
Budgeting for travel: Create a separate category for vacation and set monthly savings goals.
-
Tracking monthly bills: Monitor recurring expenses like electricity, internet, rent, and phone bills.
-
Monitoring side income: Use categories like Freelance, Consulting, or Sales.
-
Planning long-term goals: Create savings entries for emergency funds, home loans, or investments.
Conclusion
Managing personal finance doesn’t have to be intimidating. With the Personal Finance Tracker in Excel, you get a complete, powerful, and easy-to-use solution to track, manage, and analyze your income, expenses, and savings—all without spending a dime on expensive software.
Frequently Asked Questions (FAQs)
🔍 What do I need to run the Personal Finance Tracker?
You only need Microsoft Excel (2016 or later) with macro settings enabled. No additional software is required.
🔍 Is the tracker secure?
Yes, it includes a login system with user ID and password. You can also change passwords and manage multiple users.
🔍 Can I add custom categories?
Absolutely! Go to the Manage List sheet and add new categories under Income, Expense, or Saving types.
🔍 Can I track multiple months or years?
Yes. Each entry includes Month and Year columns, and the dashboard slicers let you filter by these.
🔍 How do I update or delete a transaction?
Just select the transaction ID in the Data Entry sheet, then click Update Record or Delete Record. The form will open with the details.
🔍 Is technical knowledge required?
Not at all. The tool is beginner-friendly. If you know how to use Excel, you can easily handle this tracker.
🔍 Can I hide the backend calculations?
Yes. The Support Sheet is already set up to work in the background. You can hide it without affecting the dashboard.
🔍 What happens when I submit a new transaction?
The data gets added to the Data Entry sheet, and all charts on the Dashboard are refreshed automatically.
Visit our YouTube channel to learn step-by-step video tutorials
