Managing office security incidents is crucial for maintaining a safe and compliant workplace. However, many organizations struggle with inconsistent reporting, lack of accountability, and disorganized records. That’s where the Office Security Incident Report Tracker in Excel comes in — a simple yet powerful tool built using Excel and VBA to help you monitor, track, and manage security incidents with ease.
In this comprehensive guide, we’ll explore the key features, benefits, and best practices of using the Office Security Incident Report Tracker. Whether you’re an operations manager, security officer, or administrative head, this tool ensures your office safety reporting becomes faster, easier, and more transparent.
Click to Purchases Office Security Incident Report Tracker in Excel
What Is the Office Security Incident Report Tracker in Excel?
The Office Security Incident Report Tracker is a ready-to-use Excel and VBA-based application that allows you to:
-
Log and update incident records
-
Generate insightful charts and reports
-
Maintain access control with user login
-
Automate data entry and reporting workflows
Unlike manual spreadsheets or paper-based logs, this tool offers form-driven data input, built-in dashboards, and multi-user access — all within the familiar environment of Microsoft Excel.
Key Features of the Office Security Incident Report Tracker
Let’s dive into the main features that make this Excel tracker stand out:
Login Form – Secure Access Control
The tool starts with a secure Login Form, where you can enter credentials:
-
User ID: e.g.,
Admin1 -
Password: e.g.,
abcd
Only authorized users can access the system, ensuring the privacy of sensitive incident reports. Once logged in, you are taken directly to the Main Form.
Main Form – Central Command Center
The Main Form acts as the hub where users can:
-
Add, update, or delete incident records
-
Access different sheet tabs
-
Navigate to user management or settings
-
Launch the dashboard with a single click
Everything is accessible from one screen, keeping your workflow smooth and intuitive.
Dashboard Sheet – Visual Incident Analysis
The Dashboard Sheet provides 5 dynamic slicers and 5 interactive charts that offer visual insights into the incidents logged:
📊 Charts Included:
🟠 # of Incidents by Status (Doughnut Chart)
🔴 # of Incidents by Severity (Pie Chart)
📈 # of Incidents by Follow-up (Column Chart)
🏢 # of Incidents by Department (Column Chart)
🚨 # of Incidents by Type (Flag Chart)
These visuals help decision-makers spot patterns, identify high-risk areas, and ensure timely action.
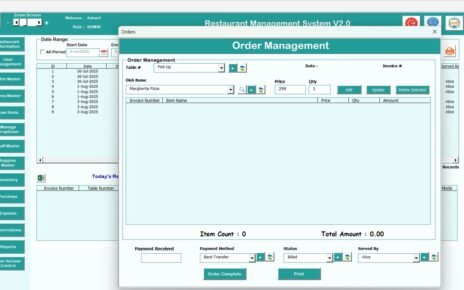
Data Entry Sheet – Add, Update & Delete Records
This sheet contains buttons for managing data:
Add New Record
Click this to open the Data Entry Form. Fill in the incident details and hit Submit — the tool will:
Click to Purchases Office Security Incident Report Tracker in Excel
-
Add the entry to the database
-
Automatically refresh the dashboard
Update Record
Click an existing ID, hit Update, and the form opens with prefilled data. Modify the details and save.
Delete Record
Select the ID, click Delete, and confirm the removal. This ensures accurate data maintenance.
Manage List Sheet – Dropdown Control
This sheet allows you to manage dropdown lists used in the form (e.g., Departments, Incident Types, Severities).
You can easily Add or Delete list items, and these changes reflect automatically in the form combo boxes.
Support Sheet – Backend Pivot Tables
While this sheet remains hidden from users, it’s essential for powering:
-
Pivot tables behind the charts
-
Dashboard summaries
You don’t need to modify this sheet — everything is automated.
User Management – Add, Update, Delete Users
Clicking the User Management button lets admins:
-
Add new users
-
Edit or remove users
-
Change passwords
This ensures controlled access and secure handling of incident data.
Settings Sheet – Configuration Panel
The Settings Sheet allows you to manage global configurations like:
-
Password policies
-
Default values
-
Data validation rules
It gives you control over how the tracker operates.
Advantages of Using the Office Security Incident Report Tracker
Here are some key benefits of using this tool in your organization:
🔐 Enhanced Security: Role-based login prevents unauthorized access.
📄 Better Documentation: Every incident is tracked with time, type, and response.
📊 Real-Time Analytics: The dashboard updates automatically with each record.
🕒 Saves Time: No manual chart creation or data compilation.
👨💼 Multi-User Support: Add users with different levels of access.
💾 Excel-Based: No need for additional software — works in Excel.
Use Cases Across Different Teams
This tracker isn’t just for security personnel. Here’s how different departments can benefit:
-
HR: Log harassment or conflict-related incidents
-
IT: Track system breaches or data access issues
-
Admin: Record maintenance or safety hazards
-
Facility Management: Monitor unauthorized access or fire alarms
Best Practices for Using the Office Security Incident Report Tracker
To get the most value from this tool, follow these tips:
✔ Keep Your Lists Updated
Regularly update dropdowns (departments, severity levels) in the Manage List sheet.
✔ Use Unique IDs
Ensure each record has a unique ID so it can be tracked, updated, or deleted easily.
✔ Train Your Team
Give a quick walkthrough of how to log, update, and delete records.
✔ Hide Unused Sheets
Hide the Support and Settings sheets after setup to prevent accidental edits.
✔ Backup Weekly
Take a weekly backup of the file to avoid data loss.
✔ Use Password Policies
Encourage strong passwords and change them regularly via the User Management screen.
How to Customize the Tool for Your Office?
You can easily customize this tracker to fit your organizational needs:
-
Add more fields like location, asset ID, or witness name
-
Add new charts for deeper insights
-
Modify dropdowns to match your structure
-
Localize the labels in your preferred language
Since it’s built in Excel and VBA, the possibilities are endless.
Why Use Excel for Security Incident Reporting?
Some may ask — why Excel? Here’s why it works great:
🌍 Universally available across organizations
🔄 Easy to share across teams
🧩 Customizable with VBA
📈 Built-in charting and pivot capabilities
🔒 No need for an internet connection (offline usage possible)
You don’t need expensive software or complex databases — just Excel.
Conclusion: Track Incidents the Smart Way
Managing office security incidents shouldn’t be a burden. With the Office Security Incident Report Tracker in Excel, you get a secure, automated, and customizable way to document, monitor, and act on incidents. Its user-friendly interface, interactive dashboard, and built-in access control make it the perfect choice for organizations of all sizes.
Don’t wait for a compliance audit or security breach to start organizing your incident records. Take control today with this powerful Excel tracker.
Frequently Asked Questions (FAQs)
1. Is this tool compatible with all versions of Excel?
It works best with Excel 2016 and above on Windows. VBA features may not function in Excel Online or Mac.
2. Can I add more fields to the data entry form?
Yes, you can customize the form and add fields using VBA editor.
3. How many incidents can I track?
You can track thousands of incidents — Excel supports over 1 million rows.
4. Is the dashboard updated automatically?
Yes! Every time you add, update, or delete a record, the dashboard refreshes automatically.
5. Can I manage users and passwords in this tool?
Yes, the User Management screen allows you to add, update, delete users, and change passwords.
6. Is this tracker secure?
It uses a login system, restricted sheet access, and Excel-based protection. For added security, store the file in a secure location.
7. Do I need to know VBA to use this tool?
No. It’s ready to use. But if you want to customize it further, some VBA knowledge will help.
8. Can I use this tracker in multiple departments?
Yes. The dropdowns and filters allow tracking by departments, incident types, and more.
9. What if I accidentally delete a record?
Deleted records cannot be recovered unless you have a backup. It’s recommended to take regular backups.
Visit our YouTube channel to learn step-by-step video tutorials