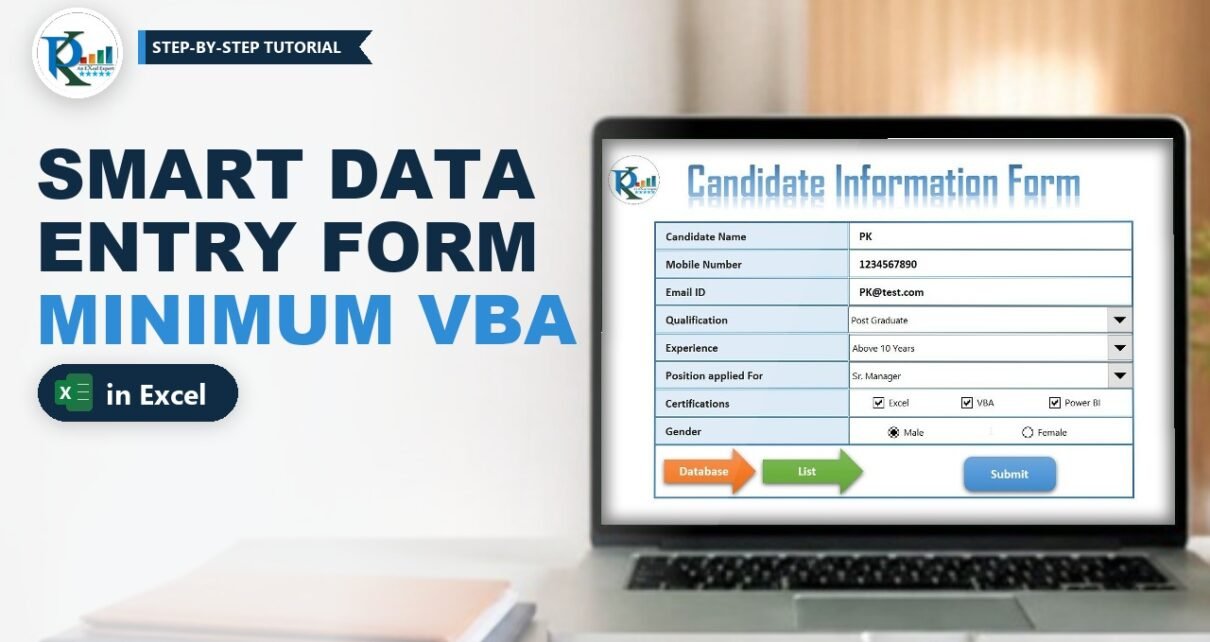
A smart data entry form in Excel does not need a VBA UserForm. In this tutorial you build a Candidate Information Form on a normal worksheet with Form Controls, logical formulas and conditional formatting, and use just one short macro to save each record. The form flags a missing name, a mobile number that is not 10 digits and an invalid or duplicate email ID before anything is saved. Drop-downs, check boxes and option buttons make data entry fast, and a database sheet shows certifications as icons.
Watch the Video Tutorial
In the video PK demonstrates the finished form, then rebuilds it from a blank workbook: the three sheets, the validation formulas, the Form Controls, the macro and the navigation buttons.
What You Will Build
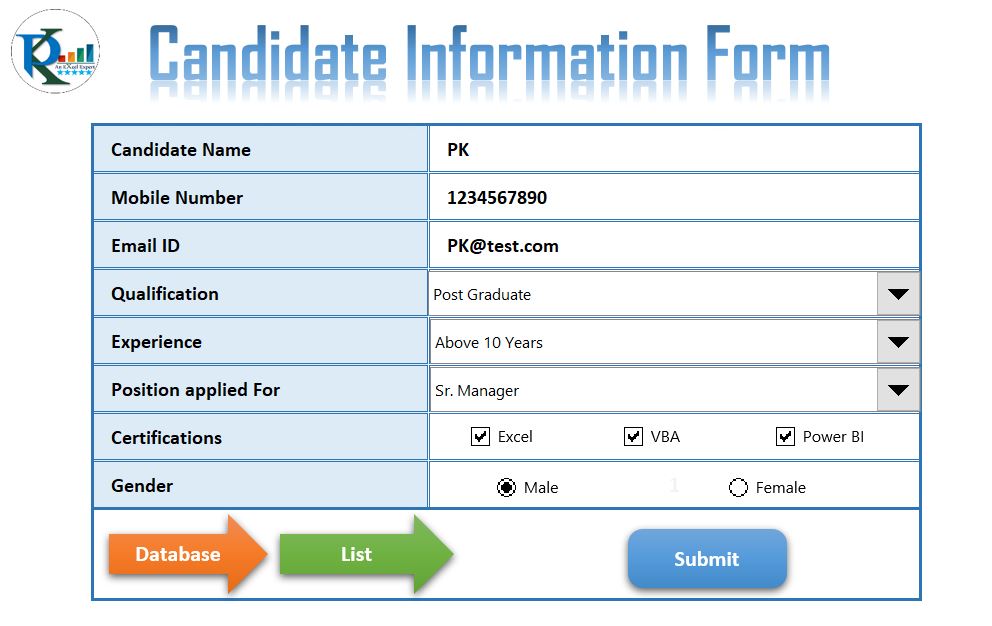
- A worksheet form for Candidate Name, Mobile Number, Email ID, Qualification, Experience, Position applied For, Certifications and Gender.
- Formula-based validation that highlights wrong entries in red as you type.
- Form Controls: three combo boxes, three check boxes and two option buttons.
- One small macro that checks the entries, writes the record to the Database sheet and resets the form.
- A database with a live candidate count and icon-set certifications, plus arrow buttons to move between sheets.
How the Workbook Is Laid Out
- List – the master lists for the drop-downs (qualifications, experience bands and positions) plus the combo boxes’ linked cells.
- Database – row 1 shows Total Candidates, row 2 holds the headers (columns A to J) and records start in row 3.
- Form – labels in B3:B10, entries in C3:C10 and a few helper cells to the right that hold the validation and conversion formulas.
Turn off gridlines on each sheet (View → Gridlines) so the form and database look clean.
Part 1 – Build the Smart Data Entry Form Sheets
Step 1: Create the List and Database sheets
Rename Sheet1 to List and type your drop-down lists, one list per column. Add a sheet named Database and type the headers in row 2: Candidate Name, Mobile Number, Email ID, Qualification, Experience, Position applied For, then Excel, VBA and Power BI under a merged Certifications title, and Gender in column J. Next to the Total Candidates label in row 1, enter in D1:
D1 =COUNTA(A:A)-1COUNTA counts every filled cell in column A, including the header, so subtracting 1 leaves the number of saved candidates. The macro uses this count to find the next empty row.
Step 2: Lay out the form
Add a sheet named Form. Copy the database headers, then use Paste Special → Transpose to paste them down column B (B3:B10). Replace the three certification headers with a single Certifications label and finish with Gender. Give the labels a light fill, increase the row height, and add a double dark-blue border with Format Cells → Border (Alt, O, E).
Part 2 – Validation with Logical Formulas
Each helper cell returns TRUE when the entry next to it is wrong. The same TRUE/FALSE values drive the red highlight and the macro’s checks.
Step 3: Candidate name must not be blank
E3 =ISBLANK(C3)Step 4: Mobile number must be a 10-digit number
E4 =OR(ISTEXT(C4),ISBLANK(C4),LEN(C4)<>10)OR returns TRUE if any condition is true: the entry is text, the cell is empty, or the length is not exactly 10 characters.
Step 5: Email ID must look like an email
E5 =OR(ISERROR(FIND("@",C5)),ISERROR(FIND(" ",C5))=FALSE,ISERROR(FIND(".",C5)))How the formula works
FIND("@",C5)returns the position of @ or an error if there is none.ISERROR(...)turns that into TRUE when @ is missing.ISERROR(FIND(" ",C5))=FALSEis TRUE when FIND does find a space, because an email ID must not contain spaces.ISERROR(FIND(".",C5))is TRUE when there is no dot.- OR wraps the three tests, so E5 is TRUE if any rule is broken. PK@test.com returns FALSE (valid).
Step 6: Highlight wrong entries
Select C3:C5, press Alt, O, D to open the Conditional Formatting Rules Manager and click New Rule → Use a formula to determine which cells to format. Enter =E3 with no $ signs, so each row checks its own helper cell, and choose bold italic red text with a light fill. Until an entry is valid, its box stays highlighted.
Step 7: Block duplicate email IDs
F5 =COUNTIF(Database!C:C,Form!C5)COUNTIF counts how many times the typed email already appears in the Email ID column of the database. Anything above 0 means a duplicate.
Part 3 – Add the Form Controls
Step 8: Combo boxes for the three drop-downs
Go to Developer → Insert → Combo Box (Form Control) and draw it. Right-click it, choose Format Control and set the Input range to the qualification list (List!A2:A4) and the Cell link to List!B1. A Form Control combo box returns the position of the chosen item, not the item itself, so convert it in C6:
C6 =INDEX(List!A2:A4,List!B1)Place the combo box over C6 so the real value sits behind it. Copy the combo box for Experience and Position applied For, point each one to its own list and linked cell, and use the same INDEX pattern in C7 and C8. For the long experience list, raise Drop down lines to 25 so all items show at once.
Step 9: Check boxes for certifications
Insert a Check Box (Form Control), rename it Excel, press Ctrl+D twice to duplicate it for VBA and Power BI, then use Shape Format → Align → Align Top and Distribute Horizontally. Link the three boxes to I2, J2 and K2 (Format Control → Cell link). Each linked cell shows TRUE when ticked and FALSE when not. Turn that into 1 or 0 below:
I3 =COUNTIF(I2,TRUE)Copy it to J3 and K3. Storing 1 and 0 in the database lets the icon set show a tick or a cross later.
Step 10: Option buttons for gender
Insert two Option Buttons (Form Control) named Male and Female and link them both to C10. Option buttons on the same sheet work as a group, so C10 returns 1 for the first button and 2 for the second. Convert it to text in I5:
I5 =IF(C10=1,"Male","Female")Part 4 – The Minimum VBA Macro
Step 11: Write the macro
Open Developer → Visual Basic, choose Insert → Module and add this procedure. It is the code built in the video, with the message text tidied:
Sub EnterData()
    Dim Form As Worksheet
    Dim Database As Worksheet
    Set Form = ThisWorkbook.Sheets("Form")
    Set Database = ThisWorkbook.Sheets("Database")

    ''''''' Validation
    If Form.Range("E3").Value = True Then
        MsgBox "Please Enter the Candidate Name", vbCritical
        Exit Sub
    End If
    If Form.Range("E4").Value = True Then
        MsgBox "Please Enter the Valid Mobile Number", vbCritical
        Exit Sub
    End If
    If Form.Range("E5").Value = True Then
        MsgBox "Please Enter the Valid Email ID", vbCritical
        Exit Sub
    End If
    If Form.Range("F5").Value > 0 Then
        MsgBox "This Email ID already exists", vbCritical
        Exit Sub
    End If

    Dim last_row As Long
    last_row = Database.Range("D1").Value + 3

    Database.Range("A" & last_row).Value = Form.Range("C3").Value
    Database.Range("B" & last_row).Value = Form.Range("C4").Value
    Database.Range("C" & last_row).Value = Form.Range("C5").Value
    Database.Range("D" & last_row).Value = Form.Range("C6").Value
    Database.Range("E" & last_row).Value = Form.Range("C7").Value
    Database.Range("F" & last_row).Value = Form.Range("C8").Value

    ''''''' Certifications
    Database.Range("G" & last_row).Value = Form.Range("I3").Value
    Database.Range("H" & last_row).Value = Form.Range("J3").Value
    Database.Range("I" & last_row).Value = Form.Range("K3").Value

    ''''''' Gender
    Database.Range("J" & last_row).Value = Form.Range("I5").Value

    Form.Range("C3:C5").ClearContents
    Form.Range("I2:K2").Value = False

    MsgBox "Data has been submitted"
End Sub
Why + 3? Row 1 holds the count, row 2 holds the headers, so with 0 candidates the first record goes to row 3, with 1 candidate to row 4, and so on. The four If blocks simply read the helper cells, which is why the macro stays so short: the formulas do the thinking. Clearing C3:C5 empties the text entries, and setting I2:K2 to FALSE unticks the check boxes. The drop-downs and gender keep their last choice, ready for the next candidate.
Step 12: Add the Submit button
Insert a rounded rectangle (Insert → Shapes), type Submit on it, right-click it, choose Assign Macro and pick EnterData. Save the workbook as an Excel Macro-Enabled Workbook (.xlsm) so the macro is kept.
Part 5 – Finishing Touches
Step 13: Icons for certifications
On the Database sheet select the Excel, VBA and Power BI columns, open New Rule → Format all cells based on their values, choose Icon Sets and set the type to Number: a green tick when the value is 1 or more and a red cross otherwise. Tick Show Icon Only so only the symbol appears.
Step 14: Navigation and a clean look
Insert block-arrow shapes labelled Database, List and Form. Select each one, press Ctrl+K, choose Place in This Document and pick the target sheet. Then go to File → Options → Advanced → Display options for this workbook and untick Show sheet tabs, and hide the helper columns on the Form sheet. Users now move around with the arrows and only see the form.
Common Errors and Fixes
The drop-down shows the right item but the database gets a number
The macro is reading the combo box’s linked cell instead of the INDEX result. Make sure C6:C8 contain the INDEX formulas and the macro copies C6:C8.
Records overwrite each other
The count in D1 is wrong, usually because a name in column A of the Database was deleted or something was typed below the records, so COUNTA no longer matches the number of rows. Keep column A free of gaps and extra entries.
The Submit button does nothing
Macros are disabled or the file was saved as .xlsx. Save as .xlsm, reopen it and click Enable Content.
A valid mobile number stays red
The cell is formatted as Text, so ISTEXT returns TRUE. Set C4 to General or Number and type the number again.
Tips (additions, not in the video)
- The email check is a quick sense check, not full validation: it confirms an @, a dot and no spaces, which catches most typing mistakes.
- Mobile numbers that start with 0 lose the zero when typed as a number. If your numbers can start with 0, adjust the rule to work with text instead.
- Protect the Form sheet with only C3:C5 unlocked so users cannot overwrite the helper formulas.
- To learn more about combo boxes, check boxes and option buttons, see Microsoft’s overview of Form Controls and ActiveX controls.
Want It Ready-Made?
If you would rather start from the finished workbook, the Smart Data Entry Form with Minimum VBA is available on NextGenTemplates.com with the form, list and database sheets already set up. You can also browse more Excel VBA tools. To get confident with ISBLANK, FIND, INDEX, COUNTIF and the other formulas behind the validation, join the video course Excel + AI Mastery: 100 Essential Formulas and Real-World Projects.
Related Tutorials
- Data Entry Form in Excel with a VBA UserForm (Add, Update and Delete)
- Quick Data Entry Form in Excel Without VBA (Built-in Form)
- Data Entry Application in Excel VBA with a List Box
- Excel Form Controls: Combo Box, Spin Button and Option Buttons
Frequently Asked Questions
Can I make a data entry form in Excel without a UserForm?
Yes. Build the form on a worksheet with Form Controls for drop-downs, check boxes and option buttons, and use formulas for validation. Only the final save step needs a short macro.
Why does my combo box return a number?
A Form Control combo box always returns the position of the selected item in its linked cell. Wrap the list in INDEX with that position, as in Step 8, to get the text back.
How does the form check the mobile number?
A helper cell combines ISTEXT, ISBLANK and LEN inside OR. It returns TRUE when the entry is text, empty or not exactly 10 characters long, and both the red highlight and the macro read that result.
How do I stop duplicate email IDs?
COUNTIF counts how often the typed email already appears in the database Email ID column. If the count is above zero, the macro shows a message and stops before saving.
Which file format should I save the form in?
Save it as an Excel Macro-Enabled Workbook with the .xlsm extension. A normal .xlsx file removes the macro, so the Submit button stops working.
About the Author
PK is a Microsoft Excel expert and trainer and the founder of PK: An Excel Expert and NextGenTemplates.com. He has been teaching Excel, Power Query and Power BI since 2016 on his YouTube channel.
Conclusion
A smart data entry form in Excel can be almost entirely formulas: ISBLANK, OR, LEN and FIND check each entry, conditional formatting shows the problems, INDEX and COUNTIF translate the Form Controls, and a single short macro saves the record. It is easy to understand, easy to change for your own fields, and a great first step before you move on to full VBA UserForms. Watch the video and build your own version step by step.