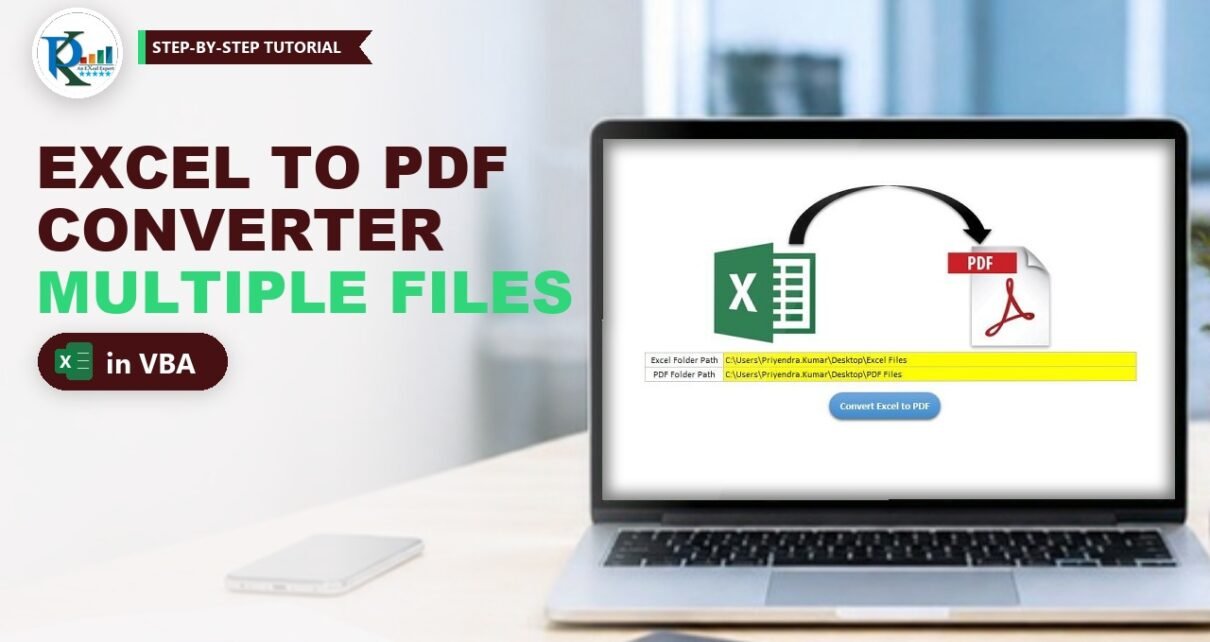
An Excel to PDF converter in VBA saves you from one of the most boring jobs in the office: opening file after file and choosing Save As PDF. For one workbook that is fine. For a folder with 10, 100 or 1,000 workbooks it takes hours. In this tutorial you will build a small macro that reads a folder path from your sheet, opens every Excel file in it, exports each one as a PDF into a second folder and shows its progress in the status bar. It uses the File System Object, and the whole macro is about 25 lines.
Watch the Video Tutorial
In the video PK converts 10 Excel files to PDF with one click, then writes the macro from scratch in a new workbook and explains each line.
What You Will Build
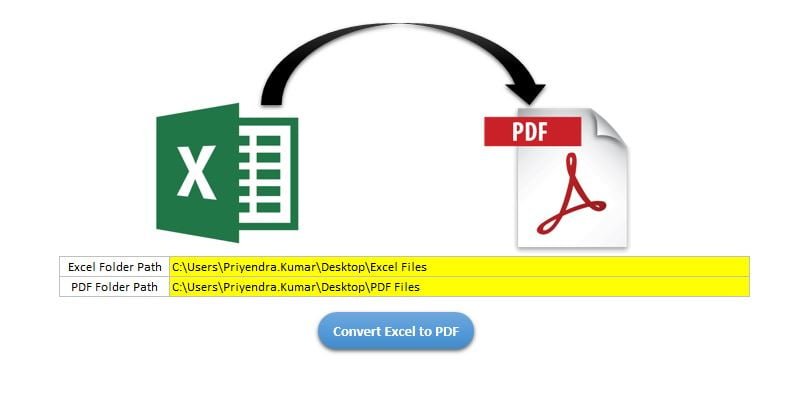
- A converter sheet with an Excel Folder Path cell and a PDF Folder Path cell.
- A reference to Microsoft Scripting Runtime so VBA can loop through the files in a folder.
- A loop that opens each workbook, exports it as a PDF with the same name and closes it.
- A live counter in the status bar, such as Processing…3/10.
- A button that runs the whole conversion and finishes with a Process Completed message.
Part 1: Set Up the Excel to PDF Converter Sheet
Step 1: Prepare two folders
Create one folder that holds the Excel files you want to convert and a second, empty folder for the PDFs. In the video they are called Excel Files and PDF Files on the desktop.
Step 2: Type the two folder paths on Sheet1
In a new workbook, type the labels and paths on Sheet1:
D2: Excel Folder Path, and inE2the full path of the Excel folder, for exampleC:\Users\YourName\Desktop\Excel Files.D3: PDF Folder Path, and inE3the full path of the PDF folder.
A quick way to get a path is to open the folder in File Explorer, click the address bar and copy it. Do not add a backslash at the end, because the macro adds one itself.
Part 2: Write the VBA Macro
Step 3: Add the Microsoft Scripting Runtime reference
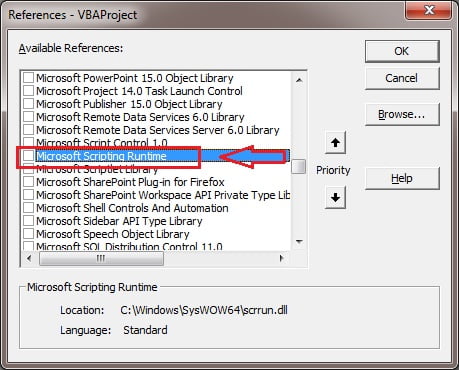
Open Developer › Visual Basic (or press Alt+F11) and choose Insert › Module. Then go to Tools › References, scroll down to Microsoft Scripting Runtime, tick it and click OK. This library gives VBA the FileSystemObject, Folder and File objects.
Step 4: Paste the converter code
This is the macro exactly as PK builds it in the video:
Option Explicit

Sub Convert_ExceltoPDF()

Application.DisplayStatusBar = True
Application.ScreenUpdating = False

Dim sh As Worksheet
Set sh = ThisWorkbook.Sheets("Sheet1")

Dim fso As New FileSystemObject
Dim fo As Folder
Dim f As File

Dim n As Integer

Dim wb As Workbook

Set fo = fso.GetFolder(sh.Range("E2").Value)

For Each f In fo.Files
    n = n + 1
    Application.StatusBar = "Processing..." & n & "/" & fo.Files.Count

    Set wb = Workbooks.Open(f.Path)
    wb.ExportAsFixedFormat xlTypePDF, sh.Range("E3").Value & Application.PathSeparator & VBA.Replace(f.Name, ".xlsx", ".pdf")
    wb.Close

Next
Application.StatusBar = ""

MsgBox "Process Completed"

End Sub
How the Excel to PDF Converter Code Works
Status bar and screen updating
DisplayStatusBar = True makes sure the status bar is visible so you can watch the counter. ScreenUpdating = False stops Excel from redrawing the screen every time a workbook opens and closes, which makes the macro faster and stops the screen from flickering.
Getting the folder and its files
fso.GetFolder(sh.Range("E2").Value) turns the path in E2 into a Folder object. Its Files collection holds every file in that folder, so For Each f In fo.Files visits them one by one, and fo.Files.Count tells you how many there are.
The progress counter
n goes up by one for each file, and the status bar shows Processing... followed by the current number and the total, for example Processing…7/10.
Opening and exporting each workbook
f.Path is the complete path of the file, including its name and extension, so Workbooks.Open(f.Path) opens it. ExportAsFixedFormat xlTypePDF then saves it as a PDF. The file name is built from three parts:
sh.Range("E3").Value, the PDF folder.Application.PathSeparator, the backslash. You could type"\"instead; PK uses PathSeparator so Excel picks the right character.VBA.Replace(f.Name, ".xlsx", ".pdf"), the original file name with its extension changed, so Test1.xlsx becomes Test1.pdf.
wb.Close closes the workbook before the loop moves on, so you never have more than one file open at a time.
Finishing up
Setting Application.StatusBar = "" hands the status bar back to Excel, and the message box tells you the job is done.
Part 3: Add a Button and Run It
Step 5: Insert the Convert button
Back on Sheet1, go to Insert › Shapes, draw a rectangle and type Convert Excel to PDF on it. Right-click the shape, choose Assign Macro and pick Convert_ExceltoPDF.
Step 6: Convert the folder
Click the button. The status bar counts through the files, and when the message Process Completed appears, open the PDF folder: there is one PDF for every workbook. In the video 10 Excel files become 10 PDFs in a few seconds. Save the converter as a macro-enabled workbook (.xlsm or .xlsb).
The Version in the Ready-Made Converter
The code PK published with the original version of this post, for the finished converter, uses the same logic with three small differences:
- The macro is called
Excel_To_PDFand the paths sit inE13(Excel folder) andE14(PDF folder). VBA.DoEventsis the first line inside the loop, which keeps Excel responsive during long conversions.- The workbook is closed with
wb.Close False, which closes it without asking to save changes. That is safer when a file has formulas such as TODAY or NOW that make Excel think it has changed.
Common Errors and Fixes
- Compile error: User-defined type not defined. The Microsoft Scripting Runtime reference is missing. Add it from Tools › References (Step 3).
- Run-time error 76: Path not found. The path in E2 is wrong or has a typing mistake. Copy it again from the File Explorer address bar.
- The PDF is named Report.xlsm.pdf or Report.xls.pdf. The Replace only changes .xlsx. For other file types, replace that extension too, or use the improved code below.
- The macro stops on a file that is not a workbook. Every file in the folder is opened, so keep only Excel files in it, or filter them as shown below.
Improved Version: Any Excel File Type (Addition)
This section is an addition to PK’s original method. It uses GetExtensionName to skip anything that is not an Excel file, GetBaseName to name the PDF for any extension, and closes without saving:
Sub Convert_ExceltoPDF_AnyType()

    Dim sh As Worksheet, fso As New FileSystemObject
    Dim f As File, wb As Workbook, ext As String

    Set sh = ThisWorkbook.Sheets("Sheet1")
    Application.ScreenUpdating = False

    For Each f In fso.GetFolder(sh.Range("E2").Value).Files
        ext = LCase(fso.GetExtensionName(f.Name))
        If (ext = "xlsx" Or ext = "xlsm" Or ext = "xls" Or ext = "xlsb") _
           And Left(f.Name, 2) <> "~$" Then
            Set wb = Workbooks.Open(f.Path)
            wb.ExportAsFixedFormat xlTypePDF, _
                sh.Range("E3").Value & Application.PathSeparator & _
                fso.GetBaseName(f.Name) & ".pdf"
            wb.Close False
        End If
    Next f

    Application.ScreenUpdating = True
    MsgBox "Process Completed"

End Sub
The ~$ test skips the hidden lock files Excel creates while a workbook is open.
Tips
- Set the print area and page layout (orientation, fit to one page wide) in your source files first. The PDF follows each workbook’s page setup.
- Test on a copy of two or three files before you run it on a folder of hundreds.
- Keep the converter workbook outside the Excel folder, otherwise it will try to convert itself.
- Microsoft’s reference for every export option, such as quality and page range: Workbook.ExportAsFixedFormat method (Microsoft Learn).
Want It Ready-Made?
If you would rather use the finished tool, the Automation: Excel to PDF Converter on NextGenTemplates.com is the workbook from this tutorial. Need to export only certain sheets? The Excel to PDF Converter for Selected Worksheets does that. For more time-saving macros, browse the Excel VBA tools collection.
Related Tutorials
- Excel to PDF Converter for Selected Worksheets
- PDF to Excel Converter in Excel VBA
- Word to PDF Converter in VBA
- PDF to Word Converter Macro in Excel VBA
- Learn Excel VBA Step by Step
Frequently Asked Questions
How do I convert multiple Excel files to PDF at once?
Put the files in one folder, type that folder path and an output folder path on a sheet, and run a VBA macro that loops through the folder with the File System Object, opens each workbook, exports it with ExportAsFixedFormat and closes it.
Why do I need Microsoft Scripting Runtime?
The code declares FileSystemObject, Folder and File variables. Those types live in the Microsoft Scripting Runtime library, so VBA cannot compile the macro until the reference is ticked in Tools, References.
Does the macro export every sheet in each workbook?
Yes. Workbook.ExportAsFixedFormat exports the whole workbook into one PDF, using each sheet’s page setup and print area. To export only some sheets, see the selected worksheets converter in the related tutorials.
Will the original Excel files be changed?
No. Each workbook is only opened, exported and closed. Closing with False, as in the ready-made version, also makes sure nothing is saved by accident.
Can I use it for .xlsm or .xls files?
Yes. Excel opens them the same way, but the original code only renames the .xlsx extension. Use the improved version in this post so every Excel file type gets a clean PDF name.
About the Author
PK is a Microsoft Excel expert and trainer and the founder of PK: An Excel Expert and NextGenTemplates.com. He has been teaching Excel, VBA, Power Query and Power BI since 2016 on his YouTube channel.
Conclusion
With one reference, one loop and ExportAsFixedFormat, this Excel to PDF converter turns a whole folder of workbooks into PDFs in a single click, with a live counter in the status bar. Build it once, keep it in your toolkit, and the next time someone sends you a folder of reports to share as PDFs, the job takes seconds instead of an afternoon.