Are you struggling to keep track of product expiry dates in your business or personal inventory? Worry no more! In our latest YouTube video titled “Expiry Date Calculator in Excel” we’ve unveiled an easy and effective way to manage this using Excel. Let’s dive into the details and transform your Excel skills!
Expiry Date Calculator in Excel
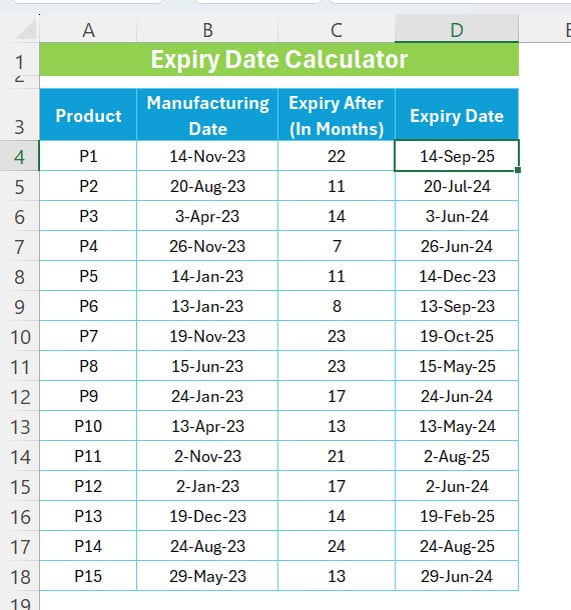
Before we leap into the formulas, let’s understand the setup. We’ve got a straightforward Excel sheet with the following data:
- Product Name is listed in the range A4:A18.
- Manufacturing Date occupies the B4:B18 range.
- Expiry After (In Months) is noted in C4:C18.
- Expiry Date – this is what we’ll calculate, and it will appear in D4:D18.
With this structure, tracking your products’ shelf life becomes a breeze. Now, let’s explore the two methods we introduced in the video for calculating the expiry date.
Method 1: The DATE Formula
Our first method involves the DATE formula, an incredibly user-friendly approach. Below is the formula:
=DATE(YEAR(B4),MONTH(B4)+C4,DAY(B4))
- Application: Enter this formula in cell D4. This formula ingeniously combines the manufacturing date with the expiry duration to give us the expiry date.
- Fill Down: Drag this formula down from D4 to D18. Voila! Your expiry dates are auto-calculated for each product.
This method is fantastic because it offers precision and adapts to different expiry periods seamlessly.
Method 2: The EDATE Formula
Next up, we have the EDATE formula. It’s as simple as pie and here’s how it rolls:
=EDATE(B4,C4)
- Application: Just like before, insert this formula in D4. EDATE is a straightforward function that fast-tracks your calculation by directly adding the specified number of months to the start date.
- Fill Down: Drag down from D4 to D18, and there you have it – another column of accurately calculated expiry dates!
Why Use EDATE?
The EDATE formula is a gem for its simplicity and efficiency, especially if you’re looking for a quick calculation without the nitty-gritty details.
Conclusion
Managing expiry dates in Excel is no longer a hassle, thanks to these two easy methods. Whether you choose the DATE formula for its detailed approach or the EDATE formula for its simplicity, you’re all set to keep your inventory up-to-date with minimal effort.
Pro Tip
Always remember to cross-check a few entries manually to ensure accuracy, especially when dealing with a large dataset.
Engage with Us!
Found this guide helpful? Don’t forget to check out our YouTube video “Expiry Date Calculator in Excel” for a visual walkthrough. Like, share, and subscribe for more such handy Excel tips. Have any questions or unique methods of your own? Drop them in the comments below – we love hearing from our audience!
Happy Excel-Ing!
Visit our YouTube channel to learn step-by-step video tutorials