Need to create multiple names using VBA in Excel instead of adding them one by one in Name Manager? In this tutorial you build a small macro that turns every column of a selection into a named range in one click. Each name uses the column header, and each range stops at the last filled cell of its own column, even when the columns have different lengths. You then store the macro in your Personal Macro Workbook and add a button to the ribbon, so the tool is ready in every workbook you open. Ten names take less than a second.
⬇️ Download the Create Quick Names File
ZIP with one macro-enabled workbook · .xlsm · enable macros to run it
Watch the Video Tutorial
PK shows the slow manual way, writes the macro in the Personal Macro Workbook line by line, and adds a Create Quick Name button to the Home tab that works in any new workbook.
What You Will Build
- A VBA macro that creates one named range per column in the selected data.
- Header-based names: Month, Day, Week, Supervisor_1 and so on.
- Exact ranges that end at the last value in each column, even when the columns have different lengths.
- A Personal Macro Workbook copy of the code, so it works in every workbook.
- A custom ribbon button that runs the macro with one click.
Step 1: Look at the Sample Data
The practice workbook has one sheet with ten columns of lists that could feed drop-downs, dashboards or reports:
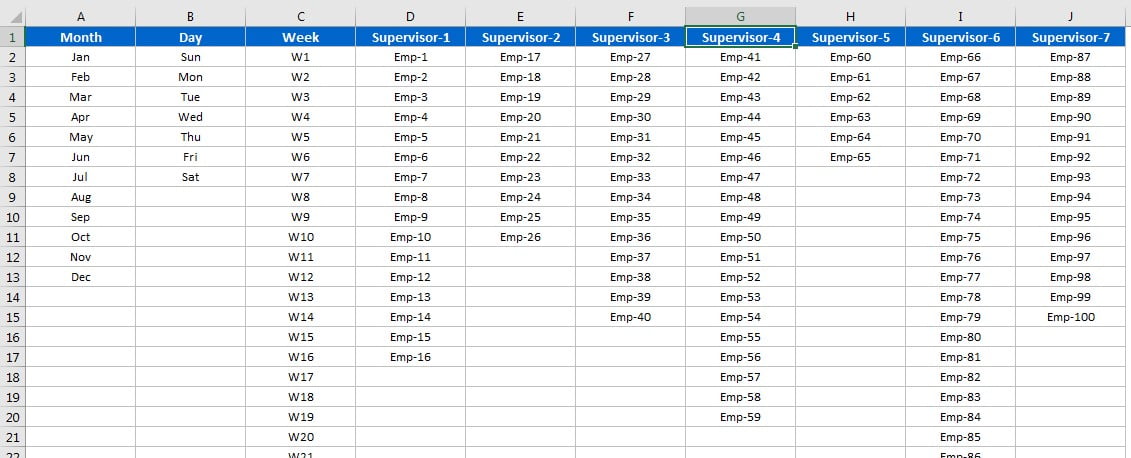
- Month (A2:A13), Day (B2:B8) and Week (C2:C53).
- Supervisor-1 to Supervisor-7 (D to J), each with the employees who report to that supervisor. Supervisor-5 has 6 employees; Supervisor-6 has 21.
To name these by hand you would open Formulas → Name Manager → New, type a name, select the right range and click OK, ten times. With hundreds of columns that takes far too long, and it is easy to grab the wrong range.
Step 2: Open the Personal Macro Workbook
A macro saved in the Personal Macro Workbook (PERSONAL.XLSB) opens with Excel, so you can use it in any file. If you do not see PERSONAL.XLSB in the VBA editor yet, create it like this:
- Go to View → Macros → Record Macro (or the Developer tab).
- In Store macro in, choose Personal Macro Workbook and click OK.
- Go straight back to Macros and click Stop Recording.
- Open Developer → Visual Basic (Alt+F11). PERSONAL.XLSB now appears in the Project window with a module that contains an empty recorded macro.
Delete the empty macro; you will paste your own code in its place. If you only want to try the code first, the downloaded workbook already contains it in Module1.
Step 3: The VBA Code to Create Multiple Names
This is the code from the practice file (the video uses the same logic under the name Create_Quick_Names):
Option Explicit


Sub Create_Name()


Dim rng As Range

Set rng = Selection


Dim i As Integer

Dim n As Long

Dim new_range As Range


Dim col_num As Integer

Dim first_Row As Long

Dim last_row As Long


For i = 1 To rng.Columns.Count

    For n = rng.Rows.Count To 1 Step -1

        col_num = rng.Columns(i).Column

        first_Row = rng.Rows(1).Row

        last_row = rng.Rows(n).Row


        If Cells(last_row, col_num).Value <> "" Then

            Set new_range = Range(Cells(first_Row, col_num), Cells(last_row, col_num))

            new_range.CreateNames Top:=True

            Exit For

        End If

    Next n

Next i


MsgBox "Done"


End Sub
How the Code Works
The selection becomes the working range
Set rng = Selection stores whatever you selected before running the macro. The first row of the selection must hold the headers, because those become the names.
The outer loop visits each column
For i = 1 To rng.Columns.Count runs once per column in the selection. col_num stores the real sheet column number of the current column.
The inner loop finds the last value from the bottom up
For n = rng.Rows.Count To 1 Step -1 starts at the bottom row of the selection and moves up one row at a time. first_Row is always the header row; last_row is the row being checked. As soon as Cells(last_row, col_num) is not empty, the macro has found the last value in that column. This is why you can select a block that is taller than your data: the empty cells at the bottom of each column are simply skipped.
CreateNames builds the name from the header
The range from the header to the last value is stored in new_range, and new_range.CreateNames Top:=True tells Excel to use the top cell as the name and the cells below it as the range. So the Month column becomes the name Month referring to A2:A13. Exit For then leaves the inner loop and the outer loop moves to the next column.
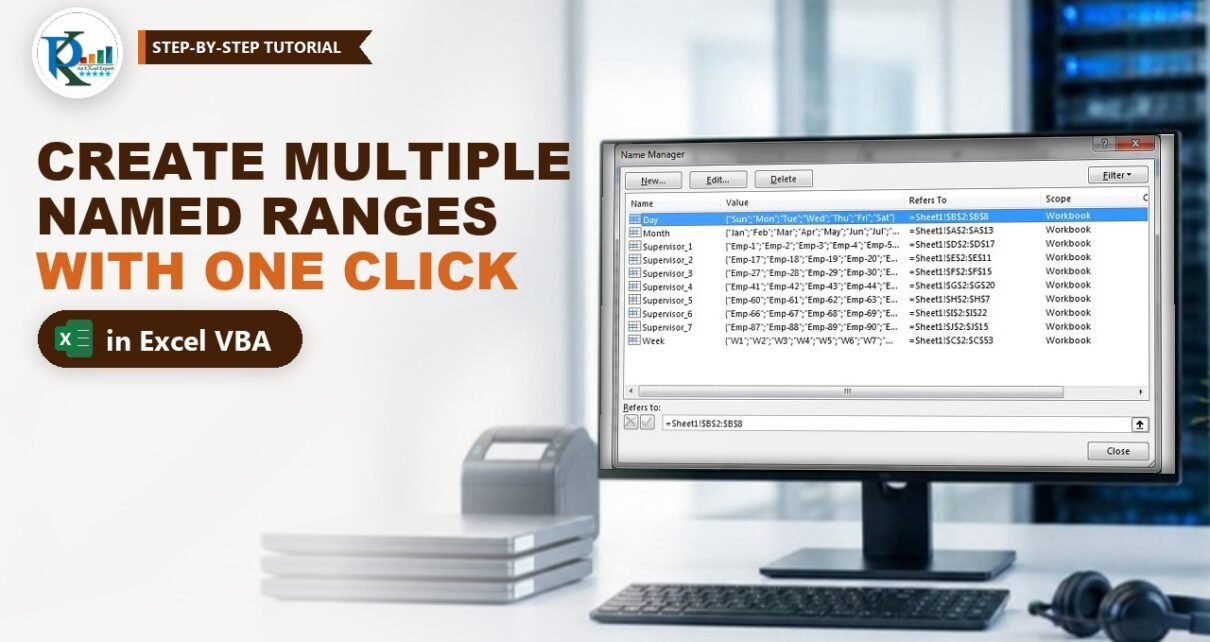
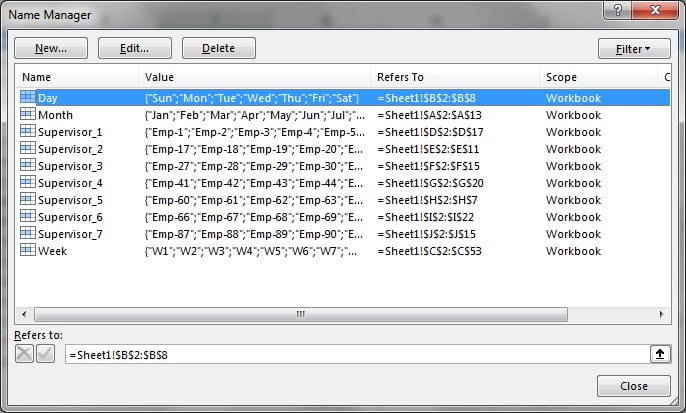
When every column is done, a message box says Done. In the practice file, the result is exactly what you see in Name Manager: Day refers to Sheet1!$B$2:$B$8, Week to Sheet1!$C$2:$C$53, Supervisor_5 to Sheet1!$H$2:$H$7, and so on. Notice that Excel turned the hyphen in Supervisor-1 into an underscore, because a hyphen is not allowed in a name.
Step 4: Run the Macro
- Select the data including the header row, for example A1:J53. Extra empty rows below the data are fine.
- Go to View → Macros (Alt+F8), choose the macro from PERSONAL.XLSB and click Run.
- Click OK on the Done message and open Formulas → Name Manager to check the new names.
Click a name in the Name box drop-down and Excel selects its range, so you can see at a glance that each one stops at the last filled cell.
Step 5: Add a Create Names Button to the Ribbon
- Go to File → Options → Customize Ribbon.
- On the right, select the Home tab (or click New Tab to make your own) and click New Group.
- Right-click the new group, choose Rename and call it something like Create Quick Name.
- In Choose commands from on the left, pick Macros, select the PERSONAL.XLSB macro and click Add.
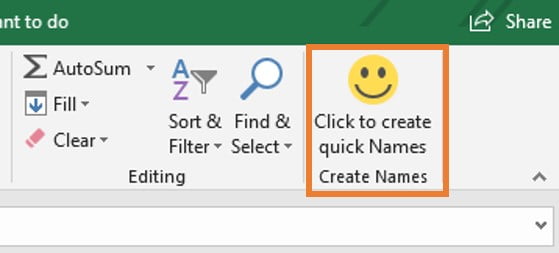
- Right-click the added command, choose Rename, type a friendly label such as Click to create names and pick an icon. PK picks the smiley face.
- Click OK. The button now sits on the Home tab.
Because the macro lives in PERSONAL.XLSB, the button works in any workbook. In the video PK pastes the data into a brand-new workbook, selects it, clicks the button, and all the names appear.
Modern Excel Alternative
This section is an addition from general Excel practice; it is not part of the video.
Excel has a built-in command for one-off jobs: select the data, go to Formulas → Create from Selection (Ctrl+Shift+F3) and tick Top row. It names every column at once, but each name covers the full height of your selection, including empty cells at the bottom of shorter columns. The macro in this tutorial fixes exactly that by trimming every range to its last value. If your lists grow over time, consider converting each list to an Excel Table, whose columns can be referred to directly in formulas and expand automatically.
Common Errors and Fixes
This section and the Tips below are additions from general Excel practice; they are not shown in the video.
The macro is gone the next time you open Excel
When you close Excel after editing PERSONAL.XLSB, Excel asks whether to save changes to the Personal Macro Workbook. Click Save, otherwise the code is lost.
The button does nothing or macros are blocked
Check File → Options → Trust Center → Trust Center Settings → Macro Settings. A downloaded .xlsm may also need to be unblocked: right-click the file, choose Properties and tick Unblock before opening it.
Excel asks to replace an existing name
A name with the same header already exists. Choose Yes to point it at the new range, or delete the old names in Name Manager before running the macro.
The macro is very slow
You probably selected entire columns, so the inner loop starts at row 1,048,576. Select only the data block, with a few spare rows at most.
Tips
- Keep headers short and clear; they become the names you type in formulas and data validation lists.
- Avoid headers that look like cell references (such as AB12), because Excel cannot use them as names unchanged.
- Use the new names as sources for drop-down lists: a list source of =Supervisor_1 is far easier to read than a cell address.
- Microsoft documents the method used here in Range.CreateNames (Excel VBA), and explains the Personal Macro Workbook in Create and save all your macros in a single workbook.
Want It Ready-Made?
If you would rather not write the code, PK’s free PK’s Utility Tool V1.0 add-in, shown at the end of the video, includes a Create Names button along with other time-saving features. For complete automated workbooks, browse the Excel VBA tools on NextGenTemplates.com.
Related Tutorials
- Excel VBA Course for Beginners: Free 18-Chapter Tutorial
- Personal Macro in Excel: Quick Data Formatting
- Delete All Blank Worksheets Using a Personal Macro
- Loop Through Worksheets, Sheets and Charts in VBA
- 33 Useful VBA Shortcut Keys
Frequently Asked Questions
How do I create multiple named ranges at once in Excel?
Select the data with headers in the first row and run the Create_Name macro from this tutorial. It creates one name per column from the header and sizes each range to the last filled cell. For a quick one-off you can also use Create from Selection on the Formulas tab.
Why does the loop run from the bottom row upward?
Starting at the bottom and moving up, the first non-empty cell the macro meets is the last value in that column. That makes each range end exactly where the data ends, even when columns have different lengths.
What does Top:=True mean in CreateNames?
It tells Excel to take the name from the top cell of the range and apply it to the cells below. Left, Bottom and Right work the same way for labels in other positions.
Why did Supervisor-1 become Supervisor_1?
Names cannot contain hyphens or spaces, so Excel replaces those characters with underscores when it builds a name from a header.
Can I use the button in every workbook?
Yes, as long as the macro is saved in your Personal Macro Workbook. PERSONAL.XLSB opens in the background with Excel, so the ribbon button can run it from any file.
About the Author
PK is a Microsoft Excel expert and trainer and the founder of PK: An Excel Expert and NextGenTemplates.com. He has been teaching Excel, Power Query and Power BI since 2016 on his YouTube channel.
Conclusion
Once you create multiple names using VBA in Excel, naming dozens of lists becomes a one-second job. The macro reads your selection, finds the last value in each column from the bottom up and calls CreateNames with the header as the name. Save it in your Personal Macro Workbook, add a ribbon button, and you have a reusable tool for every dashboard and report you build.