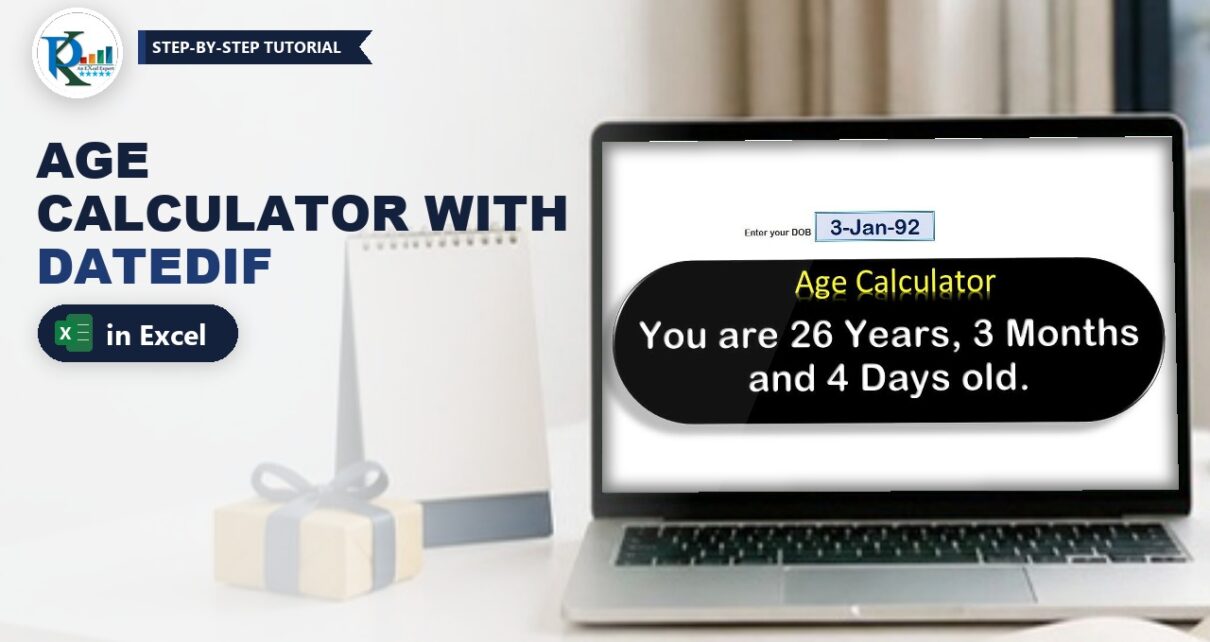
An age calculator in Excel turns a date of birth into an exact age such as You are 26 Years, 3 Months and 4 Days old, and it updates itself every day. In this tutorial you build PK’s calculator with the hidden DATEDIF function: three formulas for years, months and days, a sentence that joins them with the right singular or plural words, a friendly message when the input is not a date, and a linked text box that makes it look like a small app. It works in every Excel version from 2007 to Microsoft 365.

⬇️ Download the Age Calculator
Two sheets (finished calculator + practice sheet) · .xlsx (no macros) · 16 KB
Watch the Video Tutorial
In the video PK types DATEDIF from scratch on a blank sheet, compares the interval codes, joins the results into one sentence and links that sentence to a styled text box.
What You Will Build
- A date of birth input cell with a label.
- Three DATEDIF formulas that return completed years, the extra months and the extra days up to today.
- Singular or plural labels, so you get 1 Month but 3 Months.
- A validation message when the input is not a valid date.
- A banner-style text box linked to the result cell.
How the Age Calculator in Excel Works
The finished sheet keeps the input at H4 and does the work in a few helper cells on the right:
- N1:N3 – the words Year, Month and Day (each with a leading space).
- O1:O3 – the three DATEDIF results.
- P1:P3 – number plus the singular or plural word.
- Q1 – the final sentence, which the text box displays.
- R1:S6 – a reference table of the DATEDIF interval codes.
Gridlines and row and column headings are switched off, so only the input box and the banner are visible. The download also includes Sheet1, the simpler practice version PK builds in the video (input in F3, formulas in N1:N3 and the sentence in K1).
Step 1 – Understand the DATEDIF Function
DATEDIF returns the difference between two dates in the unit you choose:
=DATEDIF(start_date, end_date, unit)It is a hidden function: Excel does not list it in the function list or show its tooltip, so you have to type the whole name yourself. It still works in every version. The unit is a text code in double quotes:
"Y"– complete years."M"– complete months."D"– days."MD"– days, ignoring months and years."YM"– months, ignoring days and years."YD"– days, ignoring years.
For an age you need three of them: "Y" for the years, "YM" for the months left over after the last birthday and "MD" for the days left over after the last full month.
Step 2 – Enter the Date of Birth
Type Enter your DOB in G4 and a date of birth in H4, for example 3-Jan-1992. Give H4 a clear border and fill so users know where to type, and use a date format such as d-mmm-yy.
Step 3 – Calculate Years, Months and Days
Enter these three formulas:
O1  =DATEDIF($H$4,TODAY(),"Y")
O2  =DATEDIF($H$4,TODAY(),"YM")
O3  =DATEDIF($H$4,TODAY(),"MD")
How the formula works
$H$4is the start date (the birthday). The dollar signs keep the reference fixed when you copy the formula.- TODAY() is the end date, so the age moves forward every day without any typing.
"Y"counts only completed years, so you do not get a year older until the birthday itself."YM"gives the months since the last birthday (0 to 11). In the video PK shows why plain"M"is wrong here: for a date of birth of 25 January 1991 it returned 321 total months."MD"gives the days since the last monthly anniversary. Change the date of birth by one day and the day count changes by one.
Step 4 – Add Singular and Plural Labels
A plain join gives results like 1 Days. The finished sheet avoids that with a small IF in P1, copied down to P3:
P1 =O1&IF(O1>1,N1&"s",N1)When the number is greater than 1, the formula adds an s to the word in N1, so 26 becomes 26 Years, while 1 stays 1 Year. Because N1 holds ” Year” with a leading space, the number and the word are separated automatically.
Step 5 – Build the Sentence and Check the Input
In Q1, join the three parts into one sentence and show a message when H4 is not a date:
Q1 =IF(ISNUMBER(H4)=FALSE,"Please enter correct DOB","You are "&P1&", "&P2&" and "&P3&" old.")How the formula works
- Excel stores dates as numbers, so
ISNUMBER(H4)is TRUE for a real date and FALSE for text such as abc. - When it is FALSE, the cell shows the message instead of a #VALUE! error.
- Otherwise the
&operator joins the text pieces and the three labels into one line, for example You are 26 Years, 3 Months and 4 Days old.
The practice version on Sheet1 uses the simpler sentence from the video, without the plural check:
K1 ="You are "&N1&" Years, "&N2&" Months and "&N3&" Days old."Step 6 – Show the Result in a Linked Text Box
- Go to Insert > Shapes and draw a rounded rectangle for the banner, then format it with a dark fill and a shape effect preset.
- Insert a Text Box on top of the shape. With the text box selected, click in the formula bar, type
=$Q$1and press Enter. The box now shows whatever Q1 calculates. - Set the text box to No Fill and No Outline, centre the text and choose a large, bold font (PK uses Arial Rounded MT Bold).
- Add the title Age Calculator above the result and turn off gridlines and headings in the View tab.
Now type any date of birth in H4. In the video, 15-Feb-85 returned 32 Years, 9 Months and 9 Days on the day of recording.
Modern Excel Alternative (Microsoft 365 and Excel 2021)
With LET you can do everything in one cell and skip the helper columns (an addition, not in the original file):
=LET(b,H4,t,TODAY(),y,DATEDIF(b,t,"Y"),m,DATEDIF(b,t,"YM"),d,DATEDIF(b,t,"MD"),
 IF(ISNUMBER(b),"You are "&y&IF(y=1," Year, "," Years, ")&m&IF(m=1," Month and "," Months and ")&d&IF(d=1," Day old."," Days old."),"Please enter correct DOB"))
LET names the birthday, today and the three results once, so the formula stays readable. It also uses =1 for the singular test, so zero shows as 0 Months.
Common Errors and Fixes
#NUM! from DATEDIF
The start date is later than the end date. Check that the date of birth is not in the future and that the arguments are in the right order: birthday first, TODAY() second.
The message appears even though you typed a date
Excel saw the entry as text, usually because the date order does not match your regional settings (for example 13/02/2002 on a US system). Type the date in your local order or use an unambiguous format such as 13-Feb-2002.
The day count looks odd at month end
Microsoft notes that the "MD" unit has known limitations and can return an inaccurate result around month ends. If you need a safer day count, use =TODAY()-EDATE(H4,DATEDIF(H4,TODAY(),"M")), which counts the days since the last full month (an addition).
You see 0 Year or 0 Month
The IF in Step 4 tests >1, so 0 keeps the singular word. Change the test to O1=1 and swap the two results if you want 0 Years (an addition).
Tips
- To find an age on a specific date (for example on an admission or joining date), replace
TODAY()with that date or a cell reference. - For an age as a decimal, such as 26.25 years, use YEARFRAC with basis 1.
- Copy the three DATEDIF formulas down a column to calculate ages for a whole employee or student list.
- Protect the sheet and unlock only H4 so users cannot overwrite the formulas.
- Microsoft’s DATEDIF function reference lists every unit and its known issues.
Want It Ready-Made?
If you track birthdays for a whole team, the Staff Birthday and Anniversary Calendar in Excel and the Birthday Reminder Data Entry System in Excel on NextGenTemplates.com are ready to use, or browse all Excel templates. To master DATEDIF, TODAY, EDATE, LET and the other date formulas step by step, join the video course Excel + AI Mastery: 100 Essential Formulas and Real-World Projects.
Related Tutorials
- Excel DATEDIF Function: Difference Between Two Dates
- Excel YEARFRAC Function for Fractional Years
- Excel EDATE Function to Add Months to a Date
- Excel IF Function with Examples
- Dynamic Calendar in Excel with Formulas
Frequently Asked Questions
How do I calculate age in Excel from a date of birth?
Use DATEDIF with the date of birth as the start date, TODAY() as the end date and the unit Y for completed years. Run it again with the unit YM for the extra months and MD for the extra days to get the full years, months and days.
Why can I not find DATEDIF in Excel?
DATEDIF is a hidden compatibility function. It does not appear in the function list or show a tooltip, but it works in all versions when you type the full formula.
What is the difference between M and YM in DATEDIF?
M returns the total number of complete months between the dates. YM ignores the years and returns only the months since the last birthday, from 0 to 11, which is what an age needs.
Does the age update automatically?
Yes. TODAY() recalculates every time the workbook opens or recalculates, so the age is always correct as of the current date.
How do I calculate age on a specific date instead of today?
Replace TODAY() with the date you need or with a cell that holds it, for example a joining date in J4 used as the end date of DATEDIF.
About the Author
PK is a Microsoft Excel expert and trainer and the founder of PK: An Excel Expert and NextGenTemplates.com. He has been teaching Excel, Power Query and Power BI since 2016 on his YouTube channel.
Conclusion
An age calculator in Excel needs only three DATEDIF formulas with the units Y, YM and MD, a small IF for singular and plural words, an ISNUMBER check for bad input and a text box linked to the result. Download the file, type your date of birth and watch the banner show your exact age, updated every day.