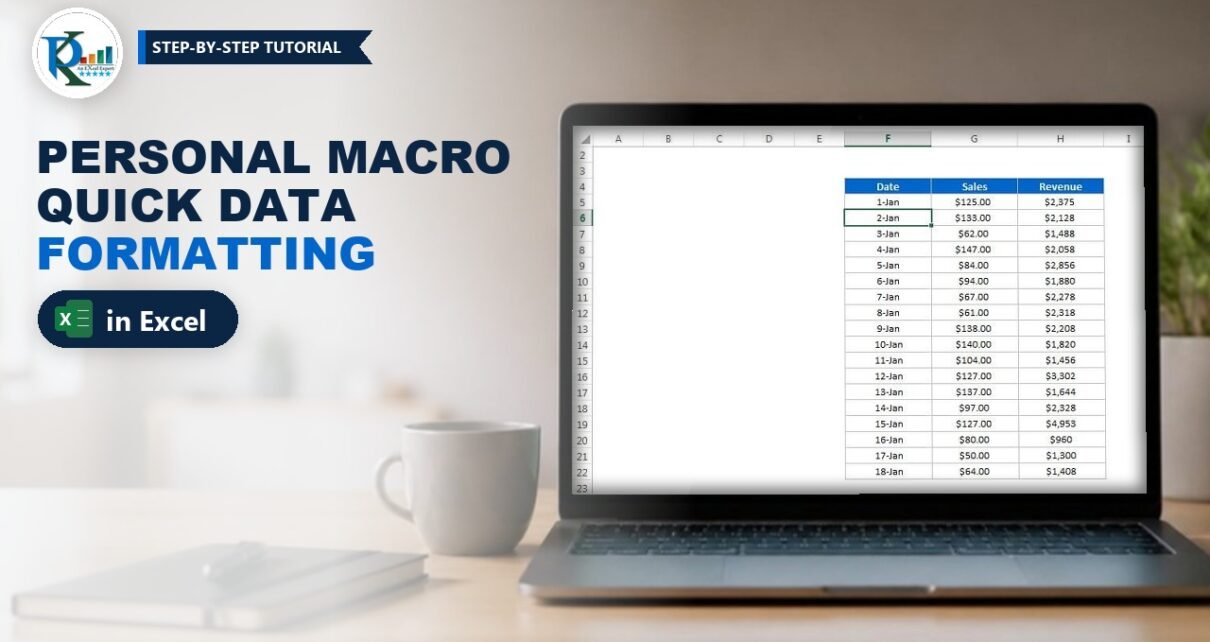
A personal macro in Excel is a macro saved in your hidden Personal Macro Workbook (PERSONAL.XLSB), so it is ready in every workbook you open on that computer. In this tutorial you build one that formats any data in a single keystroke. Select a range, press Ctrl+M, answer one question and the macro centres the text, adds light grey borders, sets the font, row height and column width, removes gridlines and turns the first row into a blue header. It is perfect for data you paste from a website, an email or another system.
⬇️ Download the Practice File
4 practice sheets plus the Format_Data macro · .xlsm (macro-enabled) · Excel 2010 and later
Watch the Video Tutorial
In the video PK runs the macro on three kinds of data, shows how to make PERSONAL.XLSB appear in the Visual Basic Editor, and explains the code line by line before assigning the Ctrl+M shortcut.
What You Will Build
- A Personal Macro Workbook (PERSONAL.XLSB) that opens silently with Excel.
- A Format_Data macro that cleans any selected range: centred text, grey hairline borders, Calibri 10, row height and column width 15, no fill and black font.
- A header prompt that asks Is first row headers? and, on Yes, makes the first row bold white text on a blue fill.
- A keyboard shortcut, Ctrl+M, that runs the macro in any workbook.
Part 1 – Create the Personal Macro Workbook
Excel only creates PERSONAL.XLSB the first time you save a macro into it. If you do not see it in the Visual Basic Editor yet, record an empty macro to create it.
Step 1: Record a macro into the Personal Macro Workbook
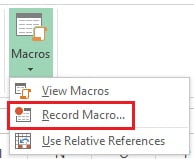
Open any workbook and go to View > Macros > Record Macro.
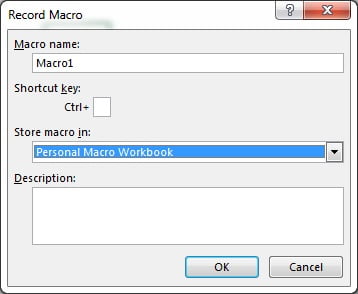
In the Record Macro window, open the Store macro in drop-down and choose Personal Macro Workbook, then click OK. Leave the name and shortcut as they are; you will replace this macro anyway.
Step 2: Stop the recording straight away
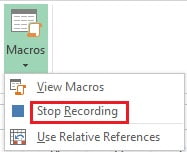
Do not click anything in the sheet. Go to View > Macros > Stop Recording. You have recorded an empty macro, and that is enough to create the personal workbook.
Step 3: Find PERSONAL.XLSB in the Visual Basic Editor
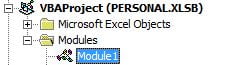
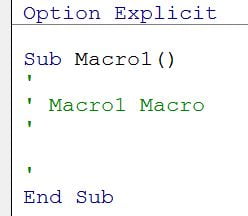
Press Alt+F11 to open the Visual Basic Editor. In the Project window you now see VBAProject (PERSONAL.XLSB). Expand its Modules folder: the recorded macro (for example Macro1 in Module1) is there with no code inside, because nothing was recorded.
Part 2 – The Quick Formatting Personal Macro Code
Step 4: Paste the Format_Data macro
Delete everything in Module1 and paste this code. It is the exact macro from the practice file.
Option Explicit

Sub Format_Data()

Dim rng As Range
Dim Header_confirmation As Integer
Header_confirmation = MsgBox("Is first row headers?", vbYesNo + vbQuestion)

With Selection
    .HorizontalAlignment = xlCenter
    .VerticalAlignment = xlCenter
    .Borders.LineStyle = xlHairline
    .Borders.Weight = xlThin
    .Borders.ColorIndex = 15
    .EntireRow.RowHeight = 15
    .EntireColumn.ColumnWidth = 15
    .Font.Name = "Calibri"
    .Font.Size = 10
    .Font.Italic = False
    .Font.Bold = False
    .Font.Underline = False
    .Interior.Color = xlNone
    .Font.ColorIndex = 1
End With

ActiveWindow.DisplayGridlines = False

If Header_confirmation = vbNo Then Exit Sub

   Dim cel As Range
   Dim c1, c2 As Integer
   Dim r As Long

   For Each cel In Selection
        c1 = cel.Column
        r = cel.Row
        Exit For
   Next

   c2 = Selection.SpecialCells(xlCellTypeLastCell).Column

  With Range(Cells(r, c1), Cells(r, c2))
        .Font.Bold = True
        .Interior.ColorIndex = 23
        .Font.ColorIndex = 2
        .Font.Size = 11
  End With

End Sub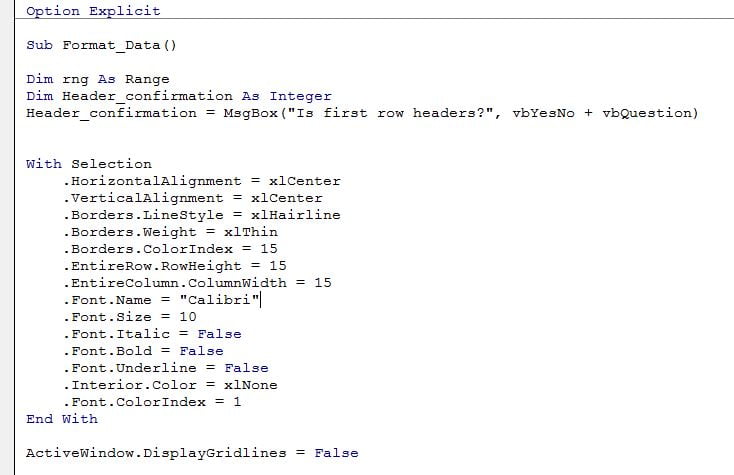
Step 5: Save PERSONAL.XLSB
Click the Save button in the editor or press Ctrl+S while you are in Module1. The tooltip reads Save PERSONAL.XLSB. This is the step people forget: if you skip it, the macro is gone the next time you start Excel.
How the Code Works
1. Ask about headers first
MsgBox("Is first row headers?", vbYesNo + vbQuestion) shows a Yes/No box with a question icon. The answer is stored in Header_confirmation so the macro can use it after the general formatting.
2. Reset and format the whole selection
.HorizontalAlignmentand.VerticalAlignment = xlCentercentre every value..Borders.LineStyle = xlHairline,.Borders.Weight = xlThinand.Borders.ColorIndex = 15draw thin grey borders. ColorIndex 15 is a light grey from the 56-colour palette shown in the VBA formatting chapter..EntireRow.RowHeight = 15and.EntireColumn.ColumnWidth = 15give every row and column the same size..Font.Name = "Calibri"and.Font.Size = 10set one font. Italic, Bold and Underline are switched off, which removes any mixed formatting the pasted data brought with it..Interior.Color = xlNoneclears background fills and.Font.ColorIndex = 1makes the text black.
ActiveWindow.DisplayGridlines = False then hides the gridlines so the bordered table stands out. If you answered No, Exit Sub stops here.
3. Find the header row
The For Each cel In Selection loop reads only the first cell and then leaves with Exit For. That gives c1, the first column, and r, the first row of your selection. In the video’s third example the first cell is F4, so c1 is 6 and r is 4.
Selection.SpecialCells(xlCellTypeLastCell).Column returns the column of the last used cell, which becomes c2.
4. Colour the header
Range(Cells(r, c1), Cells(r, c2)) is one row wide and runs from the first to the last column. It gets bold text, Interior.ColorIndex = 23 (blue), Font.ColorIndex = 2 (white) and font size 11, one point larger than the data.
Part 3 – Assign the Ctrl+M Shortcut
Step 6: Open Macro Options
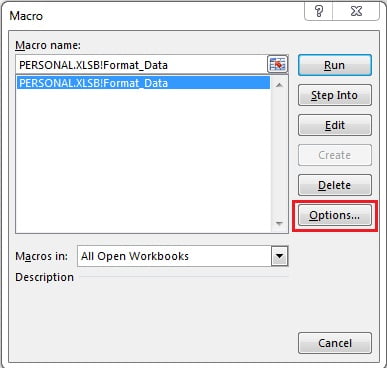
Go back to the worksheet and press Alt+F8 (or Developer > Macros). Select PERSONAL.XLSB!Format_Data and click Options.
Step 7: Type the shortcut letter
In the Shortcut key box type a lowercase m and click OK. The macro now runs with Ctrl+M. If you type a capital M instead, the shortcut becomes Ctrl+Shift+M.
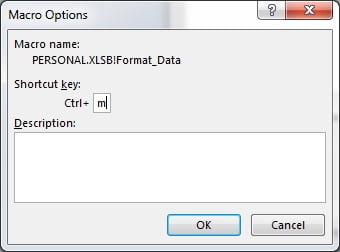
Pick a letter you do not use. A macro shortcut overrides Excel’s own one while the workbook is open, so if you chose Ctrl+N, for example, Ctrl+N would stop creating a new workbook. Open the editor again with Alt+F11 and save PERSONAL.XLSB once more.
Part 4 – Format Data with the Personal Macro in Excel
Example 1: A table with headers
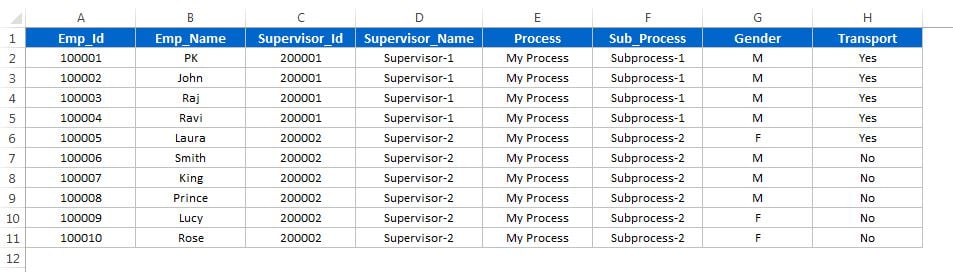
Select the employee table, press Ctrl+M and click Yes when asked Is first row headers?
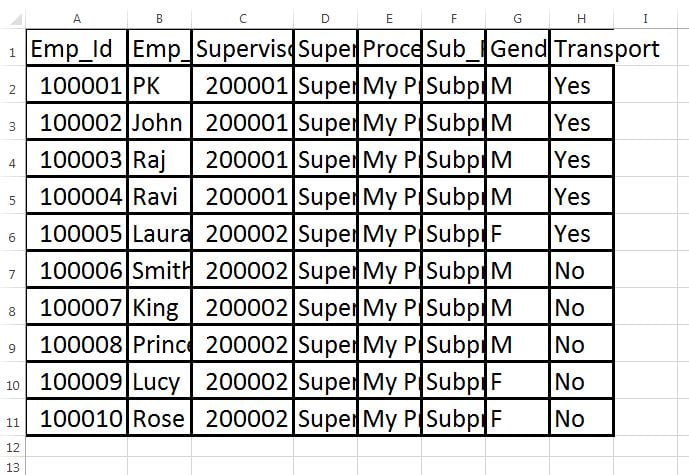
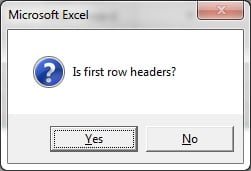
The result is the table in the picture at the top of this page.
Example 2: Numbers without a header
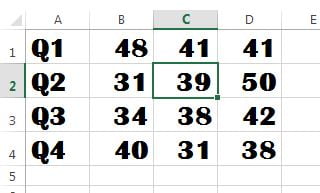
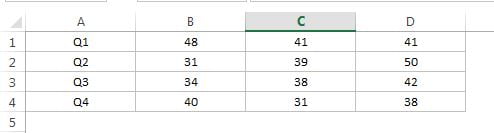
For a block such as quarterly numbers with no header row, press Ctrl+M and click No. The data is formatted but no row is coloured.
Example 3: Messy data in the middle of the sheet
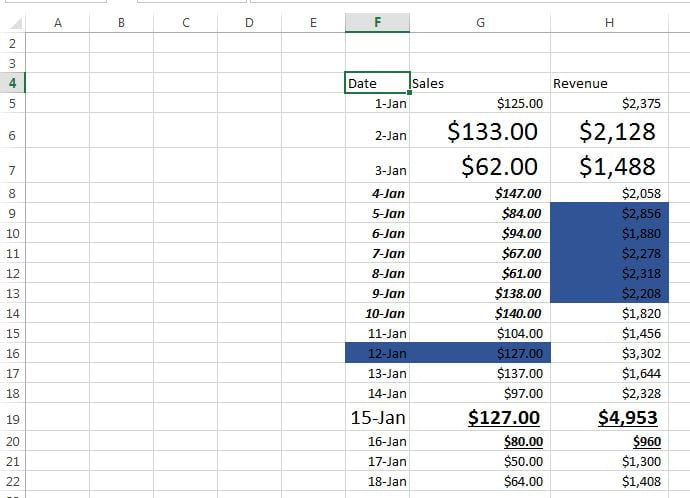
The data does not have to start in A1. This range starts in F4 and has fills, big fonts, italics and underlines. Select it, press Ctrl+M and click Yes: every leftover format is reset and row 4 becomes the header.
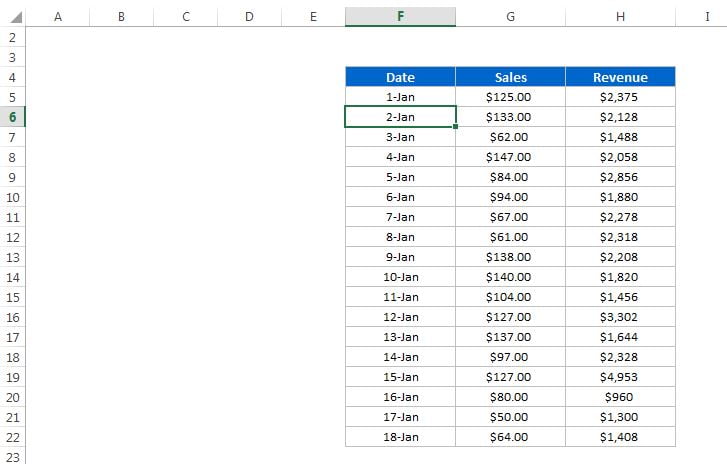
In the video PK also selects an empty range and runs the macro with Yes to draw a blank bordered table with a header row, ready for typing.
Common Errors and Fixes
The macro is missing after restarting Excel
PERSONAL.XLSB was not saved. Open the editor, select the PERSONAL.XLSB project and press Ctrl+S. When you close Excel and it asks whether to save changes to the Personal Macro Workbook, click Save.
The blue header is wider than my selection
Good to know if you use the macro on a sheet that holds more than one table. To find the last header column, the macro uses xlCellTypeLastCell, which looks at the used range of the whole sheet rather than only your selection. On a sheet with a single table, like each sheet in the practice file, that gives exactly the right column. If there is other data further to the right, the header colour stretches to that column too. To keep the header inside your selection in that case, replace With Range(Cells(r, c1), Cells(r, c2)) with With Selection.Rows(1) and keep the four formatting lines inside it. (This tip is an extra, not part of the video.)
Ctrl+M does nothing
Macros may be disabled, or PERSONAL.XLSB may have been disabled after a crash. Check File > Options > Trust Center > Trust Center Settings > Macro Settings, and look under File > Options > Add-ins > Manage: Disabled Items. Our guide to enabling macros in Excel walks through the settings.
Undo does not work after the macro
Changes made by VBA clear Excel’s undo list, so Ctrl+Z cannot bring the old formats back. Try the macro on a copy of important data first.
Tips
- Change the colours to match your brand: swap 23 and 2 in the header block for any other ColorIndex values from the 56-colour palette.
- Want columns sized to the data? Remove the
ColumnWidthline and add.EntireColumn.AutoFitinstead. - PERSONAL.XLSB opens hidden. Use View > Unhide only if you need to see it, and hide it again before saving.
- Store your other everyday helpers in the same workbook, such as the macro that deletes blank worksheets.
- Microsoft explains the file in Create and save all your macros in a single workbook.
Want It Ready-Made?
If you would rather use finished automation than write it, the Excel VBA Tools & Utilities Pack on NextGenTemplates.com bundles 8 ready-to-use VBA tools, from inventory and invoicing to a PDF converter. You can also browse all Excel VBA tools.
Related Tutorials
- Record a Macro in Excel: Macro Recorder Step by Step
- VBA Cell Formatting: Number Format, Colors, Borders and Fonts
- Delete All Blank Worksheets Using a Personal Macro
- Excel VBA Introduction: Developer Tab, Editor and First Macro
- 4 Easy Ways to Enable Macros in Excel
Frequently Asked Questions
What is a personal macro in Excel?
It is a macro stored in PERSONAL.XLSB, a hidden workbook that Excel opens automatically every time it starts. Any macro saved there is available in every workbook on that computer for the same Windows user.
Why do I not see PERSONAL.XLSB in the Visual Basic Editor?
Excel creates it only when you first store a macro in it. Record an empty macro with Store macro in set to Personal Macro Workbook, stop the recording, and it appears in the editor.
Can I use a different shortcut than Ctrl+M?
Yes. Press Alt+F8, select the macro, click Options and type another letter. Avoid letters Excel already uses, because the macro would replace that shortcut. A capital letter gives you a Ctrl+Shift shortcut.
What happens if I click No on the header question?
The whole selection is still formatted and gridlines are hidden, but the macro exits before colouring the first row, so no header is created.
Will the macro work in every workbook?
Yes, as long as PERSONAL.XLSB is saved and macros are enabled. The workbook you format does not need to be macro-enabled, because the code lives in the personal workbook.
About the Author
PK is a Microsoft Excel expert and trainer and the founder of PK: An Excel Expert and NextGenTemplates.com. He has been teaching Excel, VBA, Power Query and Power BI since 2016 on his YouTube channel.
Conclusion
A personal macro in Excel turns a two-minute formatting chore into one shortcut. Create PERSONAL.XLSB by recording an empty macro, paste the Format_Data code, save, and give it Ctrl+M. From then on, every pasted table is one keystroke away from a clean, consistent layout. Download the practice file and try it on all four sheets.