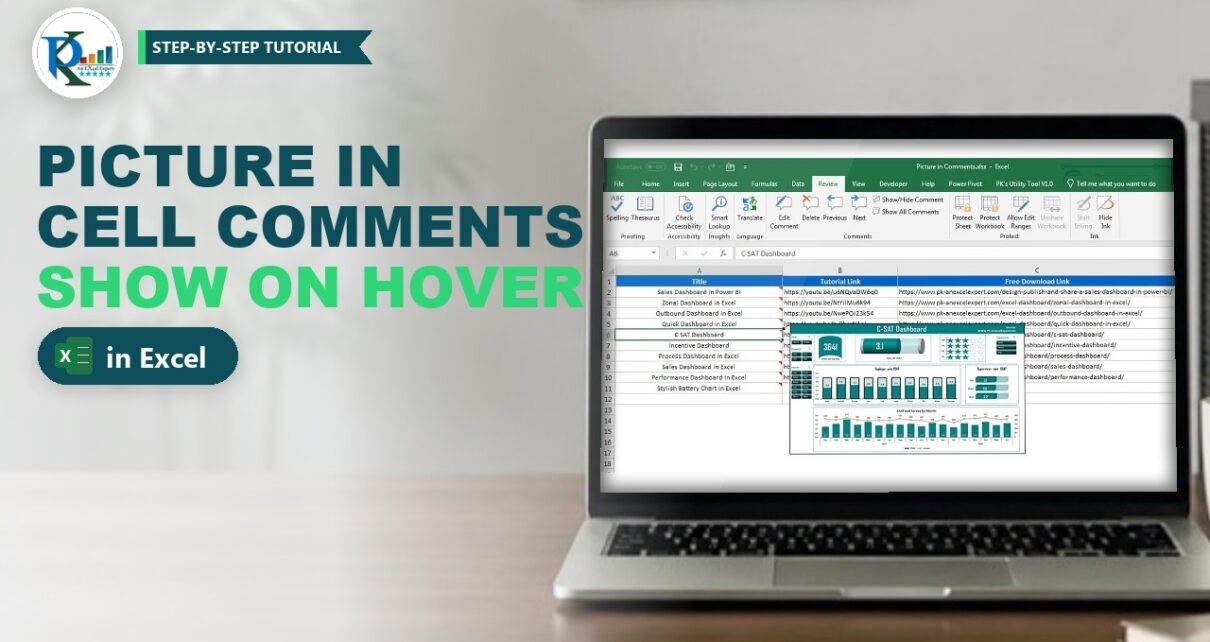
To insert a picture in Excel comments, you fill the comment box with an image instead of text, so the picture pops up only when someone hovers over the cell. PK uses this trick for a list of his dashboards: each title shows a preview of the dashboard on hover, while the table itself stays small and tidy. In this tutorial you will add a picture to a comment step by step, remove the border, resize it, and learn how the same trick works with Notes in Microsoft 365.

⬇️ Download the Practice File
.xlsx workbook (5.6 MB, it holds ten pictures) · Excel 2010 and later for Windows · no macros
Watch the Video Tutorial
In the video, PK shows the finished dashboard list, then adds a new title, inserts a comment, fills it with a battery chart picture through Fill Effects, removes the border and hovers the cell to show the result.
What You Will Build
- A compact link table with a Title, a Tutorial Link and a Free Download Link for each item.
- One comment per title that holds a picture instead of text.
- A hover preview: the picture appears only when the mouse is over the cell.
- A clean look with no comment border and a box sized to the picture.
Why Put a Picture in a Comment?
If you paste a dashboard screenshot directly on the sheet, it covers a lot of cells and the table becomes hard to read. A comment stays hidden until you hover the cell, so you can attach a big picture to a single cell without taking any space. PK also suggests the same idea for an employee list: hover a name and see the employee’s photo.
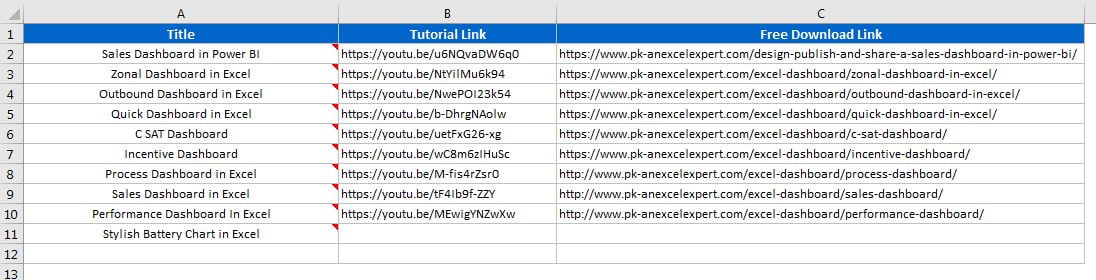
The practice file uses this layout on Sheet1:
- A1:C1: headers Title, Tutorial Link and Free Download Link.
- A2:A11: ten titles, from Sales Dashboard in Power BI to Stylish Battery Chart in Excel. Each cell has a comment filled with a picture of that dashboard or chart.
- B2:B11: the YouTube tutorial links, and C2:C11: the download pages.
How to Insert a Picture in Excel Comments, Step by Step
The steps below follow the video, which was recorded in Excel 2013. They work the same way in Excel 2010, 2016, 2019 and 2021. In Microsoft 365 the same box is called a Note; see the next section.
Step 1: Insert a comment in the cell
Type your title in the cell (PK adds Stylish Battery Chart in Excel in A11). Right-click the cell and choose Insert Comment, or press the Excel shortcut key Shift + F2. A yellow comment box opens next to the cell.
Step 2: Delete the text in the comment
The new comment starts with your user name. Select that text and delete it, because the picture will be the content. If you leave text there, it is drawn on top of the picture.
Step 3: Open Format Comment from the border
Move the mouse over the border of the comment box until the pointer changes to a four-headed arrow, and click once to select the whole box. Then right-click the border and choose Format Comment.

The Format Comment window has several tabs: Font, Alignment, Colors and Lines, Size, Protection, Properties, Margins and Alt Text. You can change the font, the text alignment, the background colour, the transparency, the border style and the size from here.
Step 4: Go to Colors and Lines and open Fill Effects
Click the Colors and Lines tab. Under Fill, open the Color drop-down. Below the colour palette you will see More Colors and Fill Effects. Click Fill Effects.

Step 5: Pick the picture on the Picture tab
The Fill Effects window has four tabs: Gradient, Texture, Pattern and Picture. The first three can give your comment a gradient, a texture or a two-colour pattern. Go to the Picture tab and click Select Picture.

The Insert Pictures window opens with three options: From a file, Bing Image Search and OneDrive. Choose From a file, select your picture (PK picks the battery chart image) and click Insert.
Step 6: Lock the aspect ratio and confirm
Back on the Picture tab, tick Lock picture aspect ratio if you want the picture to keep its proportions, then click OK. The comment box is now filled with the picture.
Step 7: Remove the border
You are still in the Format Comment window. Under Line, open the Color drop-down and choose No Line if you don’t want a border around the picture. You can also keep the border if you like it. Click OK.
Step 8: Resize the comment box
Drag a corner handle of the comment to make the picture as big as you need. PK holds Shift while dragging, so the box keeps its proportions. In the practice file the boxes are roughly 255 to 375 points wide, which is big enough to read a dashboard preview.
Step 9: Hover the cell to test it
Click any other cell, then move the mouse over your title. The picture appears next to the cell and disappears when you move away. Repeat the steps for every title in the list.
Comments vs Notes in Microsoft 365
This section is an addition and is not in the original video or file. In Microsoft 365, Excel has two different things:
- Notes are the classic yellow comment boxes used in this tutorial. They can be formatted and can hold a picture.
- Comments (threaded comments) are for conversations: people can reply and @mention each other. Microsoft notes that you currently can’t format text or add images inside them, so they can’t hold a picture fill.
So in Microsoft 365, put your pictures in a Note:
- Right-click the cell and choose New Note, or go to Review > Notes > New Note. Shift + F2 also inserts a note.
- Delete the text, right-click the note border and choose Format Comment. The window may still be called Format Comment, and the steps from Step 4 onward are the same.
- To change it later, right-click the cell and choose Edit Note.
If you open the practice file in Microsoft 365, the pictures are already stored as Notes, so they work without any change. Microsoft explains the difference between threaded comments and notes on Microsoft Support.
Common Errors and Fixes
Format Comment only shows the Font tab
You right-clicked inside the text area. Click the border of the comment so the whole box is selected (Step 3), then right-click the border again. Now all tabs, including Colors and Lines, are available.
There is no Format Comment option in Microsoft 365
You inserted a threaded comment, not a note. Delete it, insert a New Note and format the note instead.
The picture looks stretched
The box has a different shape from the picture. Tick Lock picture aspect ratio on the Picture tab and resize the box with Shift held down.
The workbook became very large
Each picture is saved inside the file at its full size. The practice file is 5.6 MB because of its ten dashboard pictures. Resize or compress big screenshots before you insert them.
Tips
- Use this for product lists, employee lists with photos, or a catalog of reports with a preview of each one.
- Keep the pictures in one folder with clear names, so updating a preview later is quick.
- If the pictures don’t appear on hover, check File > Options > Advanced > Display and make sure Excel is set to show indicators and to show notes on hover. (Addition.)
- Use Review > Notes > Show All Notes to see and resize every picture at once, then turn it off again. (Addition.)
- If you want the picture in the cell itself instead of on hover, Microsoft 365 also has the IMAGE function to insert images in Excel cells.
Want It Ready-Made?
The battery chart that PK adds as a picture in the video is available as a ready-to-use Stunning Battery Chart template on NextGenTemplates.com. For more finished workbooks like the dashboards listed in the practice file, browse the Excel dashboard templates.
Related Tutorials
- UDF to Fetch Comment Text in an Excel Cell
- IMAGE Function to Insert Images in Excel Cells
- Picture Lookup and Image inside a Pivot Table in Excel
- KPI Dashboard with Tooltip in Excel
- Free Excel Dashboard Templates by PK
Frequently Asked Questions
How do I show a picture when I hover over a cell in Excel?
Insert a comment (a note in Microsoft 365) in the cell, delete its text, right-click its border and choose Format Comment. On Colors and Lines open the fill Color list, choose Fill Effects, go to the Picture tab and select your picture. The picture then appears whenever you hover the cell.
Can I add a picture to a threaded comment in Microsoft 365?
Not at the moment. Microsoft says you currently cannot add images inside threaded comments. Use a Note instead, which is the classic comment box and still supports a picture fill through Format Comment.
What is the shortcut to insert a comment or note?
Shift + F2 inserts a comment in older Excel versions and a note in Microsoft 365. You can also right-click the cell and choose Insert Comment or New Note.
How do I remove the border around the picture?
In Format Comment, go to Colors and Lines, open the Line Color list and choose No Line, then click OK.
Why is my file so big after adding pictures?
Every picture is stored inside the workbook at its original size. Reduce or compress the images before inserting them to keep the file small.
About the Author
PK is a Microsoft Excel expert and trainer and the founder of PK: An Excel Expert and NextGenTemplates.com. He has been teaching Excel, VBA, Power Query and Power BI since 2016 on his YouTube channel.
Conclusion
Now you know how to insert a picture in Excel comments: insert a comment, clear its text, open Format Comment from the border, choose Fill Effects > Picture, then remove the border and resize the box. Your table stays compact, and every title shows its preview only when someone hovers over it. In Microsoft 365, simply do the same with a Note. Download the practice file and try it with your own list.