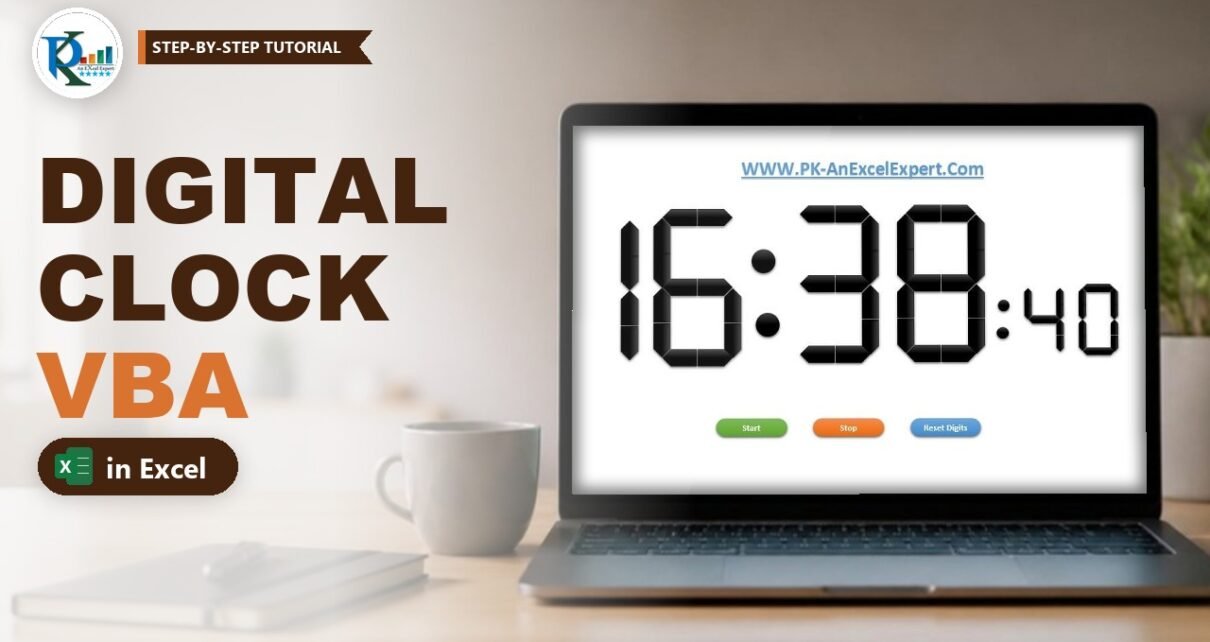
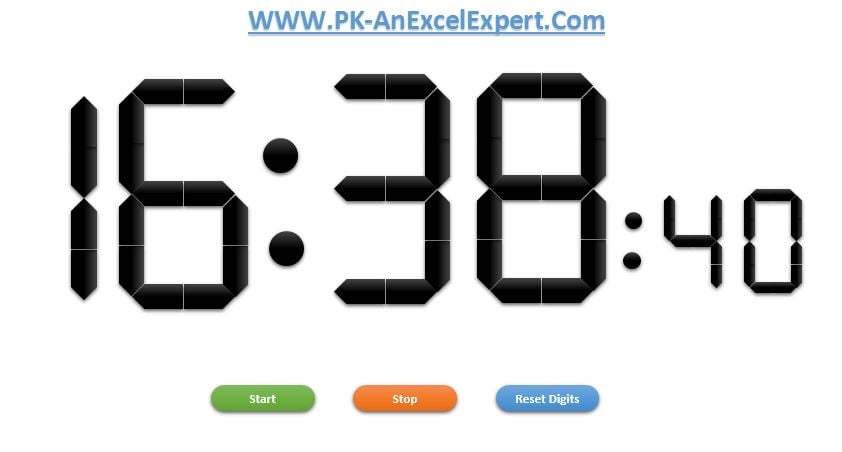
A digital clock in Excel sounds like something you would need a chart or an add-in for, but this one is built only from Excel shapes and a few lines of VBA. Each digit is made of seven segments, every segment is a named group of shapes, and a macro shows or hides the right segments every second to draw the current time. In this tutorial you will build the full clock: hours, minutes, smaller seconds, blinking dots and Start, Stop and Reset buttons. Along the way you learn to control shapes with VBA.
Watch the Video Tutorial
In the video PK builds the clock from a blank workbook: pentagon shapes become segments, segments become digits, and three short macros bring the digits to life.
What You Will Build
- Six seven-segment digits made from Pentagon shapes: two for hours, two for minutes and two smaller ones for seconds.
- 42 named groups (1 to 42), one for each segment, so VBA can find every segment by name.
- A Points group of four dots that blinks once per second.
- A Change_Digit macro that turns any digit into 0 to 9 by hiding the right segments.
- Start, Stop and Reset Digits buttons that run the clock, stop it and reset every digit to 8.
How the Digital Clock in Excel Works
On a digital display every number is an 8 with some segments switched off. A 0 is an 8 without the middle bar; a 1 is only the two right-hand bars.
Every segment is a group of shapes with a number as its name. The first digit uses groups 1 to 7, the second uses 8 to 14, and so on up to 42. A macro reads the current time, splits it into six single digits and, for each one, makes all seven segments visible and then hides the ones that number does not need.
Part 1: Build the Seven-Segment Digits with Shapes
Step 1: Prepare a clean sheet
Open a new workbook with Ctrl+N. Go to View and untick Gridlines so the clock sits on a plain white background.
Step 2: Draw one segment from two pentagons
Go to Insert › Shapes › Block Arrows and choose Pentagon. Draw it on the sheet. Copy it, then select the copy and use Format › Rotate › Flip Horizontal. Place the two pentagons back to back so they form a long bar with a point at each end, just like a segment on a digital display.
Select both shapes, pick a dark style from Format › Shape Styles (PK uses a black style), then right-click and choose Group. This group is one segment.
Step 3: Copy the segment to form an 8
Copy the segment and paste it twice more to make the top, middle and bottom bars. For the four vertical bars, paste a copy and use Format › Rotate › Rotate Right 90°, then copy that vertical segment for the other three positions. You now have seven groups that together look like an 8.
Press Ctrl+A while a shape is selected to select every shape, right-click and choose Group. Hold Shift and drag a corner handle to resize the whole 8 without stretching it, then right-click and Ungroup. Ungrouping returns you to the seven separate segment groups, which is what the code needs.
Step 4: Name the seven segments 1 to 7
This is the step everything else depends on. Click a segment, type its new name into the Name Box (left of the formula bar, where it shows something like Group 4) and press Enter. The code expects exactly this layout:
| Name (first digit) | Offset in the code | Segment |
|---|---|---|
| 1 | first_Shape | Top bar |
| 2 | first_Shape + 1 | Top right |
| 3 | first_Shape + 2 | Middle bar |
| 4 | first_Shape + 3 | Top left |
| 5 | first_Shape + 4 | Bottom left |
| 6 | first_Shape + 5 | Bottom right |
| 7 | first_Shape + 6 | Bottom bar |
The video confirms it: PK hides shape 3 to make a 0 and keeps only 2 and 6 for a 1.
Step 5: Copy the digit five more times and keep numbering
Select the seven segments, copy and paste them next to the first digit. Rename the copies 8 to 14 in the same order (8 is the top bar, 9 the top right, and so on). Repeat for the minute digits (15 to 21 and 22 to 28). Pasted shapes get default names like Group 31, so every one must be renamed.
For the seconds, paste two more digits, group them, hold Shift and drag to make them smaller, then ungroup and rename them 29 to 35 and 36 to 42. You now have 42 named groups.
Step 6: Add the blinking dots
Go to Insert › Shapes › Basic Shapes › Oval, draw a circle while holding Shift and give it the same shape style as the segments. Make four of them: two larger dots between the hours and minutes and two smaller dots before the seconds. Select the four ovals, right-click › Group and name the group Points in the Name Box.
Part 2: Write the VBA Code
Open Developer › Visual Basic (or press Alt+F11) and choose Insert › Module. The clock uses three procedures in the video, plus a reset macro.
Step 7: The Change_Digit procedure
This procedure receives the name of the first segment of a digit and the number to show. It makes all seven segments visible, then hides the segments that number does not use.
Option Explicit

Sub Change_Digit(first_Shape As Integer, Digit As Integer)

Dim n As Integer

Dim sp As Shape
Dim sh As Worksheet
Set sh = ActiveSheet
Dim i As Integer

'========= Make all visible
For i = first_Shape To first_Shape + 6
    Set sp = sh.Shapes(VBA.Format(i, "0"))
    sp.Visible = msoCTrue
Next i

'===================================

If Digit = 0 Then
    For i = first_Shape To first_Shape + 6
        Set sp = sh.Shapes(VBA.Format(i, "0"))
        If i = first_Shape + 2 Then
            sp.Visible = msoFalse
        End If
    Next i
End If

If Digit = 1 Then
    For i = first_Shape To first_Shape + 6
        Set sp = sh.Shapes(VBA.Format(i, "0"))
        If i <> first_Shape + 1 And i <> first_Shape + 5 Then
            sp.Visible = msoFalse
        End If
    Next i
End If

If Digit = 2 Then
    For i = first_Shape To first_Shape + 6
        Set sp = sh.Shapes(VBA.Format(i, "0"))
        If i = first_Shape + 3 Or i = first_Shape + 5 Then
            sp.Visible = msoFalse
        End If
    Next i
End If

If Digit = 3 Then
    For i = first_Shape To first_Shape + 6
        Set sp = sh.Shapes(VBA.Format(i, "0"))
        If i = first_Shape + 3 Or i = first_Shape + 4 Then
            sp.Visible = msoFalse
        End If
    Next i
End If

If Digit = 4 Then
    For i = first_Shape To first_Shape + 6
        Set sp = sh.Shapes(VBA.Format(i, "0"))
        If i = first_Shape Or i = first_Shape + 4 Or i = first_Shape + 6 Then
            sp.Visible = msoFalse
        End If
    Next i
End If

If Digit = 5 Then
    For i = first_Shape To first_Shape + 6
        Set sp = sh.Shapes(VBA.Format(i, "0"))
        If i = first_Shape + 1 Or i = first_Shape + 4 Then
            sp.Visible = msoFalse
        End If
    Next i
End If

If Digit = 6 Then
    For i = first_Shape To first_Shape + 6
        Set sp = sh.Shapes(VBA.Format(i, "0"))
        If i = first_Shape + 1 Then
            sp.Visible = msoFalse
        End If
    Next i
End If

If Digit = 7 Then
    For i = first_Shape To first_Shape + 6
        Set sp = sh.Shapes(VBA.Format(i, "0"))
        If i = first_Shape + 3 Or i = first_Shape + 2 Or i = first_Shape + 4 Or i = first_Shape + 6 Then
            sp.Visible = msoFalse
        End If
    Next i
End If

If Digit = 9 Then
    For i = first_Shape To first_Shape + 6
        Set sp = sh.Shapes(VBA.Format(i, "0"))
        If i = first_Shape + 4 Then
            sp.Visible = msoFalse
        End If
    Next i
End If

End Sub
How the code works
sh.Shapes(VBA.Format(i, "0"))turns the loop number into text, soi = 15finds the group named15. This is why the segment names must be plain numbers.- The first loop resets the digit to a full 8. Each
If Digit = ...block then hides only what that number does not need. For example a 4 hides the top bar, the bottom-left and the bottom bar. - There is no block for 8, because 8 uses every segment and the first loop already showed them all.
- The digit 7 line is longer than the code window in the video, so its last condition is cut off on screen.
first_Shape + 6(the bottom bar) is the only segment left that a 7 must hide, so that part of the line is reconstructed here rather than copied from the screen.
Step 8: The Start_ macro that runs the clock
Insert a second module and add the loop that keeps the clock running:
Option Explicit

Sub Start_()

Dim sh As Worksheet
Set sh = ActiveSheet

sh.Range("A1").Value = ""

x:

If sh.Range("A1").Value = "Stop" Then Exit Sub

VBA.DoEvents

Call Change_Digit(1, VBA.CInt(VBA.Left(VBA.Format(Time, "HH"), 1)))
Call Change_Digit(8, VBA.CInt(VBA.Right(VBA.Format(Time, "HH"), 1)))

Call Change_Digit(15, VBA.CInt(VBA.Mid(VBA.Format(Time, "HHMM"), 3, 1)))
Call Change_Digit(22, VBA.CInt(VBA.Right(VBA.Format(Time, "HHMM"), 1)))

Call Change_Digit(29, VBA.CInt(VBA.Left(VBA.Format(Time, "SS"), 1)))
Call Change_Digit(36, VBA.CInt(VBA.Right(VBA.Format(Time, "SS"), 1)))

Dim sp As Shape

Set sp = sh.Shapes("Points")

If Application.WorksheetFunction.IsEven(VBA.Second(VBA.Now)) Then
    sp.Visible = msoCTrue
Else
    sp.Visible = msoFalse
End If

GoTo x

End Sub
How the Start_ macro works
- Cell A1 is the on/off switch. Start_ clears A1, and the loop ends as soon as A1 contains
Stop. x:andGoTo xcreate an endless loop.VBA.DoEventslets Excel redraw the shapes and respond to your clicks while the loop runs, which is why the Stop button still works.Format(Time, "HH")gives the hour as two characters, such as16.Lefttakes the first digit andRightthe second.CIntturns the text into a number for Change_Digit. PK shows the same idea on the sheet with the TEXT function.Format(Time, "HHMM")returns hours and minutes together, such as1622, soMid(..., 3, 1)is the first minute digit andRight(..., 1)the second.- The first-shape numbers 1, 8, 15, 22, 29 and 36 match the six digits you named in Part 1.
- The
Pointsgroup is visible on even seconds and hidden on odd seconds, so the dots blink.
Step 9: The Stop_ macro
Sub Stop_()

Dim sh As Worksheet
Set sh = ActiveSheet

sh.Range("A1").Value = "Stop"

End Sub
It writes Stop into A1, and the next pass of the Start_ loop exits.
Step 10: The Reset_Digit macro
Insert one more module, as PK does in the video, and add the reset macro. Each module can start with its own Option Explicit line.
Option Explicit

Sub Reset_Digit()

Dim n As Integer

Dim sp As Shape
Dim sh As Worksheet
Set sh = ActiveSheet
Dim i As Integer

'========= Make all visible
For i = 1 To 42
    Set sp = sh.Shapes(VBA.Format(i, "0"))
    sp.Visible = msoCTrue
Next i

Set sp = sh.Shapes("Points")
sp.Visible = msoCTrue

End Sub
This shows all 42 segments and the dots again, so every digit goes back to 8.
Part 3: Add the Buttons and Test
Step 11: Insert Start, Stop and Reset Digits buttons
Insert three rounded rectangle shapes below the clock and type Start, Stop and Reset Digits on them. Right-click each one, choose Assign Macro and pick Start_, Stop_ or Reset_Digit.
Step 12: Run the clock
Click Start. The digits switch to the current time and the dots blink every second. Click Stop to freeze it, and Reset Digits to return all digits to 8. Save the workbook as a macro-enabled file (.xlsm or .xlsb; PK’s demo file is Digital Clock.xlsb) or the code is lost when you close it.
Common Errors and Fixes
- Run-time error: The item with the specified name was not found. One of the 42 groups or the Points group is not named correctly. Click each segment and check the Name Box. Pasted copies keep names like Group 31 until you rename them.
- A digit shows the wrong number. The segments of that digit were named in a different order. Compare them with the table in Step 4.
- Nothing happens when you click Start. Macros are disabled or the file was saved as .xlsx. Save as .xlsm or .xlsb and enable macros when you reopen it.
Tips
- Name the sheet Digital Clock and hide row and column headings (View tab) for a clean display, as in PK’s finished file.
- Use the Selection Pane (Home › Find & Select › Selection Pane) to see all 42 names in one list and spot a missing one quickly (addition).
- Microsoft’s reference for the property the clock relies on: Shape.Visible property (Microsoft Learn).
Want It Ready-Made?
Prefer a clock that is already built? The Analog Clock in Excel (Pie Chart + Doughnut Chart) template on NextGenTemplates.com is the companion to this digital clock, with moving hands driven by a short macro. For more macro-powered tools, browse the Excel VBA tools collection.
Related Tutorials
- Analog Clock in Excel with a Pie and Doughnut Chart
- Timer Chart Visualization in Excel
- Exam Application Form with Timer
- Excel Form Controls: Combo Box, Spin Button and Option Buttons
- Learn Excel VBA Step by Step
Frequently Asked Questions
How do I make a digital clock in Excel?
Build each digit from seven segment shapes, name the segments with numbers, and use a VBA macro that reads the current time every second and hides the segments each digit does not need. This tutorial walks through all twelve steps.
Why are the shapes named with numbers?
The code builds each shape name from a loop counter, so segment 15 is found by its name 15. Numeric names let one short procedure update any of the six digits.
Can I build the clock without VBA?
Not this design. Showing and hiding shapes needs a macro, and a formula on its own does not refresh every second. Without VBA you can show the time in a cell with the NOW function, but it only updates when the sheet recalculates.
How do I stop the clock?
Click the Stop button. It writes the word Stop into cell A1, and the Start loop checks that cell on every pass and exits as soon as it finds it.
Does the clock work in Excel for the web?
Excel for the web does not run VBA, so the clock will not tick there. Desktop Excel for Windows runs it as shown in the video.
About the Author
PK is a Microsoft Excel expert and trainer and the founder of PK: An Excel Expert and NextGenTemplates.com. He has been teaching Excel, VBA, Power Query and Power BI since 2016 on his YouTube channel.
Conclusion
This digital clock in Excel is a fun project, but the technique is serious: name your shapes, then let VBA decide which ones are visible. With 42 numbered segment groups, one Change_Digit procedure and a loop that reads the time, you get a working clock with blinking dots and Start, Stop and Reset buttons. Once you are comfortable with it, use the same show-and-hide approach for status lights, progress indicators and interactive dashboards.


