Now a days businesses rely more heavily on email communication. Managing data from multiple sources can become a real challenge. Fortunately, there is a solution: an email data consolidation tool in Excel. In the article, we will guide you about our latest Email Data Consolidation Tool in Excel.
Benefits of Email Data Consolidation Tool in Excel
An Email Data Consolidation Tool in Excel can bring several benefits to your business. Let’s have a look at some of these benefits:
Saves Time and Effort:
With this email data consolidation tool, you can automate the process of collecting data from multiple sales persons. This saves time and effort that would otherwise be spent manually collecting data from each email and consolidating it into one place.
Reduces Errors:
Manually copying data from multiple emails to consolidate it into one sheet can lead to errors. Especially when the volume of data is high. An email data consolidation tool automates the process, minimizing the chances of errors occurring.
Improves Data Accuracy:
By consolidating data from multiple sources into one Excel sheet, an email data consolidation tool ensures that the data is accurate and up to date. This can help in making informed business decisions based on reliable data.
Easy to Analyze Data:
Once all the data has been consolidated into one Excel sheet, it becomes easy to analyze and draw meaningful insights. You can use Excel’s built-in functions like pivot tables, charts, and graphs to perform data analysis.
Increases Efficiency:
With an email data consolidation tool, you can increase efficiency by automating the process of collecting data. This can free up your time to focus on other important tasks, leading to increased productivity.
Designing an Excel Template for Sales Data
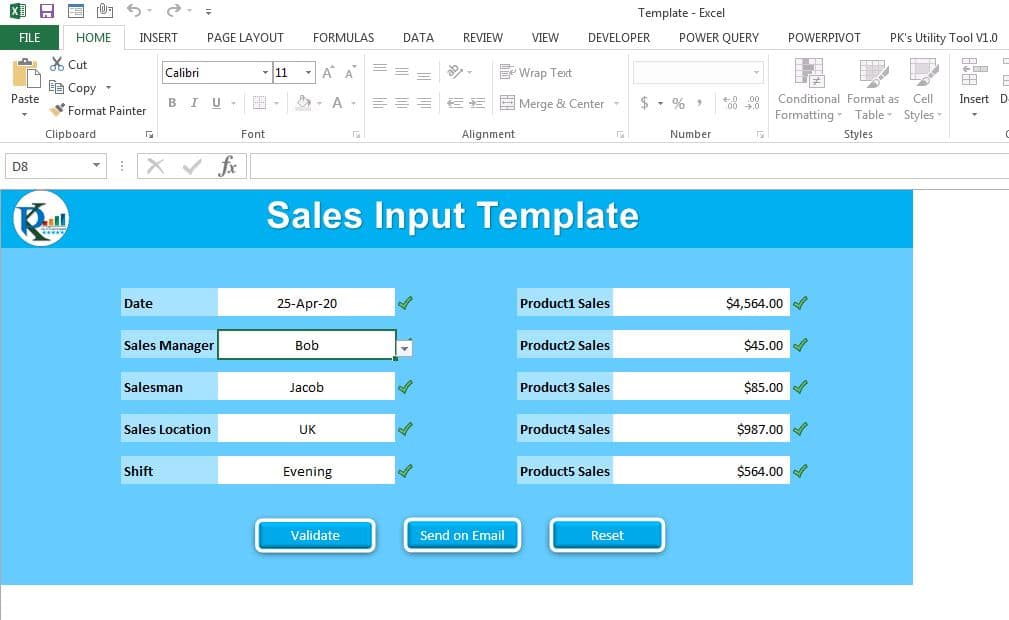
The first step in creating an email data consolidation tool is to design an Excel template for the data you want to consolidate. Let’s say you want to consolidate sales data from multiple sales persons. You can design an Excel template with fields like customer name, sales amount, sales date, etc.
Click to buy Email Data Consolidation Tool in Excel
After designing the template, you can distribute it to multiple salespeople for them to fill out. They can easily open the Excel file and enter the relevant data.
Adding a “Validate” Button:
We have added Validate button on the Template file to validate all the inputs are correct or not.
We have used below VBA code on this button-
Sub Validate()

If Application.WorksheetFunction.Sum(Range("E6:E14,I6:I14")) < 10 Then
MsgBox "Please input the correct and complete data!!!", vbCritical
Exit Sub
Else
MsgBox "Go to go!!!", vbInformation
End If

End Sub
Adding a “Send on Email” Button
To make the process even more efficient, you can add a “Send on Email” button in the Excel template. This button will allow sales persons to send the sales template via email to a specific Outlook folder. We can do this using VBA.
We have used below VBA code to send the email
Sub Send_Email()

If Application.WorksheetFunction.Sum(Range("E6:E14,I6:I14")) < 10 Then
MsgBox "Please input the correct and complete data!!!", vbCritical
Exit Sub
End If

Dim Out_App As Object
Dim msg As Object

Set Out_App = CreateObject("outlook.application")
Set msg = Out_App.Createitem(0)

msg.To = ThisWorkbook.Sheets("List").Range("J2").Value
msg.CC = ThisWorkbook.Sheets("List").Range("J3").Value
msg.Subject = "Sales Data of " & Range("D10").Value & " for " & Format(Range("D6").Value, "D-MMM-YY")
msg.body = "Hi," & vbNewLine & vbNewLine & "Please find attached Sales Data of " & Range("D10").Value & " for " & Format(Range("D6").Value, "D-MMM-YY")
msg.attachments.Add ThisWorkbook.FullName
msg.send

End Sub
Adding “Reset Button”
We have added Reset button to reset the template form. We have used below VBA code to reset the form
Sub Reset()

Range("D6").Value = ""
Range("D8").Value = ""
Range("D10").Value = ""
Range("D12").Value = ""
Range("D14").Value = ""


Range("H6").Value = 0
Range("H8").Value = 0
Range("H10").Value = 0
Range("H12").Value = 0
Range("H14").Value = 0


End Sub
Using an Outlook Rule to Move Emails to a Specific Folder
Once the email is sent, it will arrive in a specific Outlook folder. You can use Outlook’s built-in rule to move emails to a specific folder based on a specific word in the subject line. For example, if the email subject line contains the word “sales,” the email will automatically move to a folder called “Sales Data.”
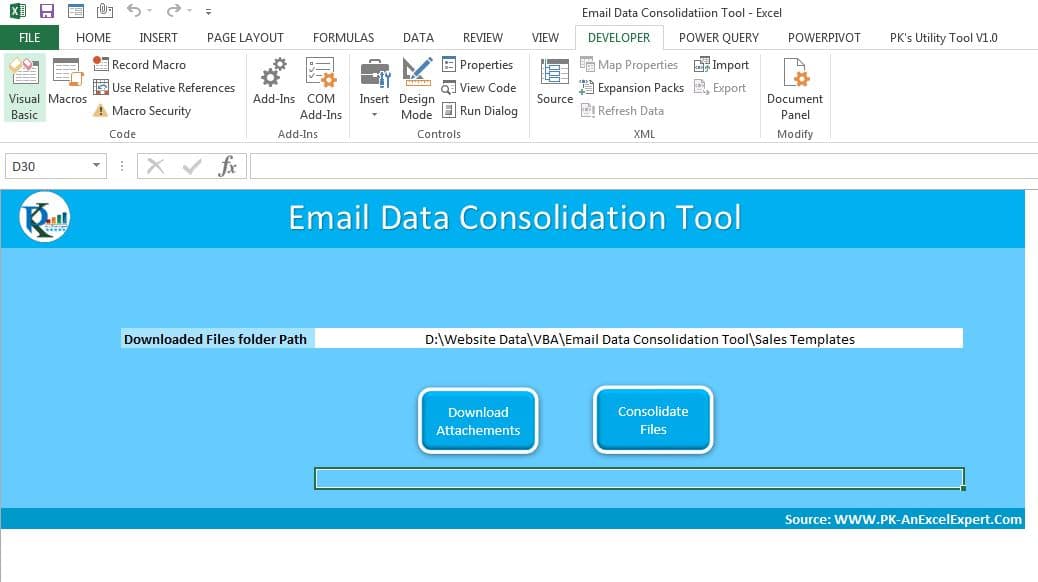
Downloading Attachments from Emails
Click to buy Email Data Consolidation Tool in Excel
Now that all the salespeople have sent their sales templates via email and the emails have been moved to the correct folder, the next step is to consolidate the data into one Excel sheet. To do this, we will use Excel’s VBA programming language to download the attachments from each email and consolidate the data into one Excel sheet.
Below is the VBA code which we have used to download the attachments-
Option Explicit
Sub Download_Attachment()

Dim out_app As Outlook.Application

Dim NewEmail_folder As Outlook.Folder
Dim Completed_Email_folder As Outlook.Folder
Dim msg As Outlook.MailItem
Dim attch As Outlook.Attachment
Dim i As Integer

Set NewEmail_folder = Outlook.GetNamespace("MAPI").Folders("Your Mailbox Name").Folders("Sales Data").Folders("New Emails")
Set Completed_Email_folder = Outlook.GetNamespace("MAPI").Folders("Your Mailbox Name").Folders("Sales Data").Folders("Completed")

If NewEmail_folder.Items.Count = 0 Then
MsgBox "There no email available in incoming Email folder", vbInformation
Exit Sub
End If


For i = NewEmail_folder.Items.Count To 1 Step -1
Set msg = NewEmail_folder.Items(i)
For Each attch In msg.Attachments
If VBA.InStr(attch.Filename, ".xlsm") > 0 Then
attch.SaveAsFile Range("D8").Value & "\" & Format(Now, "DDMMYYYYHHMMSS") & Application.WorksheetFunction.RandBetween(1, 1000) & "_" & attch.Filename
End If
Next
msg.Move Completed_Email_folder
Next

MsgBox "Done"


End Sub
Creating a New Excel Workbook
First of all, you have to create a new Excel workbook and name it “Consolidated Sales Data.” In this worksheet all the consolidated data will be stored.
Looping through Each Email
We will use VBA code to loop through each email in the “Sales Data” folder. This code will download the attachment to a temporary folder on the computer. We have used below given code to download the template using VBA-
Code here to download attachments
Copying Data from Each File
Once all the attachments are downloaded, we will use a loop in the folder wherein all attachments are available. We will copy the data from each file and append it into the “Consolidated Sales Data” sheet. This process will involve below steps –
- Opening each file
- Selecting the data range
- Copying the data
- Pasting it into the “Consolidated Sales Data” sheet.
We have used below VBA code to do this process-
Sub Consolidate_Data()
Dim wb As Workbook
Dim sh As Worksheet
Dim My_file As String
My_file = Dir(Range("D8").Value & Application.PathSeparator & "*.xlsm")
Dim lr As Integer
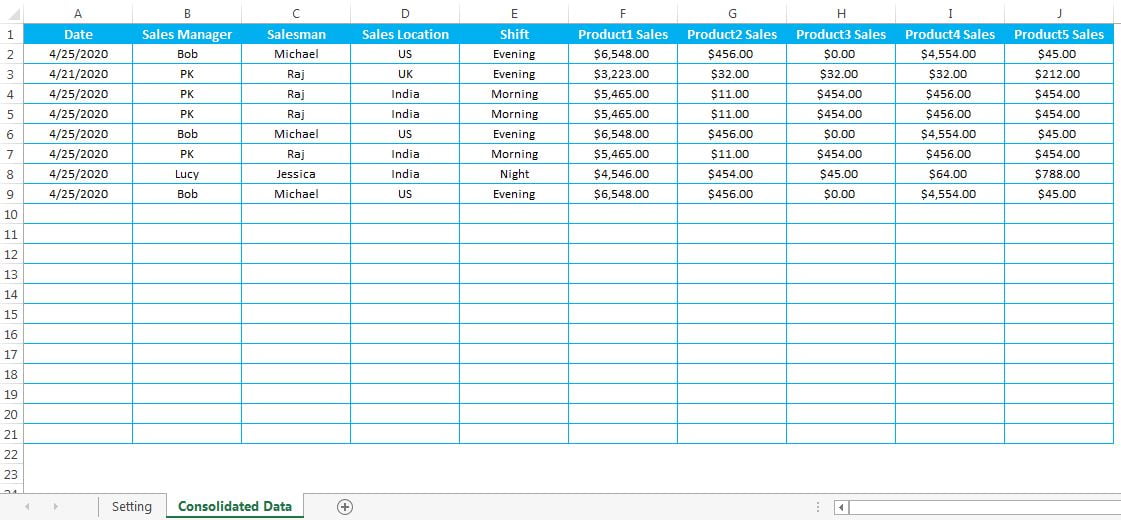
Dim dsh As Worksheet
Set dsh = ThisWorkbook.Sheets("Consolidated Data")
Do While My_file <> ""
Set wb = Workbooks.Open(Range("D8").Value & Application.PathSeparator & My_file)
Set sh = wb.Sheets("Sales Template")
lr = Application.WorksheetFunction.CountA(dsh.Range("A:A"))
dsh.Range("A" & lr + 1).Value = sh.Range("D6").Value
dsh.Range("B" & lr + 1).Value = sh.Range("D8").Value
dsh.Range("C" & lr + 1).Value = sh.Range("D10").Value
dsh.Range("D" & lr + 1).Value = sh.Range("D12").Value
dsh.Range("E" & lr + 1).Value = sh.Range("D14").Value
dsh.Range("F" & lr + 1).Value = sh.Range("H6").Value
dsh.Range("G" & lr + 1).Value = sh.Range("H8").Value
dsh.Range("H" & lr + 1).Value = sh.Range("H10").Value
dsh.Range("I" & lr + 1).Value = sh.Range("H12").Value
dsh.Range("J" & lr + 1).Value = sh.Range("H14").Value
wb.Close False
My_file = Dir
Loop
MsgBox "Data has been consoliated!!!", vbInformation
End Sub
Performing Data Analysis
After consolidating the data, you can perform any necessary data analysis or calculations. Use Excel’s built-in features like creating pivot tables, charts, or graphs. You can analyse the data by creating the proper report or Sales Dashboard.
Conclusion
The creation of a tool for consolidating email data using Excel can significantly optimize your data management workflow. To achieve this, you can design a customizable Excel template that features a “Send on Email” button, which activated, together with the application of Outlook rules, will move emails to folders for effective data collection. For more advanced data management, using the power of Excel’s VBA programming language allows for automatic attachment downloads from emails, which can then be consolidated into a single sheet. The beauty of this approach lies in its ability to make data analysis more straightforward and facilitate the extraction of actionable insights that can prove critical to business success.
Watch the step-by-step video tutorial:
Visit our YouTube channel for more videos
WWW.Youtube.com/@PKAnExcelExpert
Click to buy Email Data Consolidation Tool in Excel