Part of the free Module 10: Pivot Tables · Lesson 15 of 20 · Full Excel course
Pivot table styles, slicer styles and timeline styles are preset colour and border schemes that give your Excel report a consistent, professional look in two clicks. In this lesson you will learn how to change the style of a pivot table, a slicer and a timeline, how to use the style options for banded rows and headers, and how to create your own custom style for company branding.
Why styles matter in a pivot report
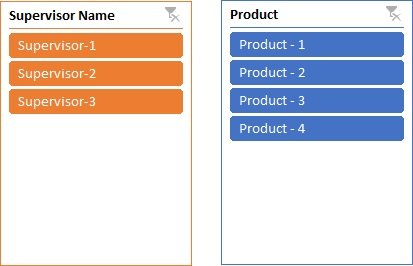
A pivot table is often the centre of a dashboard, and slicers and timelines sit right next to it. Excel’s built-in styles are organised in Light, Medium and Dark groups with the same colour families across all three object types, so a blue pivot table can be paired with a blue slicer and a blue timeline. Applying a style is faster and safer than formatting cells by hand because the style follows the pivot as it grows, shrinks and refreshes, whereas manual formatting is lost when the layout changes.
How to change the pivot table style
- Click anywhere inside the pivot table.
- Open the Design tab (PivotTable Design in Excel 365).
- In the PivotTable Styles gallery click the More arrow at the bottom right to see every Light, Medium and Dark style.
- Hover to preview and click a style to apply it.
- Use the check boxes in the PivotTable Style Options group, Row Headers, Column Headers, Banded Rows and Banded Columns, to fine-tune the result.
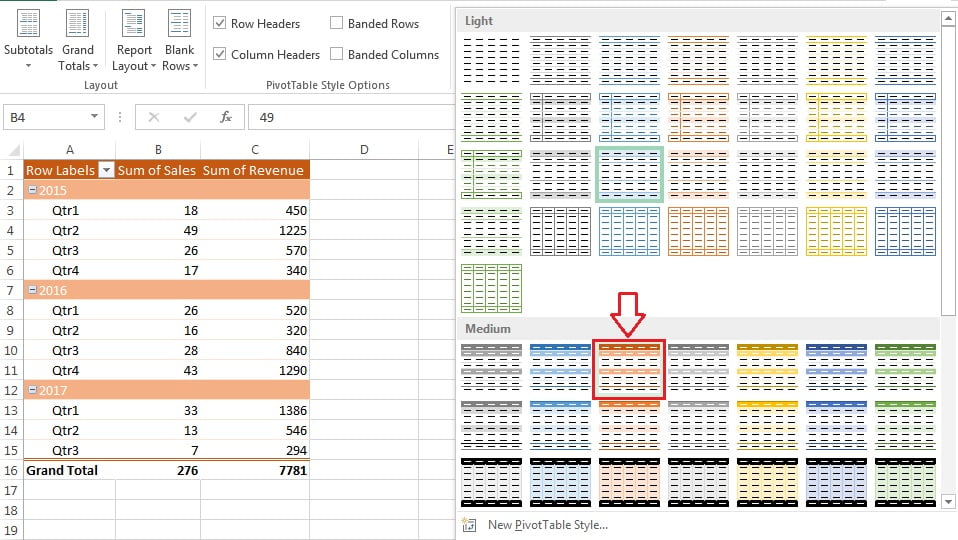
To build your own, click New PivotTable Style… at the bottom of the gallery, name it, and format elements such as Header Row, Grand Total Row and First Row Stripe. Tick Set as default PivotTable style for this document so every new pivot in the workbook uses it.
How to change the slicer style
- Click the slicer to select it.
- Open the Slicer tab (Slicer Tools > Options in Excel 2013 and 2016).
- In the Slicer Styles gallery click the More arrow and choose a style. Light styles suit white dashboards; Dark styles make a slicer stand out as a control panel.
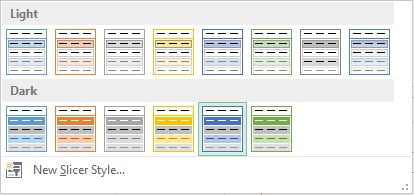
Click New Slicer Style… to design a custom one. The elements you can format include Whole Slicer, Header, Selected Item with Data, Unselected Item with Data and Hovered items, which lets you match the exact hex colours of a corporate palette.
How to change the timeline style
- Click the timeline to select it.
- Open the Timeline tab (Timeline Tools > Options in older versions).
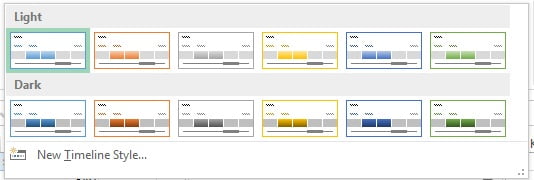
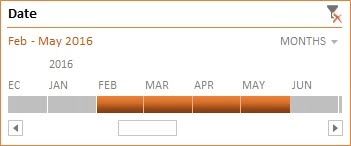
- In the Timeline Styles gallery click the More arrow and pick a style, or click New Timeline Style… to create your own with formatting for the Selection Label, Time Level, Period Labels and Selected Time Block.
Tips and common mistakes
- Copy custom styles between workbooks. Copy a styled pivot, slicer or timeline into the other file; the custom style travels with it and then appears in that workbook’s gallery.
- Duplicate before editing. Built-in styles cannot be modified. Right-click one and choose Duplicate to create an editable copy.
- Clear a style. Choose Clear at the bottom of the gallery to remove all formatting; the pivot becomes plain black text.
- Do not format cells manually. Cell-level fills and borders break when the pivot refreshes or the layout changes. Put every colour into the style instead.
- Match the workbook theme. Style colours come from the Office theme under Page Layout > Themes, so changing the theme recolours every styled object at once.
Practice and real-world use
Pick one colour family, for example Medium 2, and apply the matching pivot table, slicer and timeline styles on a single sheet. Then create a custom slicer style using your company colours and set a matching custom pivot style as the document default. Consistent styling is what separates a polished management dashboard from a raw analysis sheet.
Related lessons
- Report Layout: Compact, Outline and Tabular
- Slicers in a pivot table
- Timeline in a pivot table
- Pivot Table course hub
Frequently asked questions
How do I make my custom pivot table style the default?
Right-click the style in the PivotTable Styles gallery and choose Set As Default, or tick the default option when creating a New PivotTable Style. Every new pivot in that workbook then uses it.
Why do the slicer style colours look different from the pivot table?
Slicer, timeline and pivot styles with the same name use the same theme colours, but Selected and Unselected items add tints. Create a custom slicer style with exact fills if they must match precisely.
Can I change the font or size of slicer buttons?
Yes, but only through a custom slicer style. Choose New Slicer Style, select the Whole Slicer element and click Format to set the font, size and colour.
Want the finished version? Ready-made Excel dashboards, trackers and VBA systems are available at NextGenTemplates.com.